

THERE ARE SOME animated effects that look so advanced, it’s difficult to determine how they were actually made. It is often assumed the skill level necessary to create such advanced motion graphics is well out of the reach of the average Flash user.
Not true in most cases. When we watch animated motion graphics, if the frame rate is fast enough, the human eye may not be able to see everything that is happening. As a result, our mind fills in what may not even be there. The good news is, we can use this natural shortcoming of the human eye to our own advantage when creating “advanced” motion effects. In my experience I have discovered that the most visually appealing animations are a combination of multiple techniques happening at the same time.

1 Type out your text using the Text tool. This particular font is pretty complex and already suggests movement. Your text, however, can be hand-drawn graphics depending on the style of project you might have.

2 With the text field still selected, break it apart using ![]()
![]()
![]()
![]() once. This will split the text field into individual text fields per letter. This retains the properties of the font and you have the ability to edit each letter as such. If you wish, you can break it apart one more time to convert the font into raw vector shapes.
once. This will split the text field into individual text fields per letter. This retains the properties of the font and you have the ability to edit each letter as such. If you wish, you can break it apart one more time to convert the font into raw vector shapes.
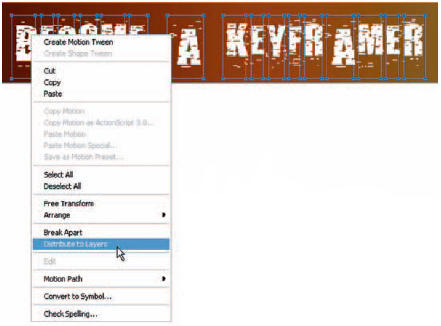
3 With every letter still selected, right-click over one of them and select Distribute to Layers. This will create a new layer for every letter and each letter will be placed into its own layer for you. A true time saver if ever there was one. Now is a good time to convert each letter to a graphic symbol.
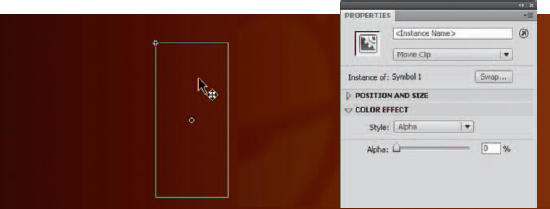
4 On each layer, add a keyframe about three to four frames down the timeline. Now go back to the first keyframe containing your letter, select the letter symbol on the stage and apply some alpha via the Properties panel. Drag the alpha slider all the way down to 0%. Repeat this procedure for every letter. Apply a motion tween for every letter so that they all fade in when you play back your timeline.

5 Next, to create the effect of each letter fading in one after the other, you will stagger each motion tween to overlap the one below it. Starting with your second letter, select the range of frames in the motion tween, then drag them down the timeline a few frames. You can also select a frame before the tween and press F5 (Insert Frames) to push each motion tween down the timeline.
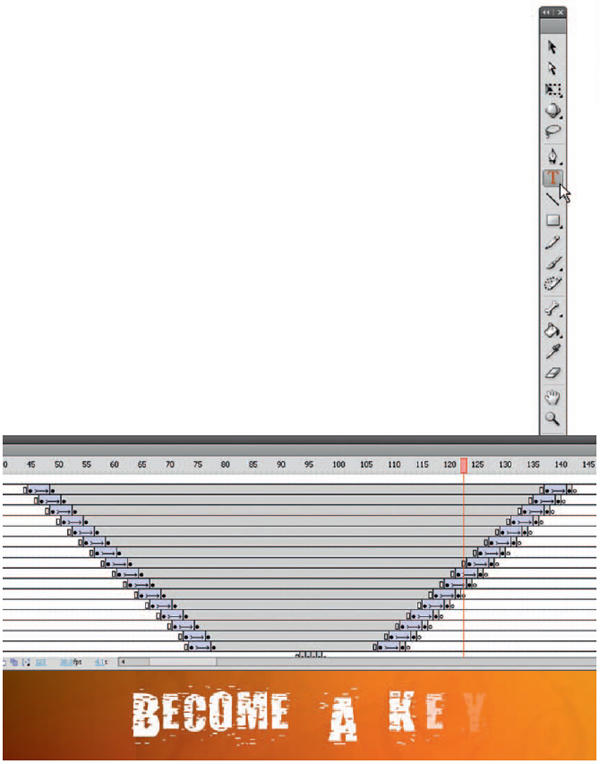
6 The final step is to select the first frame of each animation and use Shift while pressing the left arrow key. This will position each letter with 0% alpha to the left and on playback will create the motion of each letter flying into position while fading in at the same time. Once again, there is nothing particularly difficult about this effect. All you have done is used motion tweens with some alpha fades. This is still a very basic Flash animation technique. The only difference is the timing of each letter relative to each other. Throw in a slight amount of movement and suddenly you have what looks like an advanced animated text effect.

Hot Tip
Check out the “Extending Flash” chapter to learn about JSFL and how you can create your own commands for repetitive tasks such as applying a motion tween. Once something is an actual command, you can then create a custom key shortcut for it. This will save you about two clicks every time you need to apply a tween. That can add up quickly over a period of days, weeks and months. Every minute saved is a minute earned in this industry.
![]()