
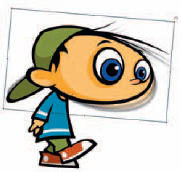
LET’S FACE IT, as an animator you are eventually going to be faced with the task of making somebody or something walk. For whatever reason, newcomers to animation regard walk cycles as being extremely difficult. Why? I won’t lie to you, they are. Well, in an anatomically accurate way, they can be very challenging. As an animator, you will find it nearly impossible to avoid the walk cycle, so it may be best to face your fear head-on right now. You just might learn that walk cycles aren’t all that difficult to accomplish. There are several ways to make the task of animating a walk cycle very difficult or relatively easy. Let’s examine the easy way.
The best way to create a walk cycle in Flash is to animate the character walking in place, as if on a conveyor belt. The main idea here is to drag an instance of this looping walk cycle animation to the stage and use a motion tween to animate the character walking across the scene. We’ll get more into that after we tackle the actual walk cycle.

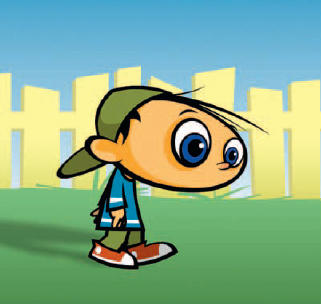
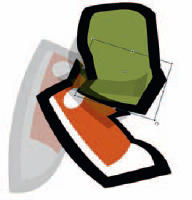
1 Design your character in three-quarter view. At this angle the character is simply easier to animate – especially when it comes to walk cycle animations. Next, convert your entire character and all its parts into a Graphic symbol. You will be working entirely inside this symbol to create your walk cycle.
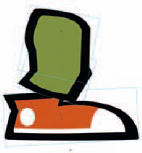
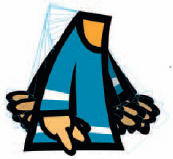
2 Let’s concentrate on just one leg for now. In fact, turn all other layers off so only one leg of your character is visible. This character’s leg is made up of three different symbols: an upper thigh, a lower leg and a sneaker. This is a straightforward setup with enough flexibility for a simple walk cycle.

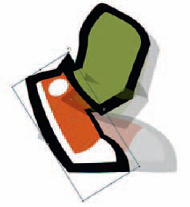
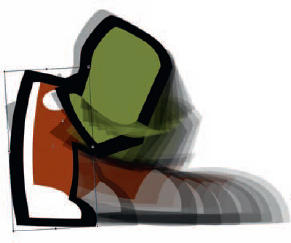
3 Position the leg into several major walk positions using keyframes. Start with the leg planted firmly on the ground. The next position is the foot still on the ground but bent so the heel is up off the ground. Then create another keyframe and position the leg just before it is lifted off the ground. Next, position the leg completely off the ground and in its most rearward position. The final keyframe shows the leg is in its most forward position off the ground. Use the Free Transform tool to rotate each leg symbol until it is in the desired position. Notice there are several slightly different shapes to the sneaker based on the amount of weight (or lack of) being placed upon it. When it is fully compressed on the ground its bottom edge is flat. Just before it’s lifted off the ground, it is bent just after the toe. When it is entirely off the ground, its bottom edge is slightly rounded. These may seem like very insignificant details, but in the grand scheme of things, they can make all the difference.
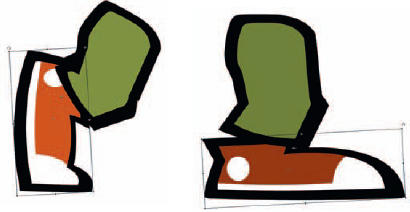
4 Notice that I didn’t use the same sneaker for every frame. Depending on the position of the leg, I duplicated the original symbol, gave it a new name and edited its shape to reflect its new position. This is the type of detail I love to add to my animations and I really feel, as subtle as it may be, that it adds a lot to the overall look and feel of the character’s movements.
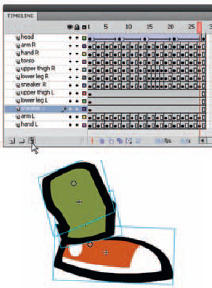
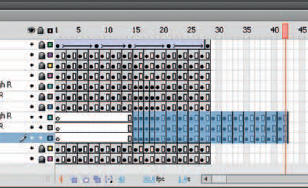
5 Turn on the Onionskin tool and adjust the playhead brackets so you can use your established leg positions as references. Create keyframes across all layers that contain your leg symbols.
6 Use the Free Transform tool ![]() to rotate and move each leg symbol into an intermediate position relative to the keyframes you already created. The number of frames between the major leg positions will determine the characteristics of the walk cycle.
to rotate and move each leg symbol into an intermediate position relative to the keyframes you already created. The number of frames between the major leg positions will determine the characteristics of the walk cycle.

7 Experiment with the frames between each leg position. Adding more frames when the foot is sliding back along the ground will create the effect of the character gripping the surface. Add fewer frames while the leg is returning to its initial position.
8 Feel free to experiment with the number of frames between each of your leg positions. You can have more frames for when the foot is sliding back along the ground (so it travels slower) and fewer frames while the leg is off the ground (so it travels quicker), returning it rapidly to its initial position. This can create the illusion that the character is heavy, or perhaps carrying something heavy. If you do the opposite and have the foot slide quickly across the ground and slower when off the ground, it may suggest your character is on a slippery surface, such as ice.
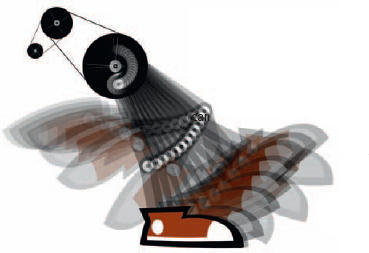
9 Play back your animation constantly so you can get real-time visual feedback as to your process. This type of animation work is trial and error and depends on your personal animation style to get the walk cycle to look and feel good to you. Don’t get frustrated, it simply takes practice. Sometimes it helps to not think of it as an actual leg. Try to imagine it’s not a leg at all but some kind of mechanical assembly like a basic pulley or lever system. This thought process can make animating less daunting and a lot more fun. Open the “leg_simulation.fla” from the included source CD. This FLA contains an example of a walk cycle experiment. I made it to show how a walk cycle can be thought of in mechanical terms. It was a fun experiment because it removes the intimidation factor that is associated with animating a walk cycle.

Hot Tip
Before you start, it may be a good idea to put down your stylus and go for a walk. I’m sure the fresh air won’t hurt, but the intention is for you to study how your body moves during the act of walking. As an animator you will find that studying from real life will be your greatest resource. Notice your right leg and left arm move in the same direction as each other. The same thing happens with your left leg and right arm. It is details like these that your animation will benefit from.
![]()
ONCE YOU ARE finished creating enough keyframes and leg positions, and you are satisfied with the movement of your leg, we can now move on to the other leg. Since you already animated one leg, there is no reason to start from scratch with the second leg (unless the other leg is designed differently). Therefore, delete the other leg entirely from the stage. Seriously, go ahead and delete it. We don’t need it any more. Trust me.
10 Hold down the ![]() key to select multiple layers and drag them to the trashcan icon or click on the trashcan icon to delete them from the timeline.
key to select multiple layers and drag them to the trashcan icon or click on the trashcan icon to delete them from the timeline.
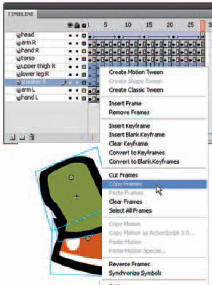
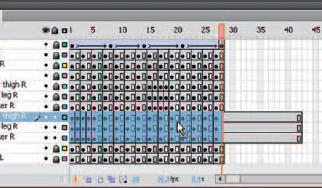
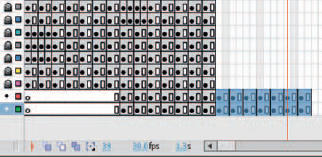
11 Select the entire range of frames and layers of the leg you previously animated. Right-click (Control + click) over the highlighted area and select “Copy Frames” from the context menu.
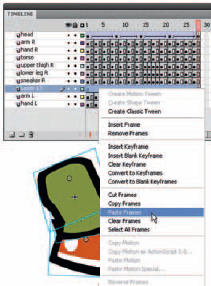
12 Add a new layer below your existing leg, select the entire range of frames, right-click over them and select “Paste Frames” from the context menu.
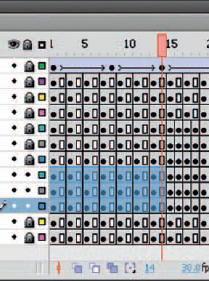
13 Lock all layers except these three you just copied and pasted. Select the first half of this duplicated leg animation by clicking and dragging across layers and frames.
14 Click and drag the entire section of highlighted frames down the timeline and place it after the latter half of the animation.
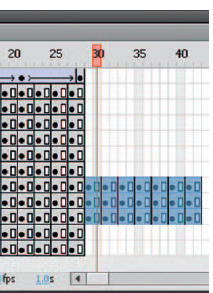
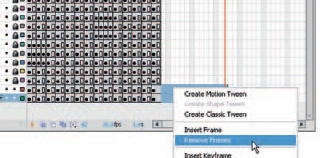
15 Select this entire range of frames and layers by clicking and dragging across all of them.
16 Click and drag this entire range of frames and layers to the left until they start on frame 1. Remove the residual frames by selecting them and “Removing” them from the right-click context menu.
17 Using Edit Multiple Frames, select the new leg symbols and use the arrow keys to nudge them to the right and up slightly. This will help separate the two leg assemblies.
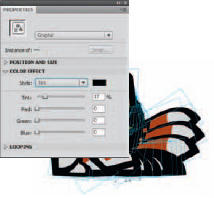
18 Apply a color tint to the leg symbols using black with approximately 30% strength. This gives the illusion the back leg is in shadow and helps create a sense of depth.
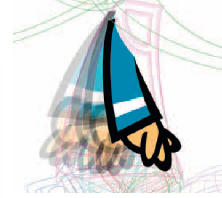
19 Animate the arm and hands by rocking them back and forth. You can use frame-by-frame or motion tweens depending on your needs.
20 As we did with the leg animations, animate just one of your character’s arms and then copy and paste its keyframes into a new layer(s) to achieve the second arm. Select the first half of your arm/hand animation and place it after the latter half of the animation.
21 Select and drag the entire arm/hand animation so it starts again on frame 1 and remove the residual frames that are left behind.
22 Turn on Edit Multiple Frames again and select this entire range of arm/hand symbols. Click on them once with the Selection tool and apply the same color tint as the legs.
23 With Edit Multiple Frames still turned on, use the arrow keys to nudge them up and to the right slightly.
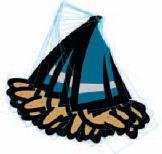
24 You can add to your walk cycle animation by adding some motion to its head and body. It comes down to personal preference and your individual animation style.
Hot Tip
Be careful when using the Edit Multiple Frames feature. Make sure only the layers you want to edit are unlocked and all other layers are locked to avoid accidents.
![]()