
REMEMBER THE FIRST time you learned to use a mouse? Or to tie your shoes? These tasks seem so simple now, but some things are just plain easier after someone shows you how. It’s the “not knowing where to start” that can be frustrating.
Well, consider this your start. I’m going to show you how simple it is to achieve some basic cool motion effects in Flash CS4 – effects that look really difficult to build, but, once you know how, are not so hard to create. Specifically, you’ll make objects appear to move very fast using an animation effect known as motion blur.

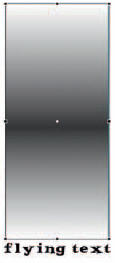
1 First, you need to create the two objects used for this effect: text and a linear gradient. The linear gradient should have at least three colors, the middle color should be a value similar to the main color of the object and the left and right colors should be the same color as your background. If you have a complex background, mix these two colors with 0% alpha so the blur blends into the background.
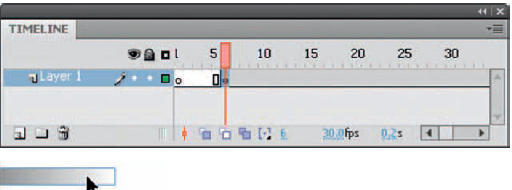
2 To create the animation for this effect, convert the linear gradient to a symbol and place it about halfway off of one side of your stage. You might want to start the animation on a frame other than frame 1 to provide a moment for the viewer to anticipate the action.

3 About three to five frames down your timeline, add a new keyframe (F6). Holding down the Shift key, use the right arrow key to move the gradient across the stage. Position it wherever you like; just make sure it remains on the stage entirely (do not position it off the stage).
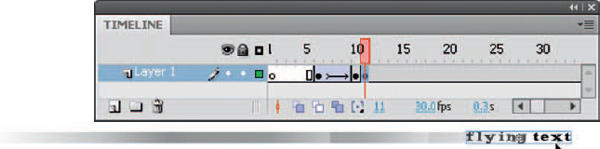
4 Apply a motion tween to make the gradient symbol move across the stage. Next, create a blank keyframe in the frame after your second keyframe and drag your text symbol to the stage from the Library panel ![]()
![]()
![]() . Turn on the Onionskin tool so you can see the previous frame and where the linear gradient is positioned. Align your text to the right of the gradient. Play back your animation.
. Turn on the Onionskin tool so you can see the previous frame and where the linear gradient is positioned. Align your text to the right of the gradient. Play back your animation.
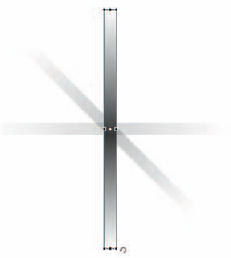
5 This effect is not limited to a horizontal format. Rotate the gradient 90 degrees.
6 Align the text below (or above) the gradient using the Onionskin tool to help guide you.
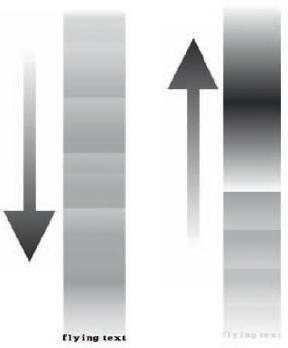
7 Repeat the same procedure as you did for the horizontal effect. Motion tween the gradient vertically from outside the viewable stage area. Then, in the frame after the tween, add a blank keyframe and position and align the text below the gradient. Reverse the procedure to make the text fly out and off the stage. I’m sure you will have a lot of fun with this effect as it is one of the easiest to master – yet it looks so good!

Hot Tip
This technique works quite well with objects other than text. Balls, bullets, superheroes, cars, just about any object in action that requires a high rate of speed will work with this effect. You will likely want to play around with a combination of frame rate and the length of your motion tweens depending on your project. The advantage with this effect is you do not need a very fast frame rate (although it does help). You can achieve the same results with a lower frame rate as long as the number of frames in the motion tweens are fewer than with a higher frame rate.
![]()