
WE HAVE TWO OPTIONS for authoring Flash for video output. The old school method requires everything to be on the main timeline. Movie Clip symbols have to be avoided altogether since their timelines are independent of the main timeline and only render during runtime in the Flash Player.
Flash 8 introduced filters and the ability to add drop shadows, blurs and other cool effects to Movie Clip symbols. But due to the dynamic nature of movie clips, they had to be avoided as well. Flash CS3 introduced the Quicktime Exporter, which solves this problem and is a feature in Flash CS4 as well. We will take a look at that later in this chapter.
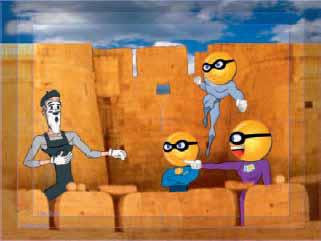
For now, let’s take a look at the old school method of creating Flash animation for export to video. This is analog Flash in its purest form, straight-ahead timeline animation, streaming sound and nested Graphic symbols.
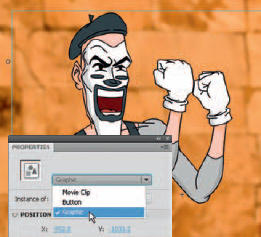
1 If your timeline contains movie clips, you must convert them to Graphic behavior. To convert a movie clip to a Graphic symbol, select the movie clip instance on the stage and change its behavior from Movie Clip to Graphic using the Properties panel. Then change its property from Single Frame to Loop or Play Once depending on your needs.
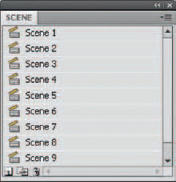
2 Scenes are a great way to manage long timelines. For example, you could have your title sequence in scene 1, your story in scene 2 and ending credits in scene 3. Using scenes is similar to multiple files chained together since each scene has its own timeline. The timeline of each scene combines into a single timeline in the exported file. The advantage here is having the entire project in one FLA.
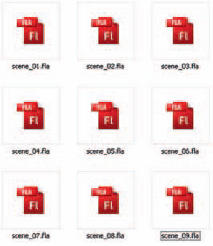
3 One of the disadvantages of using scenes is confusion during the editing process as it can be difficult to find assets within multiple scenes. Another disadvantage with multiple scenes is having more content in your FLA, which can result in a very large file size. This increases the chances of corruption and loss of work. It’s usually better to work with several smaller files, then edit the individual exported video files together in your video editor.
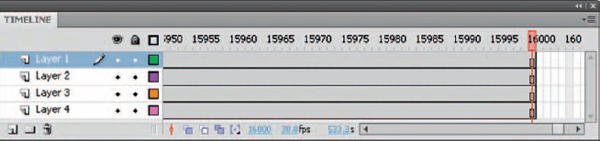
4 The Flash timeline has its own limitations. 16,000 is the number that represents the maximum number of layers in a single Flash movie as well as the maximum number of symbol instances and number of frames. It is rare to see this number reached in any situation, but it is good to understand the limitations in order to avoid them. A Flash document that is 16,000 frames long at 30 fps is nearly 9 minutes long. A file that large will cause problems even in the best situations. The file will take longer to open as well as to save. It will exhaust your system’s resources and make it harder to work with multiple Flash documents open at the same time. It will also take a very long time to export to video and will create an enormous file. If you export to AVI, you will very likely exceed the 2 GB limit that is placed on AVI files on most operating systems. Best practise is to break up your project into several smaller FLA files, typically between 30 and 60 seconds each. I often work with FLA files less than 20 seconds in length. It makes the entire process more manageable when animating, exporting and editing.
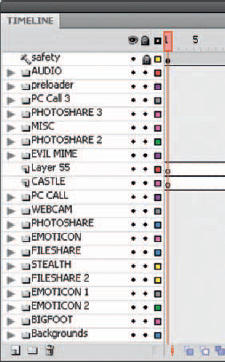
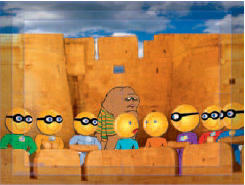
5 Layer folders are a great way to organize your timeline, especially if your animation involves a great number of layers, which is often the case with animation. Layer folders combined with nesting animations can go a long way in making efficient timelines. You can place all your character animations inside a Graphic symbol. This makes it much easier to edit and control your entire scene from the main timeline if you need to position, scale, pan, and zoom as if playing the role of a Director. Since the nested animations are inside Graphic symbols, you can still scrub the timeline with the playhead to see the animations play.
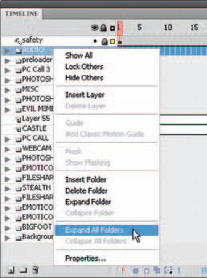
6 You can quickly expand all layer folders by right-clicking over any one of your folders and selecting “Expand All Folders” from the context menu. Collapsing all folders is done the same way.
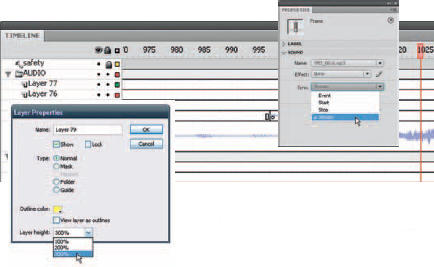
7 To sync your animations to a soundtrack, import your Sound file and place it on the timeline in its own layer. You can drag it from the Library to the stage or use the Sound drop-down menu in the Properties panel to select the file. By default, the Sync setting will be Event and must be changed to Stream. The Stream behavior embeds the sound into the timeline and will be in sync with any timeline animation. You can adjust the height of a layer by right-clicking over the layer name and selecting Properties. In the Layer Properties panel you can set the layer height to as much as 300%. This can be useful if you want to see the waveform in as much detail as possible.

Hot Tip
To keep the file size of your FLA(s) as small as possible, it is sometimes good practise to avoid inporting high quality stereo sound files. If you are planning on editing several exported video files together in your video editing program, then import a compressed MP3 audio file into Flash to use as a “scratch track”. Place the sound file(s) on its own layer so that it can be easily deleted before export. Since Flash CS3, and now in Flash CS4, you can simply turn off the visibilty of this layer to exclude it from export. Use the high quality stereo sound file in your video editing program instead.
![]()