

THE BLUR FILTER is a very handy tool for creating a more realistic motion blur compared to just a linear gradient. Filters can only be applied to Movie Clip symbols, so you will need to plan ahead if your animation relies on several nested animations that need to be in sync with each other. With a combination of motion tweens and some basic ActionScript, you can control what each movie clip does and when it should do it – not unlike the director of a movie.
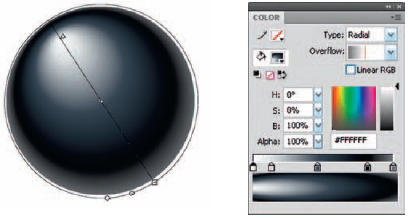
1 The billiard ball is simply a circle with a radial gradient. The trick is mixing the gradient using 5 colors: highlight, midtones, shadow and then a lighter value to the far right. This is the most critical color as it suggests light coming from behind the shape, creating the illusion that it is three-dimensional. Use the Gradient Transform tool to edit the center point as well as the scale and rotation.

2 Convert your sphere to a Movie Clip symbol. All of the ball animations are nested in this symbol, consisting of a starting roll, rolling to a stop and a continuous roll. Check out the source file on the CD to see how these animations were made using a mask and motion tweening the symbol “8” across the sphere.
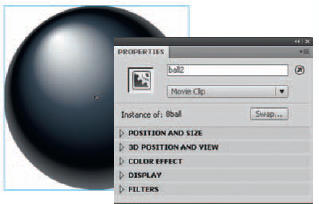
3 Copy and paste, or drag multiple instances from the Library, of this symbol to the stage – each on its own layer. Select them one at a time and type in a unique instance name in the Properties panel. This will allow you to target them individually.
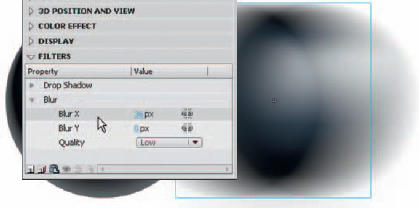
4 To add a realistic blur effect to the ball as it is motion tweened across the stage, select it and in the Filters panel drop-down menu, select the Blur option. Since the ball is traveling horizontally, we do not want any vertical blurring. So click on the little magnet icon to unlock the blur constraint. Set the amount of blurring in the X dialog. The Y dialog box should be set to “0”.

5 The technique is to use motion tweens and the Blur filter to provide the illusion that these balls are moving at an extreme velocity. Once a ball makes contact, its speed is dramatically reduced, at which point the Blur filter is removed by adding a keyframe and clicking the “-” symbol in the Filters panel.

6 To synchronize the nested animations to the main timeline, add a blank keyframe where you want to target your movie clip(s). Make sure the keyframe is selected and with the Actions panel open, type in the Movie Clip instance name you want to target, and then tell it what to do. Here the movie clip “ball1” is being told to go to the frame label “rollstop1” and play.

7 When two or more balls collide, you must target each instance and tell them what to do. On the main timeline you can control what they do with keyframes and motion tweens. The nested animations must be targeted with ActionScript since a movie clip’s timeline is independent of the main timeline. Both movie clip timelines are controlled with one line of code each. The nested animations then play until they reach a Stop action.

8 You can use _currentFrame to start or stop the ball on whatever the current frame happens to be. This is particularly handy when the timing of the animation changes on the main timeline and you don’t want to constantly have to update the nested animations. When this script is called, whatever the current frame is inside the targeted movie clip, its playhead will simply stop.

Hot Tip
Locate the file named “8ball. fla” from the CD included with this book. Double-click one of the ball symbols to see how it was animated using motion tweens and a little masking. You can add to this timeline by creating additional ball rotations. The illusion here is that the ball never rotates at all; the white circle with the number 8 inside it is what actually moves across the surface of the circle shape. For similar illusions made with masks, see Chapter 3.
![]()