

SQUASH AND STRETCH is a traditional animation technique that is widely used to give animations more realism and weight. When a moving object comes in contact with a stationary object, it will deform on impact, unless it is completely rigid. One thing that is important to remember is that no matter how much an object squashes or stretches, it always maintains the same amount of volume. The amount of squash and stretch depends on how much flexibility your object should have. Traditional animation usually contains exaggerated amounts of squash and stretch. A good example of this is a bouncing ball. When it hits the ground it actually deforms and gets squashed. It will then become stretched as it propels itself upwards. With a little motion tweening and frame-by-frame animation in Flash, we can achieve convincing realism with relatively little effort.
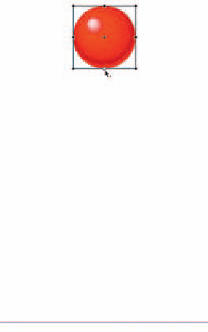
1 Start with the object in its highest position. Convert it to a symbol and then edit its center point using the Free Transform tool. Move the center point to the center of the bottom edge.
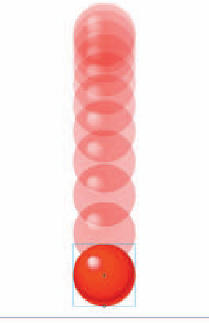
2 Insert a second keyframe further down your timeline and position the ball vertically just above the horizontal guide. Apply a motion tween with Easing set to “-100” (ease in).

3 In the next frame, insert a keyframe and turn on the Onionskin tool. Use the Free Transform tool to scale the ball so it becomes wider and shorter. It’s important to keep the volume of the ball consistent.
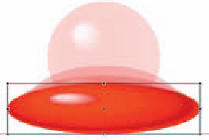
4 Insert another keyframe about four or five frames further down the timeline. Squash and stretch the ball even more. Apply a motion tween and set the Easing to “100” (ease out).
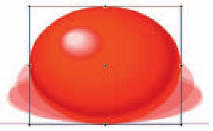
5 Insert another keyframe a few frames down your timeline and transform your ball in the opposite direction. Make sure it still has some deformation applied to it.
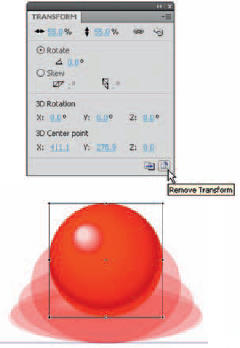
6 Start the ball’s ascent by inserting yet another keyframe and removing all transformations. The Transfrom panel has a Remove Transform button to make this a one-click solution.

7 Copy the first frame and paste it as your last frame. This will position the ball at the end of your timeline in the exact same position as it started. Apply a motion tween and set the Easing to “100” (ease out).

8 Flash CS3 and CS4 offer ways to reuse animations. Copy Motion allows a Classic tween, its frames and symbol information to be pasted to another object. Select all the frames in your squash and stretch animation. Select Edit > Timeline > Copy Motion.

9 Insert a new layer and create (or drag from the Library) a new symbol to the stage. Select this new symbol and go to Edit > Timeline > Paste Motion. Your additional symbol will now have the exact same span of frames, motion tweens, easing and transformations. Thanks to Joe Corrao for contributing the character above (joecorrao.com).


Hot Tip
As you create various animation examples from your day-today workflow, it’s a good idea to keep them all in a single FLA document. This serves as a great way to quickly reuse animations using the Copy Motion feature in Flash CS4.
![]()