
THE FUSION OF TRADITIONAL and digital animation has given us “tradigital” animation. I don’t know who invented the term but the effect was first shown to me by Ibis Fernandez (www.2dcgi.com), a well known and talented animator who blew me away when he sent me a sample of this technique a few years ago. Up until that point in my career, I had been using Flash for four years and thought I knew every trick in the book. It was clear to me I had more to learn.
Tradigital animation is the result of traditional animation techniques translated by the use of digital tools. The end result may look traditional, but the process is very different and less time-consuming. When a client deadline is looming, traditional animation goes out the window. A common argument among traditionalists is that tweens are too easy to use and often become relied upon for every aspect of an animation. This may result in your animation looking very mechanical and stiff. So where do you draw the line (sorry, bad pun)? What technique should you use? Motion tweens? Shape tweens? Frame by frame?
Answer: All of the above. Don’t limit yourself to just one technique if you don’t have to. Use the technique that the action calls for, even if it means combining two or more techniques. What is so impressive about this particular technique is the fluidity of the movement you can achieve. Draw image “A” and then image “B” with the Line (or Pencil) tool, and then with each line segment on its own layer, apply the shape tween from “A” to “B”. Merge all your layers, clean up your lines, add some fills and shading - voila! You’re a “tradigitalist”.
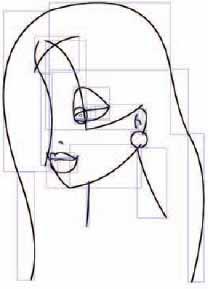
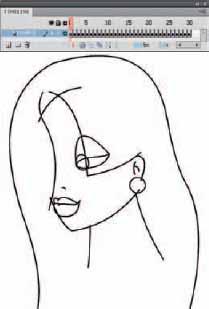
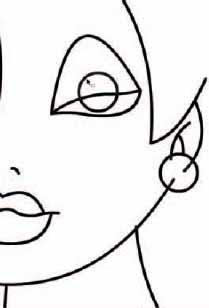
1 For this technique to be a success, you need two different drawings of your character or object. Object Drawing mode is highly recommended here as each stroke will remain as a separate object that can still be edited. It is also critical because you will later distribute each stroke to its own layer.
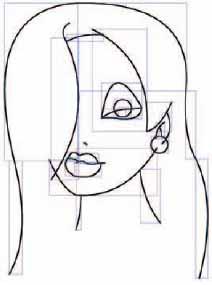
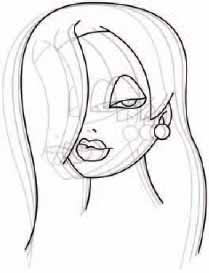
2 Insert a blank keyframe (F7) in a new frame (frame 30 will do), and draw the new angle of your character or object. The trick here is to use the same number of strokes as you did in the first drawing. You could also choose to insert a keyframe (F6) and edit the same strokes to reflect your new angle.
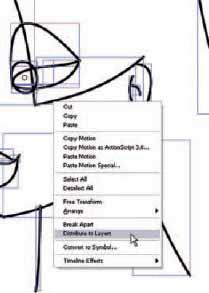
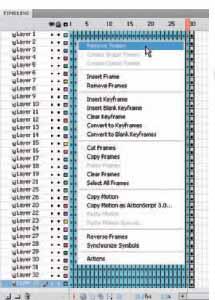
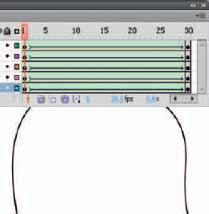
3 For both drawings, select all of your strokes, right-click over them and select Distribute to Layers from the context menu. Since this will create a whole new set of layers for each drawing, you will need to select all the keyframes for one drawing and drag them to the other drawing’s layers.
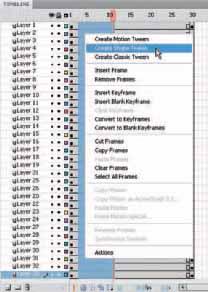
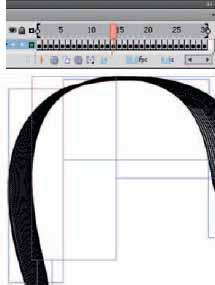
4 Drag across all layers, right-click and select Create Shape Tween from the context menu. Previous versions of Flash didn’t offer this option in the context menu. If you are using an older version of Flash, apply the shape tween using the Properties panel or drop-down menus. Now is the time to add easing if preferred.
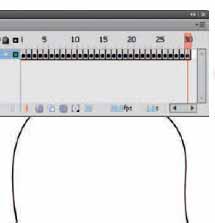
5 Next you need to prepare your layers for merging. Drag across all layers and frames, selecting them all in black. Hit the F6 key to convert all the shape tweens to keyframes. While selected, remove the shape tween using the Tween drop-down menu in the Properties panel. Go to File > Save and save your work at this point.
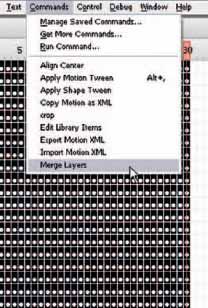
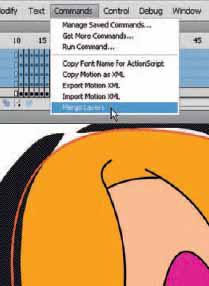
6 Make sure you have the Merge Layers extension installed (see Chapter 12 and the source CD). Make sure all layers and keyframes are selected and go to Commands > Merge Layers. This will run the JSFL command, which will compress all keyframes and layers to one single layer for you. The time you just saved will allow you to grab another cup of coffee.
7 You can delete all the old layers as they will all be empty after the merge. Go to File > Save As and save this file with a new name. This is important because you may decide to make some changes to your image at some point in the future. After all layers are merged, this becomes very difficult.
8 Next, you need to break apart strokes from the Object Drawing mode. Why? Because if you have overlapping strokes and want to add color fills to your image, it needs to be flattened one step further for editing. Turn on the Edit Multiple Frames feature and adjust the frame indicator brackets to span all keyframes. Break apart (Ctrl + B) to merge all strokes.
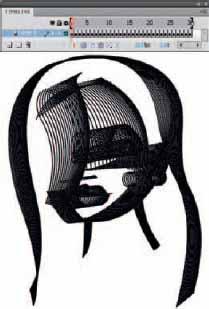
9 Use the Selection tool while holding down the Shift key to select all unwanted strokes and delete them. In this situation it is simply a fact of life that, as an animator, eventually you will have to perform the tedious chore of cleaning up after yourself or, even worse, someone else’s work.
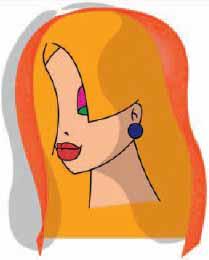
10 As tedious as the last step was, here’s your reward – a very slick looking animation that looks like it was made using three dimensions. But it gets even better when you add color and shading.

Hot Tip
Flash doesn’t have a built-in “Merge Layers” feature. Not sure why this feature was never considered but with JSFL (JavaScript Flash), we can make our own features. David Wolfe has created a “Merge Layers” extension for Flash that is available on the source CD in this book. Techniques like those used for the “tradigital” topic would take at least five times longer to complete without the use of a Merge Layers extension. So make sure you check out how to use this handy extension in Chapter 12 and install it before attempting the technique on these pages.
![]()

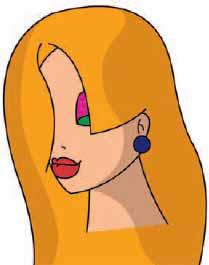
11 Once all your strokes are connected and cleaned up, mix your colors and start filling. You will need to apply all color fills across all keyframes by hand. Flash has no automatic way of doing this for you.

12 Occasionally you may find an area of your image will not accept the fill color. Usually the cause for this is a gap between strokes that is hard to see. Make sure Snap is turned on and use the Selection tool to drag their end points until they “snap” together.

13 Let’s take this effect to the next level by adding shading. Add two new layers above your animation and draw two shapes in each new layer. Use the color black mixed with about 30% alpha. Make sure the brush has Smoothing set to 100. The fewer vector points the better.

14 Insert a keyframe in both layers in the last frame of your animation. Move the left shape about 20 pixels to the left and the right shape the same distance to the right. Use the Selection tool to bend their outlines to reflect the new contour of your character and apply shape tweens.
15 Remember the previously saved version of this animation? Open it and find the layers containing the outline strokes of your character. Select them and Copy/Paste Frames, into a new document. You will use these strokes to “cut” away the shading you will not need.
16 Select all frames and layers and convert them to keyframes (F6). While they are still selected, remove the tween from the Tween drop-down menu (Properties) and merge all layers using the Merge Layers JSFL extension (Commands > Merge Layers).
17 Turn on the Edit Multiple Frames feature and make sure the Frame Indicator brackets span all keyframes. Select all (Ctrl + A) and break apart (Ctrl + B) all Drawing Model objects to merge all the strokes together.
18 Copy all frames of your outline from the previous step and paste them into a new layer above your shading layers. Make sure all other layers are locked, turn on Edit Multiple Frames, and select all strokes and change their color to bright red or something in contrast to the character itself.
19 Turn off Edit Multiple Frames, and unlock the two layers containing the shading animations. Select all frames across all three of these layers and go to Commands > Merge Layers to compress them down to one layer. Delete the remaining empty layers.


20 Use the Selection tool to click anywhere outside the shapes to deselect them. Select the shaded area outside of your character’s outline and delete it. Repeat this procedure for every keyframe.
21 The final step is to double-click the red stroke (double-clicking selects all segments in the stroke), and delete it. Repeat this for every keyframe until you are left with just the shading shapes inside the contours of the original character.

22 Next, test your movie and sit back to enjoy the fruits of your labor. This technique is great when you want to add some realism and drama to your shot. But remember to plan ahead carefully to avoid having to spend more time making revisions.

Hot Tip
Shape tweening in Flash is a “Voodoo” science. Results can often be unexpected depending on the number of vector points the object(s) is comprised of. The biggest tip is to keep your shapes as simple as possible if you need to tween them. This is why in step 14 I chose to insert a keyframe and work with the exact same shapes from frame 1. I know they will have the exact same number of points and increase the chances of my shape tween being successful. If any of the shapes “implode” during the shape tween, you may have edited them a bit too much.
![]()