Customizing Forms
Let's dive right in with an example of how we can use the System Customization area. We'll start by returning to Deployment Manager and creating a set of new schema fields on the Contact object. For this example, let's assume that we're using the Contact object to track students at a private school. Table 11.2 lists the specifications for the fields we will create. We'll be creating one field for each data type.
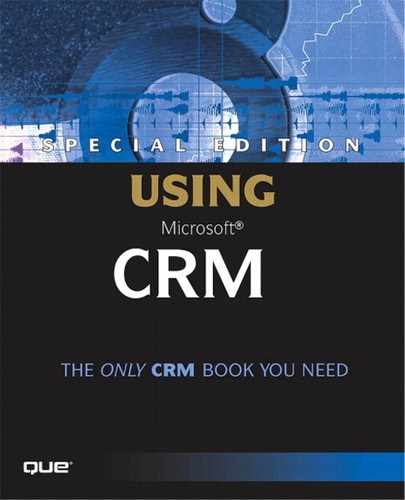
Figure 11.20 shows a view of our custom fields in Deployment Manager. Notice that the field's description is included to the right of each field. Microsoft CRM's standard fields do not have descriptions, but it is a good idea to add them with custom fields so future system administrators can understand the intended purpose of the custom fields.
Figure 11.20. Viewing the list of custom Contact fields in Deployment Manager.
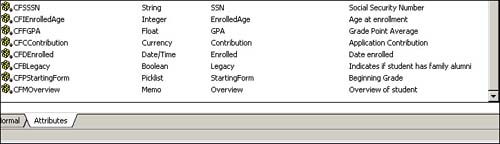
After we have created our new fields, let's go to the System Customization area and add these fields to a new tab and section on the Contact form. Notice that when we go to System Customization and select Contact, Figure 11.21 shows the area of the Contact configuration screen that lists several configuration options.
Figure 11.21. User interface configuration options for the Contact object.
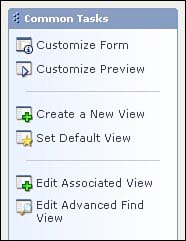
We'll select Customize Form and start by creating a new tab called Student Details. Select Add a Tab and type the name Student Details as shown in Figure 11.22.
Figure 11.22. Adding a new tab to the Contact form.
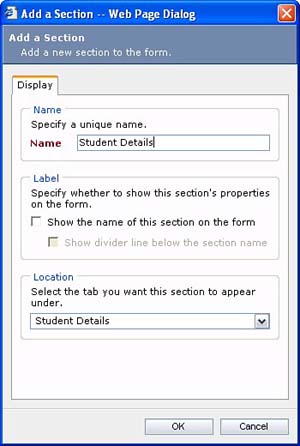
Because all the custom fields we'll be adding to this tab can be grouped together, we don't really need sections to separate groups of fields. However, because all fields must be added inside a section, we'll add a section and specify that its title not be displayed on the form. We can do this by selecting Add a Section and entering Student Details as shown in Figure 11.23. By default, the check box labeled ”Show the name of this section on the form” is unchecked.
Figure 11.23. Adding a new section that will not be displayed on the form.
Now that we have our new tab and section, let's add our custom fields to the section. Select Add Fields and a list of all of the Contact object's fields is displayed. Figure 11.24 shows this field list. Scroll through the list and select the new fields we just created in Deployment Manager.
Figure 11.24. Selecting fields to add to the Contact form.
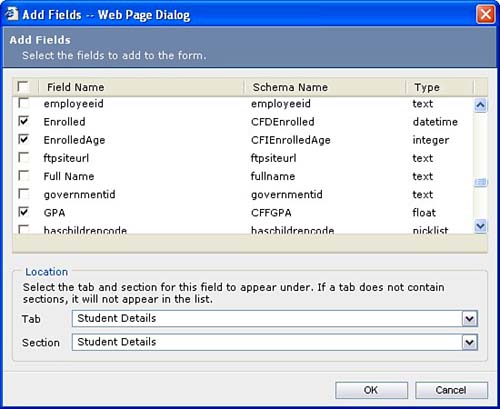
NOTENotice that the fields appear in this list without the publish customization process having to be run. This is because the publish customization process is only necessary when you are making changes that affect the user interface. Up to this point, our new fields only existed in the database and application object model. |
After the fields you want added to the section are selected, click OK to see what the form looks like. By default, the fields are listed in alphabetical order and the memo field spans two columns. We'll want to clean up the captions a little and add values to our picklist field. Let's start by selecting the field EnrolledAge and clicking Change Properties. The Field Properties dialog box, shown in Figure 11.25, opens to the Display tab.
Figure 11.25. Changing the properties of an integer field.
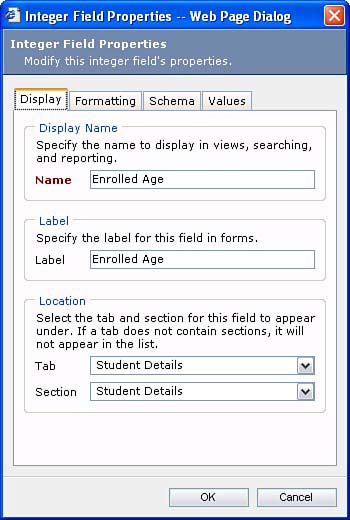
Notice the two descriptions of the field: one is titled name and one is titled label. Name is used in views, searching, and reporting, whereas label is used for forms. Most of the time you'll want to use the same value for both. The exceptions to this rule are cases where you abbreviate the label field to make it fit on the form better. You may also have fields that are defined by their section heading and need little or no field caption added on the screen.
The Field Properties dialog box is slightly different for each field type. The various options available are straightforward; you can navigate through them and get a good understanding of the options in no time. However, a couple of things are worth highlighting:
The schema tab enables you to select whether the field has No constraint, is Business Required or Business Recommended. If you select Business Required you will be required to enter a value in this field when inserting or updating a record. Business Required field captions appear in red. Business Recommended field captions appear in blue. These fields are not enforced by the system. Fields marked No Constraint are not required and do not have colored captions.
The Values tab for picklist fields enables you to enter the values the user sees when editing these fields. Figure 11.26 shows this tab. As you enter values, an integer value is assigned to each one. Notice that if you change the order of the values in your list, the integer value stays with the text entries so that you will end up with integer values that are out of sequence. This is why the Entity Mapper in Deployment Manager allows you to map the virtual fields created with picklists.
Figure 11.26. Adding values to a picklist field.

Now that we've changed the caption on the Enrolled Age field, we'll add values to our StartingForm picklist field and modify its name and label values for readability. We'll save the changes to our form, and then select Create Form (pictured in Figure 11.27) from the preview menu to see how it looks.
Figure 11.27. The Create Form preview of our modified Contact form.
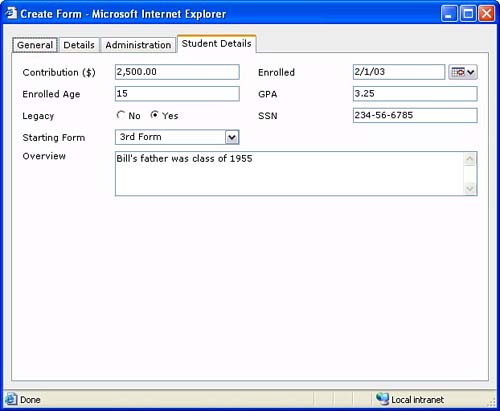
Two additional changes were made that weren't mentioned in the text. The Boolean field was modified to display Yes/No instead of the default True/False and the green directional arrows were used to move the Overview field to the bottom of the form. We filled in some data so you can see how the various field types display the information.