Status and Status Reason
One type of picklist field is different from the others. This is the Status Reason field found on Opportunity and Case records. Status Reason fields are different because their picklist values are linked to their object Statuses. Remember that Status and Status Reason are different fields. Status is noneditable header information that is listed in the lower-left corner of each object's main screen. The Status value of an object can only be changed by taking an action from the object's action menu (for example, invoicing a Contract or disqualifying a Lead). Status Reason is a user-editable field on the object's screen. Status Reason can be updated by a user simply changing the value in its picklist. A Microsoft CRM administrator can change the values that appear in the Status Reason picklists. The administrator cannot change the values of Status for each object. Those are set by the system.
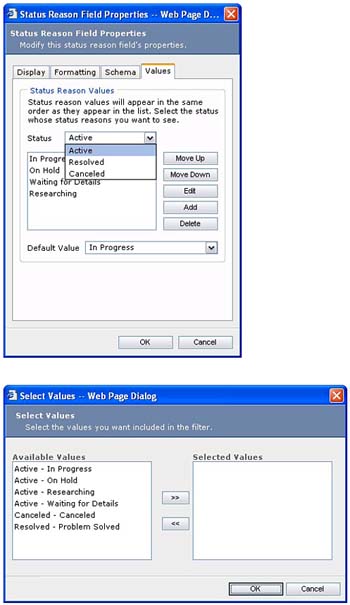
When you use Form Customization to update the values of the Status Reason field (see Figure 11.28), you will notice that you can create a different set of Status Reason values for each of the object's statuses. The Status Reason fields you see on the form depend on what Status the object is in at the time you are selecting a Status Reason. Because these two fields are linked, you will see their values concatenated (see Figure 11.28) when you are selecting a Status Reason in, for example, the Advanced Find tool.
Figure 11.28. Status Reason picklist values are linked to a Cases's Statuses. When you are selecting Status Reason fields in the Advanced Find tool, they will be concatenated to their corresponding Statuses.
Before moving on, it is worth noting that certain system fields cannot be removed from forms. For example, on Sales Opportunities, you cannot remove the Boolean field labeled Revenue.
Customizing Previews
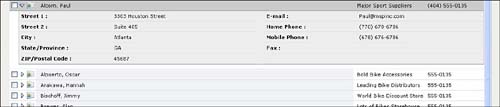
Previews allow the user to view key data points about a CRM record without actually opening the record. You can access previews by clicking the arrow icons listed in all of the Microsoft CRM grids. For each CRM object, there is one and only one preview. It is available from all of the object's views. Figure 11.29 shows the Contact preview.
Figure 11.29. The Contact preview.
You can configure which fields are displayed in the preview by going to Settings, System Customization, selecting the object you want to configure, and selecting the Customize Preview option. Figure 11.30 shows the preview configuration screen.
Figure 11.30. Configuring the Contact Preview.
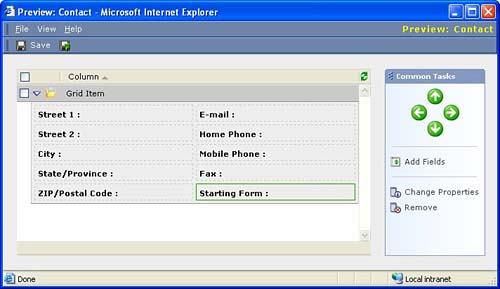
Configuring previews works just like configuring the main object form. The only thing to keep in mind is that if you want to modify a field's properties (for example, its name) you have to do so in the Customize Form section. The field name (not label!) you set in this area is displayed when you add that field to an object's preview.
Adding and Customizing Views
Views are what determine which columns and records we see in the various Microsoft CRM grids (screens where records are listed in a tabular format). There are three standard areas within the system where users can see object views. These are
Main view— The window that is displayed when the object's main tab is clicked.
The Account's main window is displayed by going to the Sales area and clicking the Accounts tab.
Associated view— The window that is displayed when the object is linked to another object.
A view of Contacts can be seen by going to an Account and clicking the Contacts tab.
Advanced Find view— The record listing that is displayed in the Advanced Find tool.
By default, each object's main window has a few standard views. You can modify those and create new ones. With views you can define which columns to list, as well as filter data based on criteria that you set.
NOTEThe ability to filter data in views is powerful, yet it is limited in that it does not extend to logical users. For example, you cannot create a view to display my in-progress opportunities because there is no way to tell the view that you want only in-progress opportunities for the active user. |
Views are global so all views can be seen by all users. However, keep in mind that the security model governs what data each user will see when selecting a given view. In Microsoft CRM, users will always only see records for which they have the appropriate permissions. It is also worth noting that with each object you can set a default view and this default is global.
The Associated View is the view a user sees when looking at a list of the records from another record. For example, when a user opens an Account record and looks at the list of linked Contacts, the user is seeing the Associated View for the Contact object. There is only one Associated view for each object.
Similar to the Associated view, there is only one Advanced Find view for each object.
You can add any of an object's fields as columns to that object's views. The only rule is that the default initial column (the primary column) cannot move. For example, you can rearrange the columns that show up in the My Active Leads view for Leads, but the Name field must appear first.
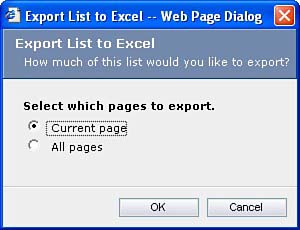
Record Retrieval in Microsoft CRMAs we talk about custom views and start to look at the default views in the system, the question that comes to mind is how Microsoft CRM deals with large data sets when querying views and using the Advanced Find tool or third-party query tools such as c360's SearchPac Query Manager discussed in the previous chapter. For each set of views there is a catchall view that retrieves all records for the object type we have selected. What will happen if we have 250,000 Contacts in the system and we select the Active Contacts view? Will the system crash or will our browser break down trying to display all the data? As we saw earlier in the book, all users can set a user option to specify how many records they want to see per page. The options for this are 25, 50, 75, or 100 records per page. Whenever Microsoft CRM executes a query, the CRM application server begins reviewing records matching the query criteria to determine which records the requesting user has access to view. This is another example of how the security model is always consulted. When the number of records reviewed equals the maximum number of records the user has requested to see per page (as determined by his/her user preferences), or when the end of the matching record set has been reached before the maximum has been satisfied, the data is sent to the client and the page of records is displayed. This is why you never see a total record count in any of the Microsoft CRM views. You see a per page count on each page, but you never see a total count. The server is working through the list and determining what you can see. It does not pull the entire list and then chop it up and send it to you. Furthermore, if your query has enough matching results that more than one page is needed, you will be able to click the forward and backward arrows to see each page. As you do this, the server is going back for the next batch of matching records and examining each one to ensure that you have access to view it. This type of paging design has positive performance implications. The system never gives you more data than you can handle. You will, however, want to be aware of the impact of this when you execute any of the actions on a list of records that spans more than one page. Selecting all the records and executing the action will only apply the action to the records on the active page. If you have a results set that is five pages long, you will need to execute the action five times to affect all records. An exception to the previous statement deals with exporting and printing records. If you query a large record set, and then use the print or Excel import buttons on the grid to print or export the data, you will be asked whether you want to print/export all pages or just the current page. This option is illustrated in Figure 11.31. Figure 11.31. The Excel export dialog box enables the user to export all pages.
Exporting or printing a very large data set could take up a significant amount of resources. It would be wise to do some tests to see how far Microsoft CRM and your particular environment can take you. The data gathering/packaging aspects of the export and print processes runs on the CRM application server so, if you are printing or exporting a large dataset, you might experience a long wait time. |
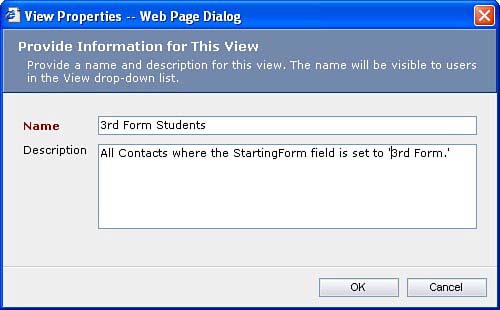
To illustrate what we can do with views, let's create a custom Contact view titled 3rd Form Students and set it as our default view. We'll start by navigating to the System Customization section, clicking Contact, and selecting Create a New View. Figure 11.32 shows the screen where we are asked to enter the view's name and description.
Figure 11.32. Creating a new Contact view titled 3rd Form Students.
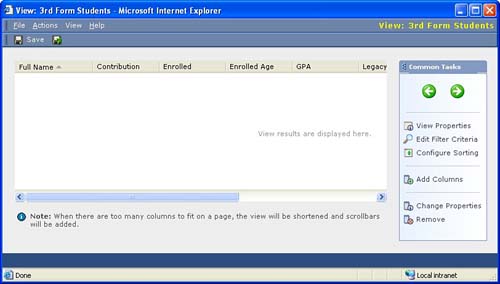
In the New View form we'll use the Add Columns button to add all the new custom fields we created earlier in the chapter. After we've added those, we can use the left and right arrow buttons to change the field order. Figure 11.33 shows the view configuration screen.
Figure 11.33. Adding new columns to a view.
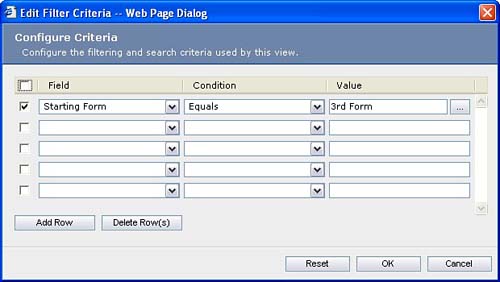
Our next step is to set up our filter so that our new view only displays records that meet specific criteria. To do this we click Edit Filter Criteria, and then configure the screen so that we only pull back Contacts with a Starting Form set to 3rd Form. Figure 11.34 shows the view filter screen.
Figure 11.34. Adding filter criteria to a view.
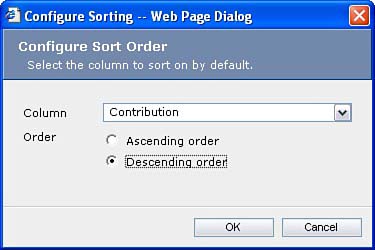
Finally, we'll click Configure Sorting and set the view to sort by Contribution in descending order so we can see all the big spenders at the top of our list. Figure 11.35 shows the view sorting screen.
Figure 11.35. Configuring the sorting criteria for a view.
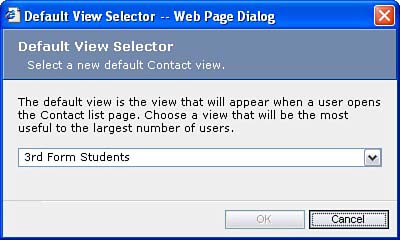
Now that we've created our new custom view, we will set it as the default view for Contact records. We can do this by going into System Customization and selecting Set Default View, shown in Figure 11.36. Again, keep in mind that this is a global default so all users will now see this view when going to the Contact's main screen.
Figure 11.36. Setting the default view for an object.
All the user interface customizations you do in version 1.0 of Microsoft CRM affect all users and Business Units. It would be nice to be able to customize the interface based on the user, Business Unit, or a variety of other factors, but for now we'll just have to wait. However, it does appear that Microsoft has designed their customization structure with extensibility in mind. One indicator of this is the customization XML node titled dmUpdateOrgUI. The way this is named and structured leads us to believe that Microsoft is able to add sections for any level of interface customization they eventually want to build into the product.