Integration Settings
The Settings and Administration tool is easy to use and enables configuration of how data is mapped between Microsoft CRM and Great Plains. The Integration User that was created during installation of the Microsoft CRM Integration should be logged into Windows prior to launching the Setting and Administration tool. This ensures that the tool has the proper security rights to access information in Microsoft CRM.
The majority of the selections that are available in the Settings and Administration tool come from values that are set up within either Great Plains or Microsoft CRM. When any of these values are added or updated within Great Plains or Microsoft CRM, the new values might not be immediately available as options within the tool. It might take 15 minutes for the newly added items to appear in a drop list. One alternative to waiting is to stop and start the IIS Web server on the machine where Microsoft CRM Integration is installed. Restarting the Web server forces the Settings and Administration tool to pull all options from both Microsoft CRM and Great Plains.
The Microsoft CRM Integration Settings and Administration tool is broken into three areas:
General settings
Microsoft CRM settings
Great Plains settings
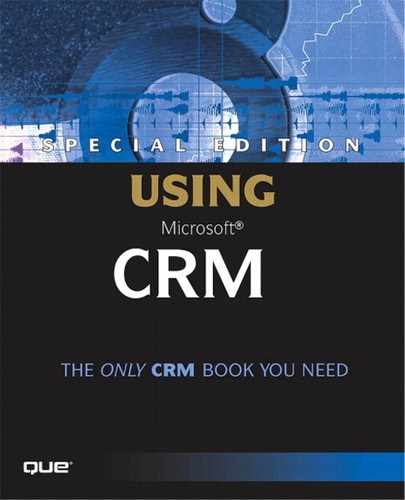
The General settings consist of simply the Time to Live (TTL) setting in seconds. Figure 13.3 shows the General configuration tab. This setting determines how long the Microsoft CRM Integration will try to complete a record transfer before giving up. During normal use, the default value, 43,200 seconds, should be left in place. However, it is recommended that this value be increased for the initial data migration. After completing the initial data migration, the TTL value should be returned to the default value. This is covered in more detail later.
Figure 13.3. Time To Live is the only general configuration setting for the integration.
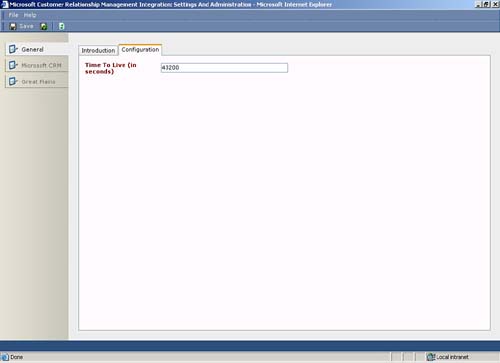
The Microsoft CRM settings area consists of five tabs. The General tab, shown in Figure 13.4, has the Organization Name and Functional Currency values that were selected during the installation. These values cannot be changed without reinstalling the Microsoft CRM Integration. At this time Microsoft CRM Integration can only map one functional currency and one company database between Microsoft Great Plains and Microsoft CRM.
Figure 13.4. The General tab of the Microsoft CRM area.
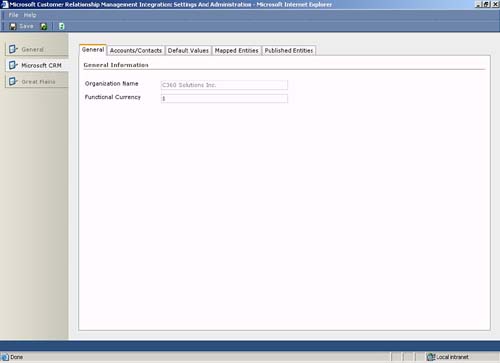
The Accounts/Contacts tab, shown in Figure 13.5, determines whether new customers created in Great Plains are created as Accounts or Contacts within Microsoft CRM. The decision on what type of records are created in Microsoft CRM is based on whether the business is primarily B2B or B2C. For more information on B2B versus B2C, please refer to Chapter 7, “Sales Force Automation.”
Figure 13.5. The Accounts/Contacts tab determines how customers are created in Microsoft CRM.
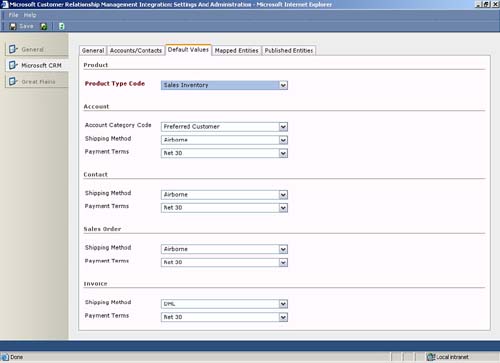
The Default Values tab is used to set default values for the five integration entities. Figure 13.6 shows the Default Values tab. These default values are only used when the values sent from Microsoft Great Plains have not been mapped to values stored in Microsoft CRM. The actual values that appear in the drop lists depends on the values setup in your implementation of Microsoft CRM.
Figure 13.6. Setting default values for unmapped records in MS CRM
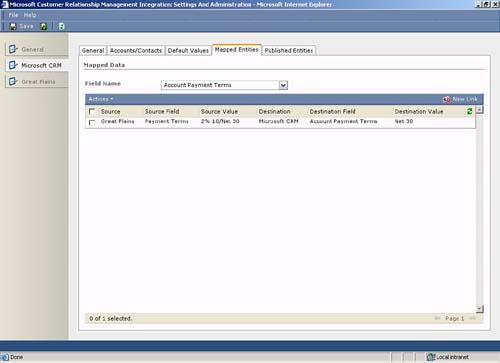
The fourth tab in the Microsoft CRM area is labeled Mapped Entities. Figure 13.7 shows the Mapped Entities tab. This tab is used to map entity values sent from Microsoft CRM to values stored in Microsoft Great Plains. Note that the field name drop list contains all the items listed on the Default Values tab. If the entity values are not mapped coming from Great Plains, the default value that was set on the Default Values tab is used.
Figure 13.7. Mapping entities from Great Plains (source) to Microsoft CRM (target).
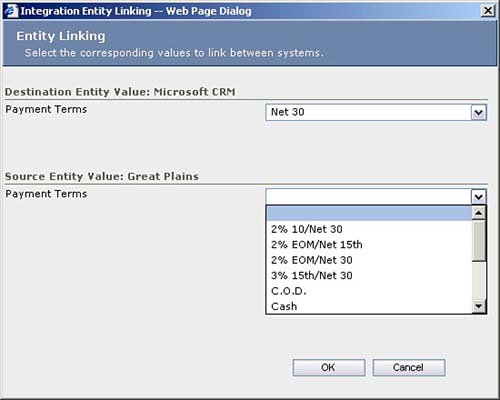
To map an entity value, select an entity value from the Field Name drop list and press the New Link button. The Integration Entity Linking dialog box appears. When a Destination Entity Value that has not aleady been mapped is selected from the drop list, the Source Entity Value can be selected. If the selected Destination Entity Value has already been mapped, the Source Entity Value drop list is greyed out. To change a mapped entity value, the existing mapped entity values must first be deleted before the new linked entity values are created. Figure 13.8 shows the Entity Linking dialog box.
Figure 13.8. Mapping Payment Terms values between Microsoft CRM and Great Plains.
the Microsoft CRM area. This tab is used to determine which of the four integrated entities in Microsoft CRM will be pushed to Microsoft Great Plains. It is important to note that for Orders to be published to Microsoft Great Plains, Accounts, Contacts, and Addresses must be published. To get Addresses to publish both Contacts and Accounts must be selected to publish. Figure 13.9 shows the Publish Entities tab.
Figure 13.9. Specifying which CRM entities to publish to Great Plains.
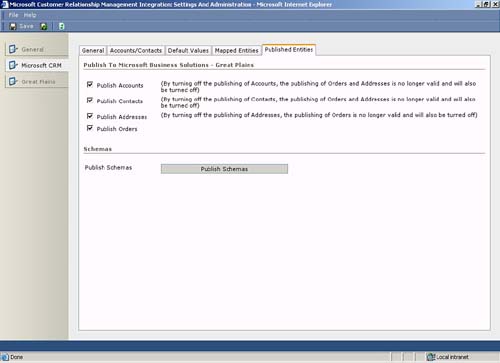
The Published Entities tab is the fifth tab in the Microsoft CRM area. This tab is used to determine which of the four integrated entities in Microsoft CRM will be pushed to Microsoft Great Plains. It is important to note that for Orders to be published to Microsoft Great Plains, Account, Contacts, and Addresses must be published. To get Addresses to publish both Contacts and Accounts must be selected to publish. Figure 13.9 shows the Publish Entities tab.
The Great Plains settings area has six tabs that are used to configure the Great Plains side of the CRM Integration. The General tab displays the Great Plains company name and the functional currency that was selected during the installation of the CRM Integration. The Create Customers drop list determines when a customer is created in Great Plains. If On Orders Only is selected, customer data is only sent to Great Plains after an order is created for a contact or account. If Always is selected, customer data is sent to Great Plains after an contact or account is created within Microsoft CRM. Figure 13.10 shows the General tab for the Great Plains settings area.
Figure 13.10. Company and Currency are read-only, but when Great Plains customers are created, they can be modified.

The Customers tab contains settings that direct the CRM Integration on how to create Customers and Addresses in Great Plains. Figure 13.11 shows the Customers tab for the Great Plains settings area.
Figure 13.11. The Customers tab shows which CRM fields map to the ID field in Great Plains
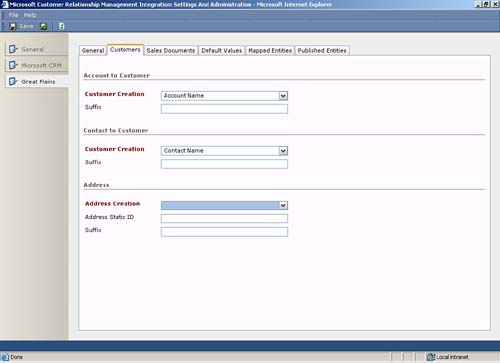
When CRM customers are used to create customers in Great Plains, the customer number field is used to create the unique customer ID in Great Plains.
When creating Great Plains customers with Microsoft CRM contacts, a slightly different approach is taken. Microsoft CRM Integration uses a combination of last name and first name to generate the Great Plains customer ID. However, contact names can be 100 characters in Microsoft CRM, but the customer ID is limited to 64 characters in Great Plains. So, Microsoft CRM Integration concatenates the first 50 characters of the last name with the first 14 characters of the first name to create the customer ID.
When creating addresses in Great Plains, there are two options for what is used as the Address ID in Great Plains. Either a static ID or using the phone number of the customer or contact can be used. If the static ID is chosen, a value, like “Primary,” for the static ID is required.
The Sales Documents tab, shown in Figure 13.12, contains setting for handling orders that are pushed to Great Plains from Microsoft CRM. The default sales document type and whether to override the customer's credit limit can be specified for all orders created in Great Plains by Microsoft CRM Integration.
Figure 13.12. Sales Documents tab with options for handling orders created in Great Plains.
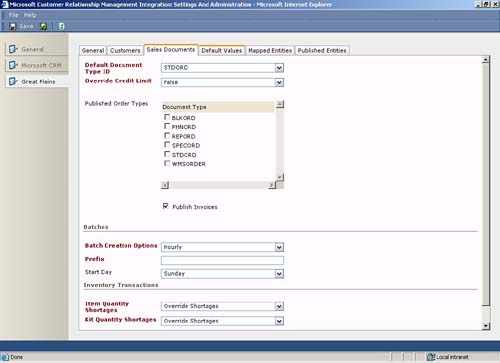
The sales document types that are to be published to Microsoft CRM from Great Plains can be specified on this screen. Additional options determine how to handle item/kit shortages and batch creation.
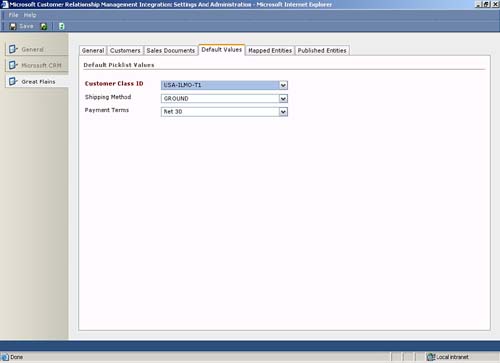
The Default Values tab in the Great Plains Settings area serves the same purpose as the Default Values tab in the Microsoft CRM Setting areas. This tab is pictured in Figure 13.13. The default customer class, payment terms, and shipping method can be specified for customers created in Great Plains by Microsoft CRM Integration. These default values are used if there is not an entity value mapped between the two systems. Whether a mapped entity value exists can be determined by looking at the Mapped Entities tab.
Figure 13.13. Default values used for customers created in Great Plains.
The Mapped Entities tab allows entity values to be mapped between Great Plains and Microsoft CRM. Figure 13.14 shows the Mapped Entities tab and the field names that can be mapped.
Figure 13.14. Mapped Entities tab with possible field names to map.
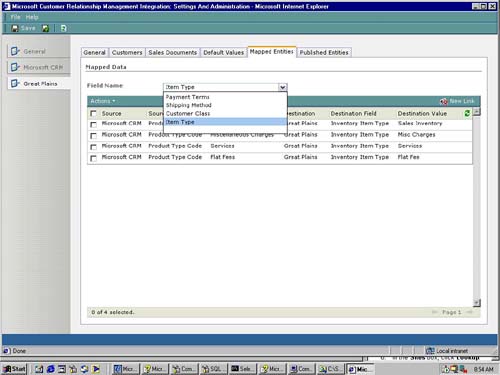
Customer class, payment terms, shipping methods, and item types can all be mapped. Take notice that a default value for item types could not be set on the Default Values tab, so it is important to map item types so that products are created correctly in Microsoft CRM.
It is also important to note that after you install Microsoft CRM Integration Great Plains becomes the master database for items and that products can longer be created in Microsoft CRM.
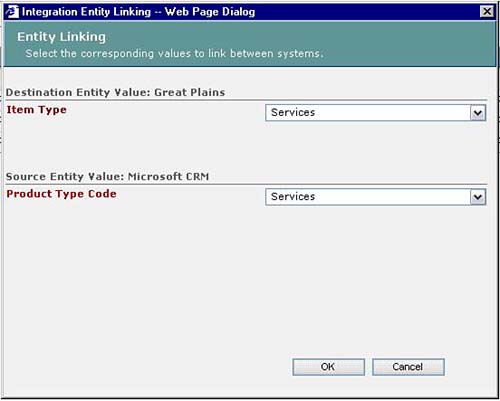
Mapping entities in the Great Plains Settings area is an identical process to mapping entities in the Microsoft CRM Setting area. Select an entity value from the Field Name drop list and press the New Link button. The Integration Entity Linking dialog box appears. When a Destination Entity Value that has not already been mapped is selected from the drop list, the Source Entity Value can be selected. If the selected Destination Entity Value has already been mapped, the Source Entity Value drop list is greyed out. To change a mapped entity value, the existing mapped entity values must first be deleted before the new linked entity values are created. Figure 13.15 shows the Entity Linking dialog box.
Figure 13.15. Mapping Item Types between Great Plains (source) and Microsoft CRM (destination).
The Published Entities tab is the sixth tab in the Great Plains Setting area. Figure 13.16 shows the Published Entities tab. This tab is used to determine which of the four integrated entities in Great Plains is published to Microsoft CRM.
Figure 13.16. Customers, Addresses, and Products must be selected to publish Orders.
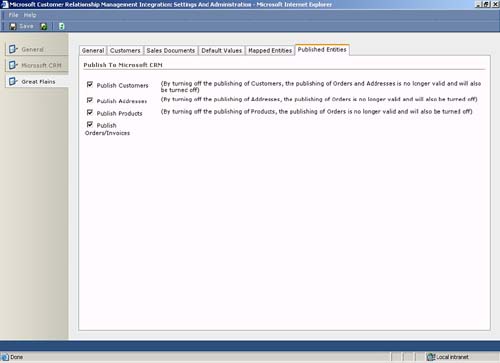
If orders are to be published to Microsoft CRM, Customer Addresses and Products must be selected for publishing. With Orders/Invoices checked the selections made on the Sales Documents tab determines which document types in Great Plains are published and whether invoices are pushed to Microsoft CRM. The Published Order Types section of the Sales Documents tab enables selection of which sales documents will be published from Great Plains.