The Microsoft CRM Home Page
By default, a user's first page in Microsoft CRM will be the home page. Figure 6.1 illustrates the home page and divides it into several sections.
Figure 6.1. The Microsoft CRM home page.
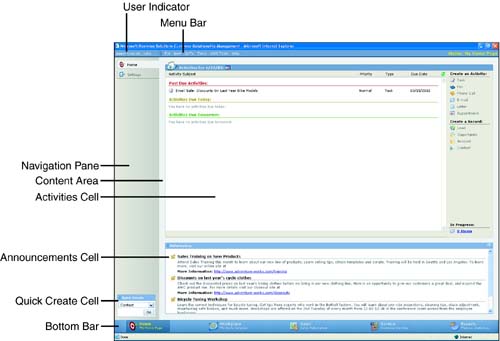
User Indicator
The User Indicator provides the name of the user currently logged into Microsoft CRM. Because Microsoft CRM uses Windows authentication, a user logged onto the domain never needs to see a login box or enter a password to gain access to the application. The authentication is transparent to the user and Microsoft CRM simply opens. Because of this ease of access, having the user's name at the top of the screen can be very helpful. The User Indicator is always present regardless of where the user is within the application.
Menu Bar
The Menu Bar is very similar to the menu bars found in any other application. It is always present and its options do not change from screen to screen. The menu bar and the navigation pane can be customized by Independent Software Vendor's (ISV). What this means is that additional custom tabs can be added to the Menu Bar and Navigation Pane to provide functionality beyond what the core application provides.
Navigation Pane
The Navigation Pane, unlike the Menu Bar, is context-sensitive and changes as the user navigates through the application. It is the control that enables an area of the application (for example, Sales) to have subareas (for example, Leads).
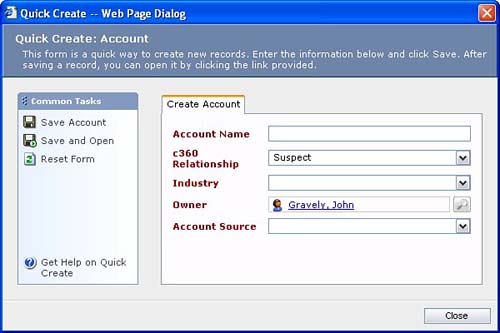
Quick Create
Quick Create is a feature of the Navigation Pane that remains constant throughout the application. As the name states, Quick Create is a usability feature that enables the user to quickly enter basic information about an Account, Contact, Lead, or Opportunity without navigating to another section of the application. You might think of this as the ability to create a placeholder to remind you to follow up later. It helps to ensure that people enter data into the system without taking their focus too far off of what they were doing when the information came to their attention.
The Quick Create always displays an object's required fields. This ensures that any fields that have been set as required must be entered to create the object. If desired, the Quick Create can be turned off for the installation as a whole (although we haven't thought of a reason why this would be advantageous). This can be done through a setting in the web.config file. The web.config file is discussed in Chapter 14, “Customizing Microsoft CRM.” Figure 6.2 shows the quick create screen for an Account object that has been customized to add additional required fields.
Figure 6.2. The Quick Create screen for a modified Account object.
Content Area
The Content Area is where the main content of each area and subarea is displayed as the user navigates through the application. Depending on the area of the application, the Content Area will look very different. In the case of the home page, the Content Area is divided into two cells—Activities and Announcements.
Activities Cell
The Activities Cell lists all activities based on whether they are past due, due today, or due tomorrow. As we discussed in Chapter 1, “Introduction,” Activities in Microsoft CRM refer to Tasks, Faxes, Phone Calls, Emails, Letters, and Appointments.
On the right side of the Activities cell are two lists; the first is a list of buttons to create an Activity (Task, Email), and the second is a list of buttons to create a record (Lead, Contact). The buttons to create an Activity provide the same functionality as the New Activity option on the New menu. The buttons to create a Record enable the user to open the full record creation screen and enter all fields. This differs from the Quick Create option, which takes the user to a simpler screen where she can enter only the basic data points.
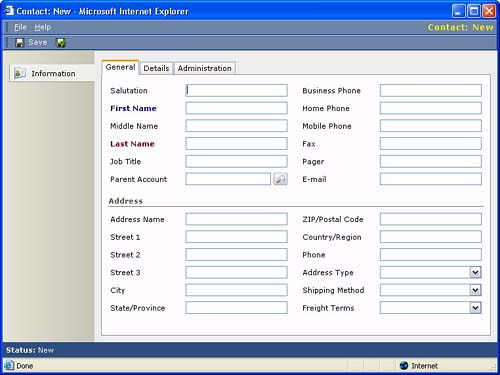
Using the home page buttons to create Activities and Records presents the user with data-entry screens with blank field values. Figure 6.3 illustrates the contact screen that is presented from the home page. A quicker option for creating Records and Activities is to create them from a parent record to which they are related. For example, if you are creating a new Contact record from the Account record to which the Contact is related, much of the data on the Account record will be copied over to the Contact record, thus saving time in entering information. What data gets transferred over depends on how the Account to Contact field mapping is set up in the Microsoft CRM Deployment Manager, which will be discussed in detail in Chapter 11, “Configuring Microsoft CRM.”
Figure 6.3. Creating a new Contact from the home page. Note that no information has been prepopulated.
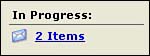
As illustrated in Figure 6.4, in the lower-right corner of the Activities cell is a link titled In Progress. If the user has configured his/her personal options to see the Sales view of Workplace, this link takes the user to the Workplace email screen. If the user has configured his/her Workplace personal option to Service, this link will take the user to the Assigned Personal Work Queue in Workplace. We'll cover Workplace in more detail shortly.
Figure 6.4. The In Progress link takes the user to the Workplace area.
Announcements Cell
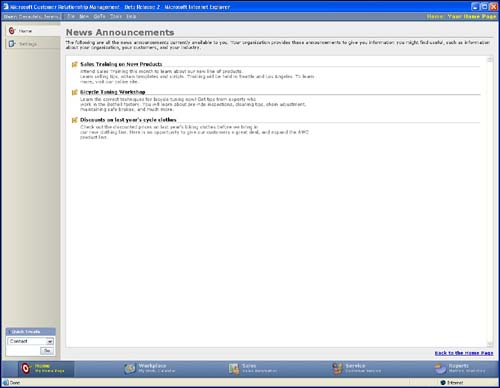
The Announcements Cell is a feature that is simple, yet remarkably useful. As the name implies, this cell lists Announcements that all users of Microsoft CRM will see when visiting the home page. Two things are to be considered when discussing announcements. First, each user can define a start-up page to see when they enter Microsoft CRM. Because of this, it is incorrect to assume that all users will see the Announcements page by default. Second, the user creating the Announcement has the option of publishing the Announcement to the home page. Notice that after the final Announcement on the home page there is a link titled Show All Announcements. This link takes the user to another page that will list all Announcements, both those published and unpublished to the home page. Figure 6.5 shows the Announcements page with all announcements.
Figure 6.5. The Announcements Page lists all Announcements. The home page lists only those Announce-ments that are marked for publication to the home page.
NOTEAnnouncements are visible to all users of Microsoft CRM. In an earlier beta release of Microsoft CRM, the person who created an Announcement could publish the Announcement to all users or to a subset of users. This would have been very useful in communicating team-specific information (for example, a Sales Manager could have announced a “Spif” just to her sales team). However, this functionality was removed (and hopefully will be reincorporated in Version 2.0) from the product. |
Announcements are created in the Announcement section of the Settings page. Like everything else in Microsoft CRM, the system administrator can determine who can create Announcements. Figure 6.6 shows the Announcement creation screen.
Figure 6.6. The Announcement creation screen.
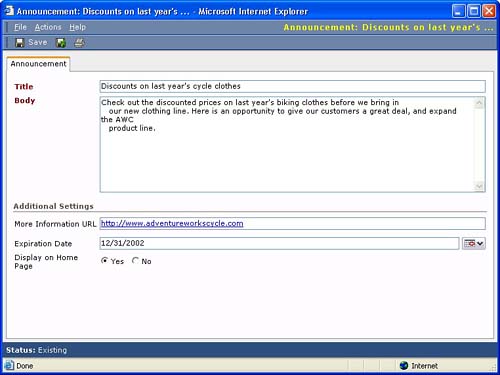
Beyond a title and description, Announcements can have an associated URL as well as an expiration date. The associated URL is displayed with the Announcement, and the Announcement will disappear from the Announcements page on the day of expiration.
Bottom Bar
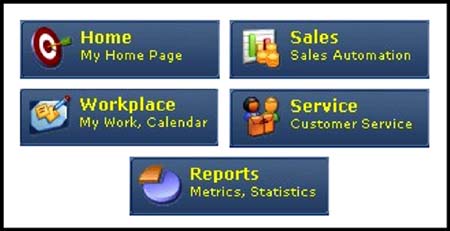
The Bottom Bar enables the user to navigate through the main areas of the application. Throughout this chapter, the terms Areas and Sub-Areas are used to specify portions of the application. Areas are the high-level application pieces including Home page, Workplace, Sales, Service, and Reports. After you've used the Bottom Bar to navigate to an Area, you can use the tabs on the Navigation Pane to navigate to a sub-area of the area. For example, the home page area has two sub-areas—Home and Settings. Refer to Figure 6.7.
Figure 6.7. The main areas of Microsoft CRM.