
Creating Track View sequences are very akin to creating animation within the key frame animation DCC tools.
This recipe will familiarize you with the Track View editor and take you through some of the important interface controls.
Let's create our own Track View sequence:
- Open Sandbox and then open any level.
Note
Any time you add cut-scenes or Track View sequences to a level, you should always make a new layer to add your objects onto. This will allow you to control all these objects independently of the level and hide or show them when needed.
An object is placed onto whatever layer is active when the new Track View sequence is created.
- 2 Add a layer called
Cinematics.Once the layer is added, ensure that it is the active layer by checking that it is highlighted.
- To create a Track View sequence, open the Track View panel selecting the menu option View | Open View Pane | Track View.
- Click on the Add Sequence icon in the Track View editor to create a new sequence:
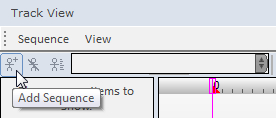
- Clicking the Add Sequence icon will present you with the opportunity to name the sequence. Name this sequence
my_first_cutscene. - When the sequence is added, a new object is placed on the active layer. This object is called a sequence object and will store all the information for our Track View sequence.
- Now that we have created a new sequence, it's time to adjust some of the fundamental settings for it.
- To do this, click the Edit Sequence icon:

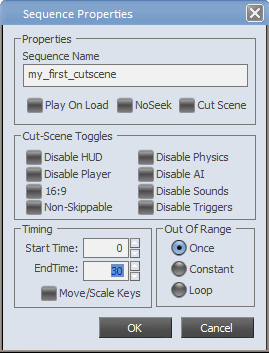
Upon clicking Edit Sequence, you will be presented with the properties window. Many of the properties here are self-explanatory.
- In our case, let's simply adjust the length of the sequence by changing the EndTime parameter to 30.
Now that we have the basic setup, let's add some tracks to our sequence:
- The first track that we will add will be a director node.
- The director node allows us to activate different cameras throughout the course of the Track View allowing a simple form of camera cutting. In our example, we will only use a single camera but it is a good practice to always add a director node to your sequences.
- To add the director node, right-click in the empty whitespace in the left-hand side of the Track View editor. You will see a large dialog with many different track additions that you can make.
- Select to add a director (scene) node:
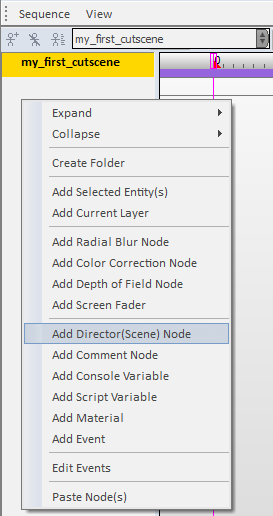
We will use this director node to activate different cameras in the following recipe.
This sequence that we just added is the cut-scene itself. For each sequence, you can add a number of nodes for each object that you use, including the top-level node of the scene itself—this was what we added the director node to. For each node that you have, you can have a number of tracks, depending on what kind of node it is. Each track is measured in seconds, and has points marked on it to indicate where a key frame or event starts.
You will likely want to know more about the available properties in the sequence as well as some additional tracks that you can add to the director node.
The director node has unique tracks that can be added to it. Adding a track to any node can be done simply by right-clicking the node and selecting an available track; some of these include:
- Console allows a key frame to contain information to be passed to the engine's console. An example could be changing the level of detail settings to high for cut-scenes.
- Capture allows a capture command to be sent to the engine to allow for the output of the Track View cut-scenes to sequentially capture frames.