
In this recipe, we will explore the use of an important flow graph node that allows designers to stream in and out entire layers of objects.
The requirements for each level will be different and thus to begin, you should have a populated level open that has entities split between different layers.
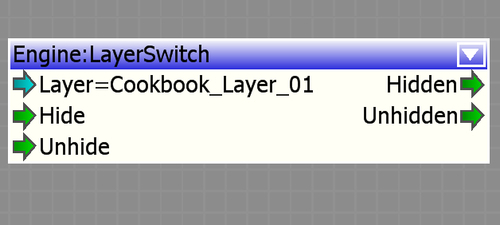
In this example, we will use the layer activation and de-activation to show all the contents required for a particular game play section. Typically, when creating levels, they are split into unique sections called action bubbles. It is common practice to hide layers that contain action bubbles not being played. It is possible to activate and deactivate all entities in a specific layer by using the Engine: LayerSwitch flownode.
- Create a new flow graph and add the Engine: LayerSwitch flownode to the graph.
- Next, double-click in the layer property. This will present you with a pull-down window allowing you to set the layer that should be attached to this node:
Layer switching needs to be globally enabled in the level in order to work.
- In the RollupBar, switch to the Terrain tab, then select Environment and set UseLayersActivation to True, which is in the EnvState section.
Being able to hide and show different layers, expands the control a designer has on the world while the player is playing in it. It is common that multiple triggers are used to hide certain layers or unhide other layers as the player progresses through a level. This can also save a massive amount of time when it comes to re-working entire areas for a player to re-visit the area after an event.
It is important to know that though it can immediately save performance there is no core manipulation of the streaming system when performing layer switching.
You may want to know the limits of layer switching or how to use this tool when it comes to creating a cinematic.
Though this is a simple technique, there are some limits to what it can do:
- Entities which are set to Hidden In Game will not unhide if the Unhide input is triggered
- Picked up objects will disappear in the player's hands when their layer gets hidden
- Only entities, brushes, and solids are affected
- A layer which gets hidden/unhidden should never contain AI to avoid conflicts with territories and waves
- The layer switch has nothing to do with streaming
It is good workflow to always create a layer dedicated to cinematics. The cinematics will typically have to unhide and hide different entities within the world to function, as well as, to be able to maintain a high standard of quality in the cutscene while saving performance on the rest of the level. Using the layer switch combined with the cinematics layer gives a lot of control.
- Go to the Debugging the Flow Graph recipe in Chapter 9, Game Logic, to learn how to debug a flow graph