
In this recipe, we will demonstrate how you can set up different cameras at different positions to be utilized within the game. We will demonstrate some of the basic views such as First Person and Third Person as well as the popular Wheel rim camera usually used in action replays in various other media.
Complete the Creating a new car XML recipe. Then open MyVehicle.xml in Notepad or an equivalent editor.
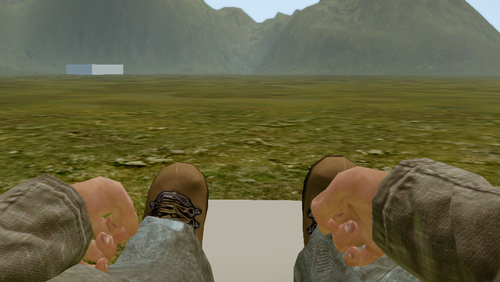
First Person Camera:
- After the Creating a new car XML recipe, we should already have the majority of what we need in the
<Seats>cells. For our first camera, we will utilize the<View class="FirstPerson">cell to make a new first person camera that we can also look around with. - First, we will need a new Helper. Copy the following into the
<Helpers>cells:<Helper name="driver_view" position="-0.75,0.35,2.0" direction="0,1,0" part="body"/>
- Now, define this
driver_viewhelper in the emptyFirstPerson.helperproperty:<FirstPerson helper="driver_view" />
- To allow the player to look around in this First Person view, we will need to add/change the properties in the
FirstPersonclass to match the following line:<View class="FirstPerson" canRotate="1" rotationMin="-45,0,-170" rotationMax="45,0,170">
Note
The
rotationMinandrotationMaxare measured in degrees. - You may need to tweak the position a bit, but the result should look something like the following screenshot:
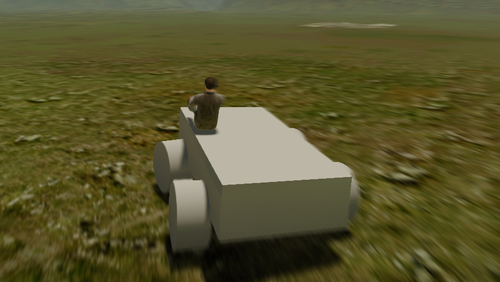
Third Person Camera:
Since the creation of the car, the Third Person camera is basically set up. However, we may want to adjust some of the properties to the following:
<ThirdPerson distance="3" heightOffset="2.5" speed="1" />
This will bring the overall distance a little closer, push up the camera's height as well as slow down the camera to induce a little bit of lag, allowing the car to move further ahead of the camera a bit when driving really fast or lag a bit on sharp turns.
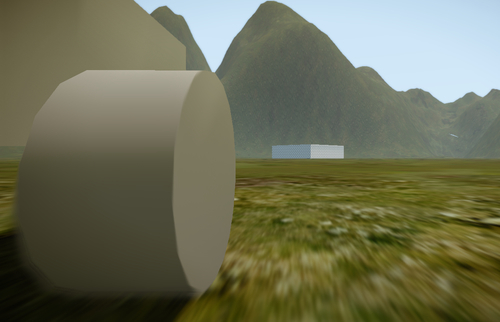
Wheel Camera:
- This is a bonus camera that may add a bit of fun when cycling between cameras. To make this camera, we will need to first create a new view. Copy the following into your
<Views>cell:<View class="FirstPerson" canRotate="0"> <FirstPerson helper="wheel_cam" /> </View>
- Next, we need to create a new helper for this camera:
<Helper name="wheel_cam" position="1.9,-0.5,0.5" direction="0,1,0" part="body"/>
Note
This position will depend on the body of the vehicle and the position of the wheels from the mesh.
- In the end, the desired affect is a Wheels Camera that resembles something like the following screenshot:
Just like defining a helper position for the sitting position, helpers can be used in a number of different places on the XML and the cameras are no different. Utilizing the positions and directions of the helpers, you will be able to create some interesting camera positions of your own.
Some additional cameras such as SteerThirdPerson and ActionThirdPerson (no longer supported) can also be utilized as other styles of cameras when the player is sitting in the seat of the vehicle. You can find their properties from def_vehicle.xml (MyGameFolderScriptsEntitiesVehicles).