
- CryENGINE 3 Cookbook
- CryENGINE 3 Cookbook
- Credits
- About the Authors
- www.PacktPub.com
- Support files, eBooks, discount offers and more
- Support files, eBooks, discount offers and more
- Support files, eBooks, discount offers and more
- Why subscribe?
- Free access for Packt account holders
- Preface
- 1. CryENGINE 3: Getting Started
- 2. Sandbox Basics
- Introduction
- Creating a new level
- Generating a procedural terrain
- Terrain sculpting
- Setting up the terrain texture
- Placing the objects in the world
- Refining the object placement
- Utilizing the layers for multiple developer collaboration
- Switching to game mode
- Saving your level
- Exporting to an engine
- Essential game objects
- Running a map from the Launcher
- 3. Basic Level Layout
- 4. Environment Creation
- Introduction
- Creating your first time of day using the basic parameters
- Adjusting the terrain lighting
- Using the real-time Global Illumination
- Editing HDR lighting and the effects for flares
- Creating a global volumetric fog
- Creating a night scene with time of day parameters
- Color grading your level
- Creating a photo realistic ocean
- Improving your sky with clouds
- Making it rain in your level
- 5. Basic Artificial Intelligence
- 6. Asset Creation
- Introduction
- Installing the CryENGINE 3 plugin for 3D Studio Max
- Creating textures using CryTIF
- Setting up units to match CryENGINE in 3ds
- Basic material setup in 3ds
- Creating and exporting static objects
- Creating and exporting destroyable objects
- Using advanced material editor parameters to create animation
- Creating new material effects
- Creating image-based lighting
- 7. Characters and Animation
- 8. Creating Vehicles
- 9. Game Logic
- Introduction
- How to beam the player to a tag point from a trigger
- Making the AI go to a location when the player enters a proximity trigger
- Debugging the Flow Graph
- Creating a kill counter
- Rewarding the player for reaching a kill goal
- Displaying the player's health through a Flow Graph
- Changing the player camera through key input
- Creating a countdown timer
- 10. Track View and Cut-Scenes
- 11. Fun Physics
- 12. Profiling and Improving Performance
- Support files, eBooks, discount offers and more
- Support files, eBooks, discount offers and more
- Support files, eBooks, discount offers and more
Up to this point, you might have noticed that the terrain texturing can look a bit poor with the amount of tiling that may be seen. In this recipe, we will explore how you can break up some of the terrain tiling with Decals.
- From the RollupBar, open the Objects tab.
- Click the Misc button.
- Select Decal.
- Align the Decal to your terrain and place it down in an area with a lot of tiling.
- From the Decal properties, click MTL (or bring up the material editor).
- Find Materials | decals | ground_crack_a.
- Apply the material to the Decal.
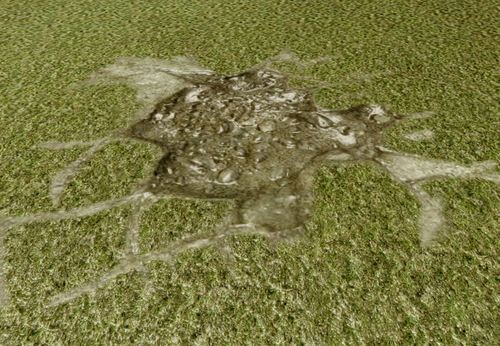
Decals are simple texture planes that can be projected against both terrain and objects (such as the Road tool).
Here is some additional information about the Decals and what parameters can be set.
- ProjectionType:
- Deferred: Uses screen space calculation instead (better on performance, but may not look as good)
- ViewDistRatio: Distance Ratio in which the Decal is seen based on the size of the decal
- SortPriority: The priority of which projected texture should be displayed on the top (roads match this priority range)
-
No Comment
..................Content has been hidden....................
You can't read the all page of ebook, please click here login for view all page.