
In this recipe, we will demonstrate a basic use of setting up a trigger area and then teleporting the player to a particular location once the player walks inside that trigger area.
- In the RollupBar, click on the Entities button.
- Under the Triggers section, select ProximityTrigger.
- Place this ProximityTrigger on the ground with the following property changes:
- DimX = 10
- DimY = 10
- DimZ = 5
- OnlyPlayer = True
- Next, draw down a solid to mark the area where we might see the trigger area that the player needs to enter. Match the dimensions to the following—10x10x1 meter.
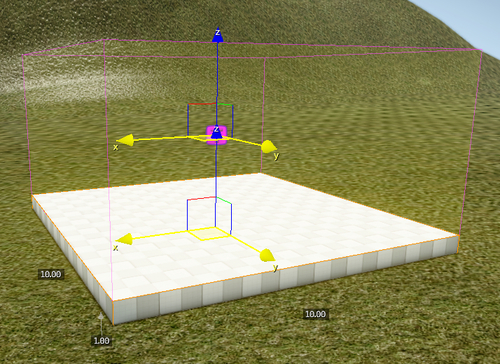
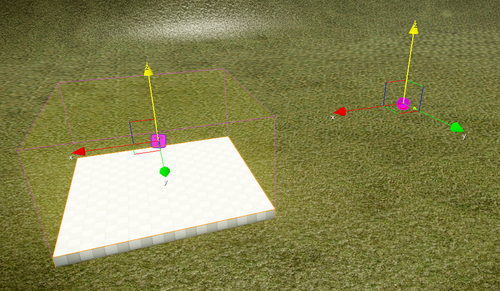
- Next, place down a tag point to reference as the beaming destination.
- In the RollupBar, click on the AI button.
- From the Object Type, select Tagpoint.
- Place the tag point several meters away from the trigger.
- And finally, we need to create the logic within the Flow Graph to trigger the beaming event for the player.
- Right-click the ProximityTrigger | Create Flow Graph.
- Name the Flow Graph
Beam_Triggerand click OK. - Go back into the editor's perspective viewport and select the ProximityTrigger.
- Open the Flow Graph editor again and select the ProximityTrigger within the FG hierarchy.
- Right-click in an open space and click Add Selected Entity.
- Repeat steps 3 to 5 for the tag point.
- Right-click Add Node | Entity | Beam Entity.
- Then right-click Add Node | Game | Local Player.
- Link the Enter output from the ProximityTrigger to the input of Beam on the BeamEntity node.
- Link the entityId of the LocalPlayer node to the input of Choose Entity in the BeamEntity node.
- Link the pos output from the Tagpoint node to the Position input on the BeamEntity node.
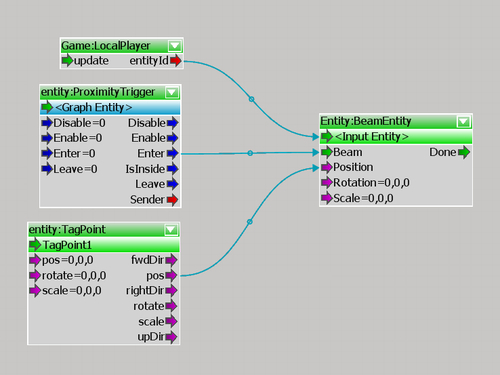
Now every time the player walks into the defined proxy trigger area, the player will be beamed to the tag point's world coordinates.
Beaming within CryENGINE 3 is like instantly teleporting an entity to any defined location in the level. With this setup, we are telling the code to beam the player to the tag point's defined Vec3 position within the world as soon as they enter the trigger. This works with any entity type within CryENGINE 3.
..................Content has been hidden....................
You can't read the all page of ebook, please click here login for view all page.