In this recipe, you will interact with the HDR effects and learn to manipulate the global fog and other fog effects such as volumetric fog.
You should have Forest.cry open in the Editor and have completed the Creating your first time of day using the basic parameters recipe earlier in this chapter.
As we will soon be adjusting the fog color, to be able to visualize it easier being multiplied on top of the haze created by the HDR sky, we must set its multiplier:
- Open the Time Of Day dialog and ensure that the advanced time of day settings are displayed.
- Set the FogColorMultiplier to 10, so that we can easily see our color changing.
- Next, select a color for the fog.
- In the following final screenshot, I have used the sky color of RGB 150, 200, 210 for the fog.
- Next, let's adjust the atmosphere height. This parameter defines the atmosphere height above the sea level. So, in reality the higher the atmosphere is, the less visible the effect of fog layers will be.
- Let's set our atmosphere to 8000. Since we have raised the atmosphere, the fog in the distance will be too bright and we will need to adjust for this.
- Set the FogColorMultiplier down to a more comfortable value of 5.
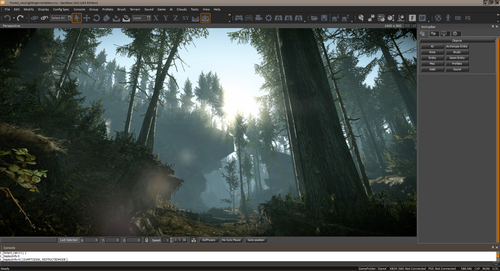
You can now see that setting good volumetric fog can increase the believability of a level and especially highlight the silhouettes of distant objects.
Global volumetric fog in the CryENGINE allows you to model almost all aspects of an atmospheric Aerial Perspective. It simulates particles/aerosols distributed uniformly along the ground plane and falling off exponentially from a height (based on height above the sea level). The fog integral between the viewer and each pixel in the scene gets properly solved taking the two mentioned distributions into account. Additionally, it accounts for sunlight scattered into the view ray to produce halos around the sun in foggy environments.
You would have noticed other settings under the Fog parameters in the Time Of Day dialog such as Density offset. You might also want to know how to enable and disable fog rendering for ease of editing.