
In this recipe, we will demonstrate how you may be able to get your AI to navigate on top of objects as well as interiors.
- Before we begin, you must have Sandbox 3 open
- Then open
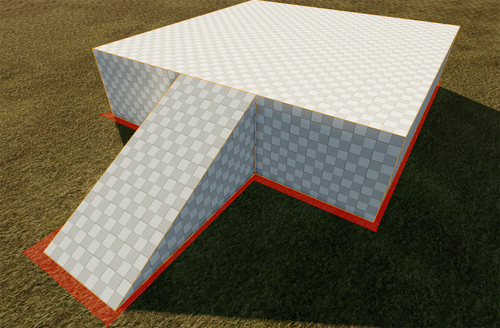
My_Level.cry - Build a platform from the Solids tool to the dimensions of
20 x 20 x 5 - Again, using the Solids tool, build a ramp that leads up to the platform

- Also, be sure to cover the ground section around the solid with a forbidden area (see the Forbidden areas recipe)
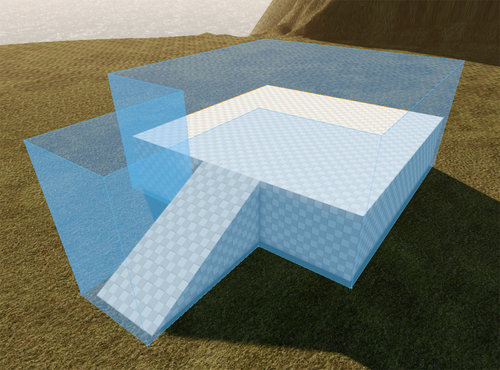
AI Navigation Modifier: Before we place down any of the nodes required for navigation, we must first outline the area that we want the AI to perceive as an interior navigation. We do this by creating an area around the object known as an AI Navigation Modifier.
- In the RollupBar, click on the AI button.
- From the Object Type, select AINavigationModifier.
- With the Follow Terrain enabled and Grid Snap set to 1 meter, click eight points that surround the platform and the ramp (remember to double-click on the eighth point to finalize your area).
- In the AINavigationModifier Params, change the Height value to 10 (meters).
- In the AINavigationModifier Params, change the WaypointConnections to Auto-Dynamic.
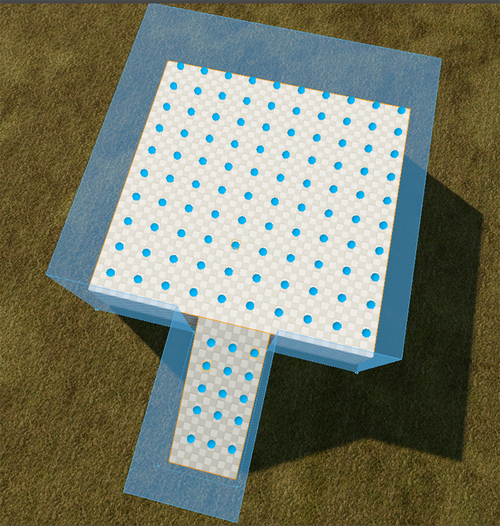
AI Points: Now that we've created an interior area for the AI to recognize, we must now create the navigation points within the area defined for the AI to use as the navigation triangulation. To do this, we must create the AI points.
- In the RollupBar, click on the AI button.
- From the Object Type, select AIPoint.
- With Follow Terrain and Snap to Objects enabled, and the Grid Snap set to 1 meter, click 1 AI Point into a corner at the top of the platform.
- Copy and paste 99 additional points covering the whole top surface with a two meter gap between each point (10 points x 10 points).
- Do the same with the ramp by covering the surface with 15 AI points (3 points x 5 points).
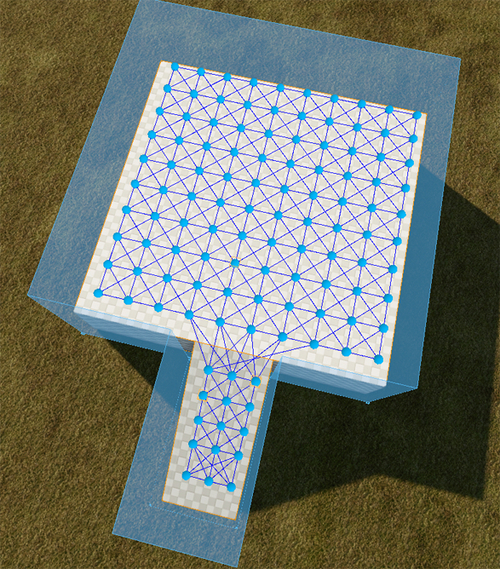
- To connect all the points, you must now generate the AI navigation. See the Generating the AI navigation recipe. You should now see all of your interior navigation points connected.
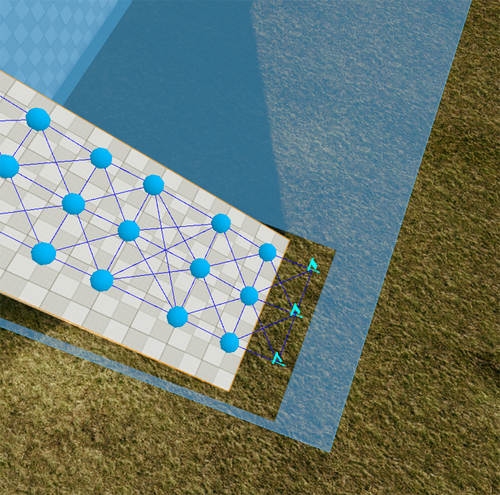
Entry/Exit Points: Before we can get the AI to travel between the Interior Navigation and the Terrain Navigation, we must first create Entry/Exit Points from the AI points that are placed onto the Terrain, but also within the Navigation Modifier.
- Copy three of the AI points on the lowest end of the ramp and place them onto the Terrain two meters away from the lowest AI points.
- Selecting each point one by one, change their Type from Waypoint to Entry/Exit.
- Select the AINavigationModifier and Edit Shape to move the two points at the end of the ramp to come out a bit farther to wrap around the three entry/exit points.
- Generate the AI navigation.
The Interior Navigation is a node-based AI triangulation tool. This tool allows for specifically placed nodes to act as vertex points for the break up of the triangulation. Using the interior navigation nodes also allows for 3D navigation to be possible, so that the designers are able to create land bridges to allow AI to travel across the top as well as underneath the bridge. This method is used in cases where the object that the AI needs to travel on is roughly two meters higher than the terrain triangulation.
Here is some additional information about the interior navigation points that you should know.
The main difference between the generation of the AI points for the interior navigation is that the Designer Controlled Points are AI points that can manually be linked by the designer. It usually takes a long time to link these points up, but if—for whatever reason—the designer needs to have total control over how the links operate, then this is possible.
However, Auto-Dynamic automatically links the nodes if they are within the range of another node (defined by NodeAutoConnectDistance) and is not obscured by the edge of the AINavigationModifier.