
In this recipe, we will be creating a night scene utilizing the advanced parameters of time of day.
Let's create a night time atmosphere for our level:
- Open the time of day editor.
As we will only be worrying about the important values that will pertain to creating a night scene, let's reset the current values.
- Click reset values.
- Set the time of day to 21:00, which we can safely call night.
You will notice that the sun goes below the horizon but we can now adjust the position of the moon texture, which—for all intents and purposes—will be used as the "sun" in our night scene.
- The first value we should change is the moon color in the Night Sky Multiplier section of the time of day dialog.
- Set the moon color to 2. Now that the moon is visible we must adjust the moon texture's position and size.
- Open the Environment tab in the RollupBar and locate the moon environment properties.
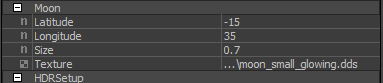
- Adjust the longitude and latitude to change the position of the moon in the sky to wherever you want it, or you may copy the parameters in the image.
- Now that we have our basic setup, we need to adjust the overall coloring and lighting of the scene.
- Set the sky color multiplier to 0.4, which will dim the entire maps ambient lighting.
- Next set the Zenith color in the Night Sky parameter to a suitable night sky color of 40,54,51 RGB.
- Now we can add some stars to the scene by increasing the Star intensity in the Night Sky parameter to its maximum of 3.
- As we want no direct lighting, let's set the sun color multiplier to 0.
The final touch we will make is to add some fog to the scene to highlight the silhouettes of distance objects.
- Set the fog color to a fairly dark color of 61,80,84.
- Now, adjust the Fog Color multiplier to 1.
- Finally, to retain the silhouettes of objects set the global density to 0.2.
You now have a realistic night time of day!
There are many other properties available to you when adjusting for a night scene. Some of these are explained as follows.
To enhance your night scene you will likely want to increase the SSAO (screen-space-ambient occlusion) amount and its corresponding contrast.
It is likely that you will need to adjust the HDRSetup paramters to less extreme values than during the daytime in your level. HDR effects such as flares and coronas will be much more obvious and visible to your player at night.
If you wish to have a more surreal scene, you can adjust the moon color to different extremes of colors; it should be noted that this color is simply multiplied onto the color of the moon texture. The corona scale and color settings will allow you to highlight your moon and its surrounding sky area with more or less lighting.
Having now created a whole atmosphere, go toChapter 3, Basic Level Layout to start laying out your night time level.
Continue to the next recipe to color grade your entire night scene to emphasize certain colors or styles.