
Before using textures and the advanced shading on objects, the CryENGINE needs the object to have a material ready to be read by the engine. These materials are stored as .MTL files.
In this recipe, you will learn how to create a material using 3ds Max and translate that material's information into an MTL file.
In this example, we will create a material for a basic prop with a texture and collision. To begin, open 3ds.
Let's set up our material for export to the engine:
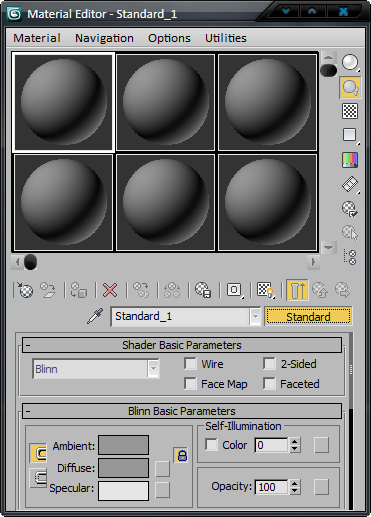
- Open the Material Editor in 3ds Max by pressing the keyboard shortcut M.
- Create a new Multi/Sub-Object material in the first material slot by clicking the Standard button.
- Select Multi/Sub-Object from the dialog that opens.
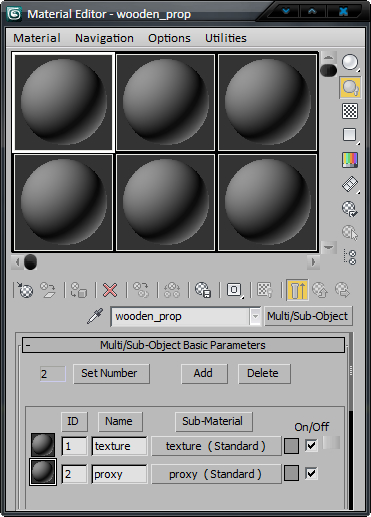
- Next, set the number of sub materials to two by clicking the Set Number button in the newly created material.
Note
CryENGINE 3 supports up to 32 sub materials; however, every sub-material that is rendered will add to the overall draw call count of the asset. For the best performance keep the number of sub-materials low.
We should give the material and all sub-materials appropriate names. As and when we create the .MTL file, these names will be transferred and used by the engine.
- Name the parent material to wooden_prop and the subsequent sub-material to texture and proxy.
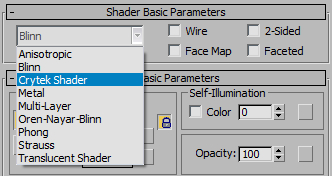
- This next step is very important as each sub-material must be opened and the Shader Basic Parameters section changed to the Crytek Shader type.
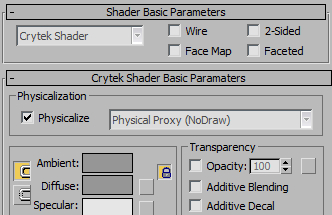
Having selected the Crytek Shader for both submaterials, you would have seen a new parameter for these materials under the heading of Physicalization.
This setting controls the way the material acts in the engine, particularly with physics.
The default setting can be used for most materials as it has no additional physics capabilities.
- Select the Proxy sub-material and change its Physicalization type to Physical Proxy (NoDraw). This will cause any geometry assigned this sub-material to be ignored by the renderer making it invisible to the user.
- Next, to actually physicalize the material in the engine, select the Physicalize checkbox.
Note
If Physicalize is disabled, the object will not physically interact with anything in the game world.
Now that our material is set up, we can create the
.MTLfile.The
.MTLfile must be created in the directory you plan to save your assets in. - Open the CryENGINE export and locate the Material Rollout.
Ensure that the top-most material is active; you should see all the sub-material in their list. If a sub-material is active while creating the
.MTLfile, the file will contain only that sub-material. - Create the
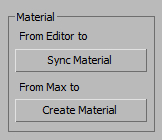
.MTLfile by clicking on Create Material.The Sandbox Material Editor window will open.
- Click Create Material in 3ds Max a second time.
You will then, finally, be asked to enter a filename for the new MTL file.
Again ensure that this name is the same as the name of the material in 3ds Max.
- For this recipe, save this material as
wooden_prop.mtlto a folder namedobjects/wooden_props/ - Click Save when completed.
Multi/Sub-Object materials allow a mesh to have multiple material IDs on a per poly level. This means that two welded triangles can have different material IDs. This is useful many times when making complex objects.
The material has now been created and is readable by the engine. The .MTL files are .XML files that can be manually edited, if so desired.
Now that we have created this .MTL file, we can assign textures to it and use it for new or existing assets in the engine.
You may want to know how to add textures to the 3ds max material now that you have created or got more information on the Physicalize parameter.
You can assign textures to each submaterial, except for the Physical Proxy (NoDraw) submaterial which, as discussed, will not be rendered. The main three slots that are used for textures before generating or exporting an .MTL are the diffuse, specular, and bump slots.
When the Physicalize checkbox is checked, it actually stores information on the mesh for it to be physical. Simply setting a material to physicalize in 3ds and exporting it to engine will not cause it to be physical when applied to other objects. It is thus important to realize that adjusting the physical properties of collision will likely require a re-export of your mesh.