During the ESXi deployment through Auto Deploy, the image is cached on local disk, remote disk, or USB drive. vSphere Auto Deploy always provisions the host, but if the server becomes unavailable due to bottlenecks (for example, hundreds of hosts that attempt to access the Auto Deploy server simultaneously), the host boots from the cache and attempts to reach the Auto Deploy server to complete the configuration.
The stateless caching solution is primarily intended to prevent situations where the deployment process may fail due to server congestion, a typical scenario that occurs in large environments.
To enable stateless caching mode, follow these steps:
- From vCenter Server, navigate to Home | Host Profiles.
- Edit an existing host profile attached to hosts to provision or create a new one.
- Under Advanced Configuration Settings, select System Image Cache Configuration.
- From the drop-down menu, select Enable stateless caching on the host and click Finish to save the configuration. You can specify a comma-separated list of disks to use (by default, the first available will be used) using the syntax shown in Table 4.1 to configure an unattended installation:
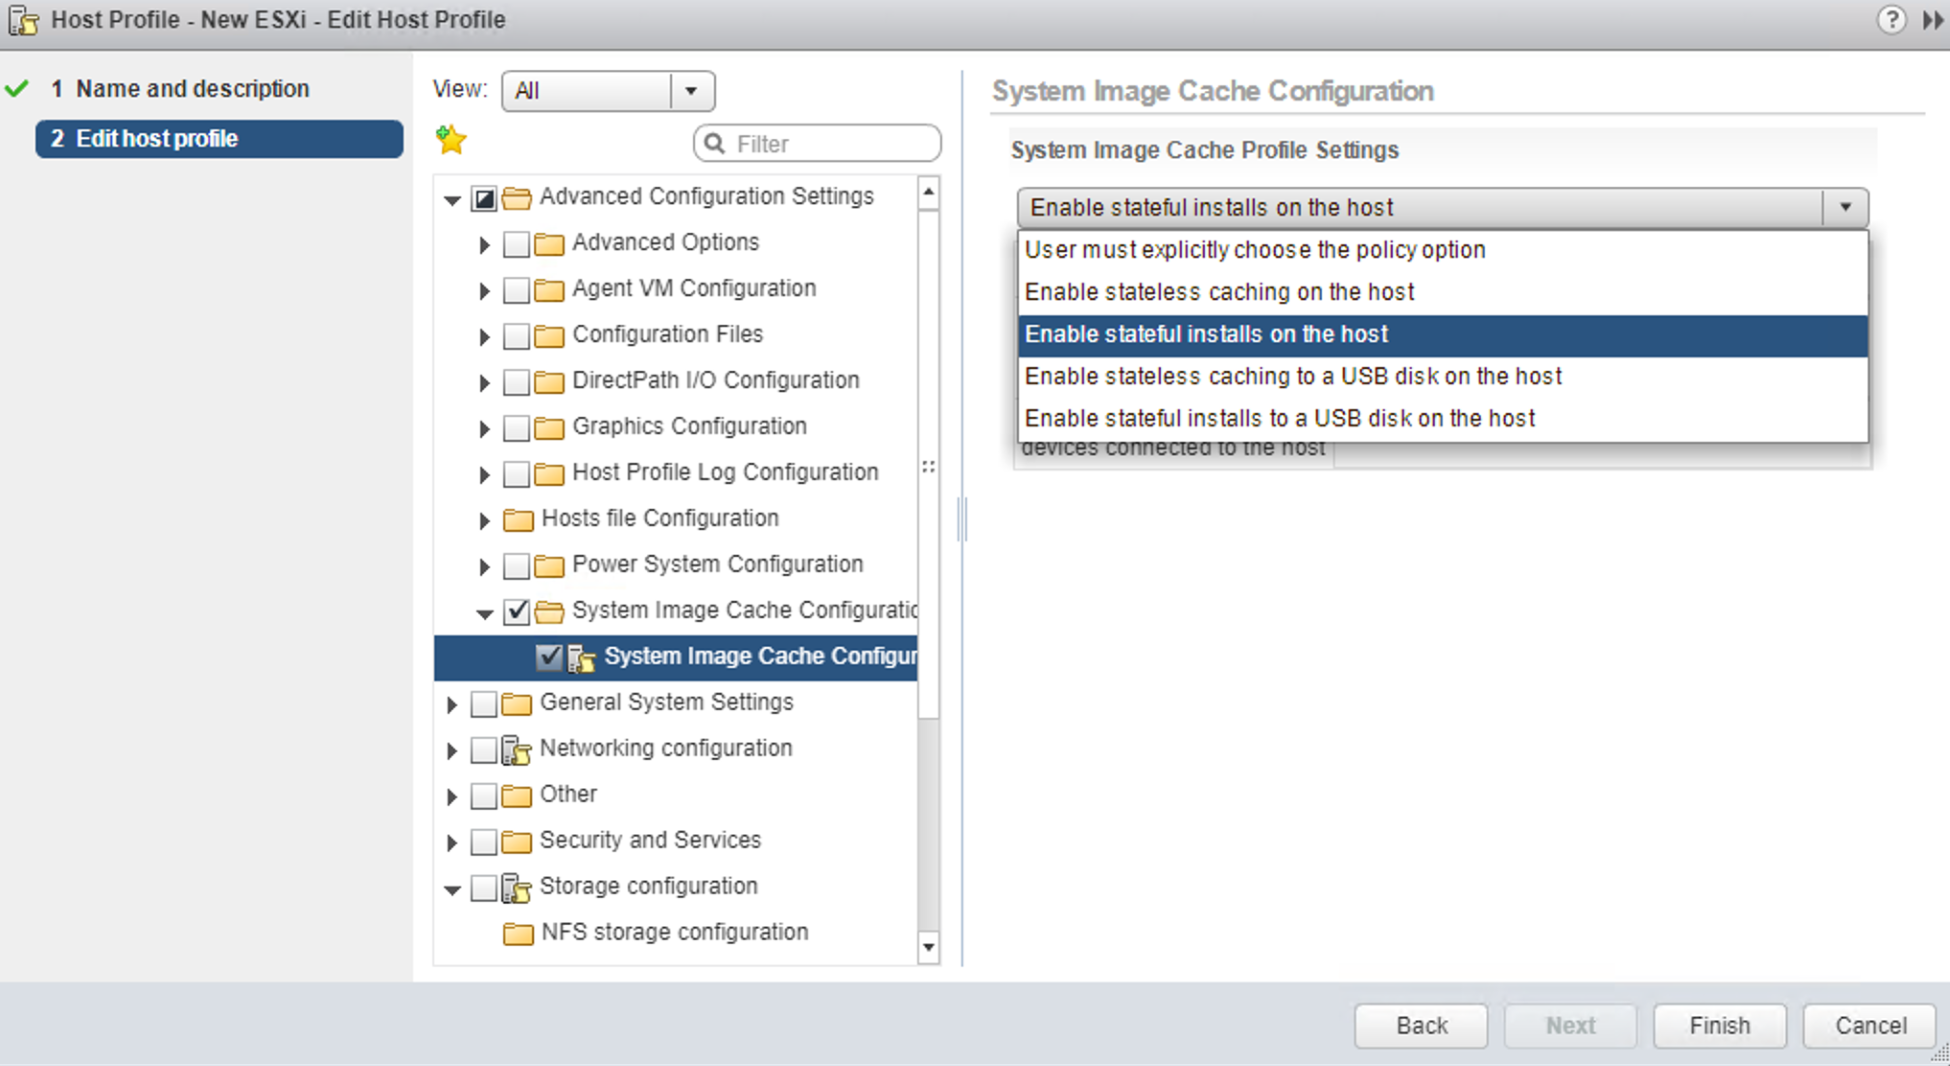
The host profile configuration must be modified to enable stateless caching.
- Configure the boot order from the BIOS of your server to boot from the network first then from the local disk. Reboot the host to get a fresh image.
- After a successful boot, the Auto Deploy image loaded in memory is saved to the local disk.
- When you reboot the host and Auto Deploy is not available, the host boots from the cached image on local disk.