VMs can be created or deployed using the different methods shown previously. In some circumstances, you might need to put in your production environment a pre-created VM from another source. You may be wondering how to deploy this virtual machine.
First, using vSphere Client, you need to upload the VM files (generally the .vmx and .vmdk files) to an attached datastore that is reachable by the hosts. When the files are in the datastore, you have to register the VM to add it to the vCenter Server or the ESXi host inventory. Once the VM has been added to the inventory, you can start using and managing the VM.
To register a VM to the inventory, follow this procedure:
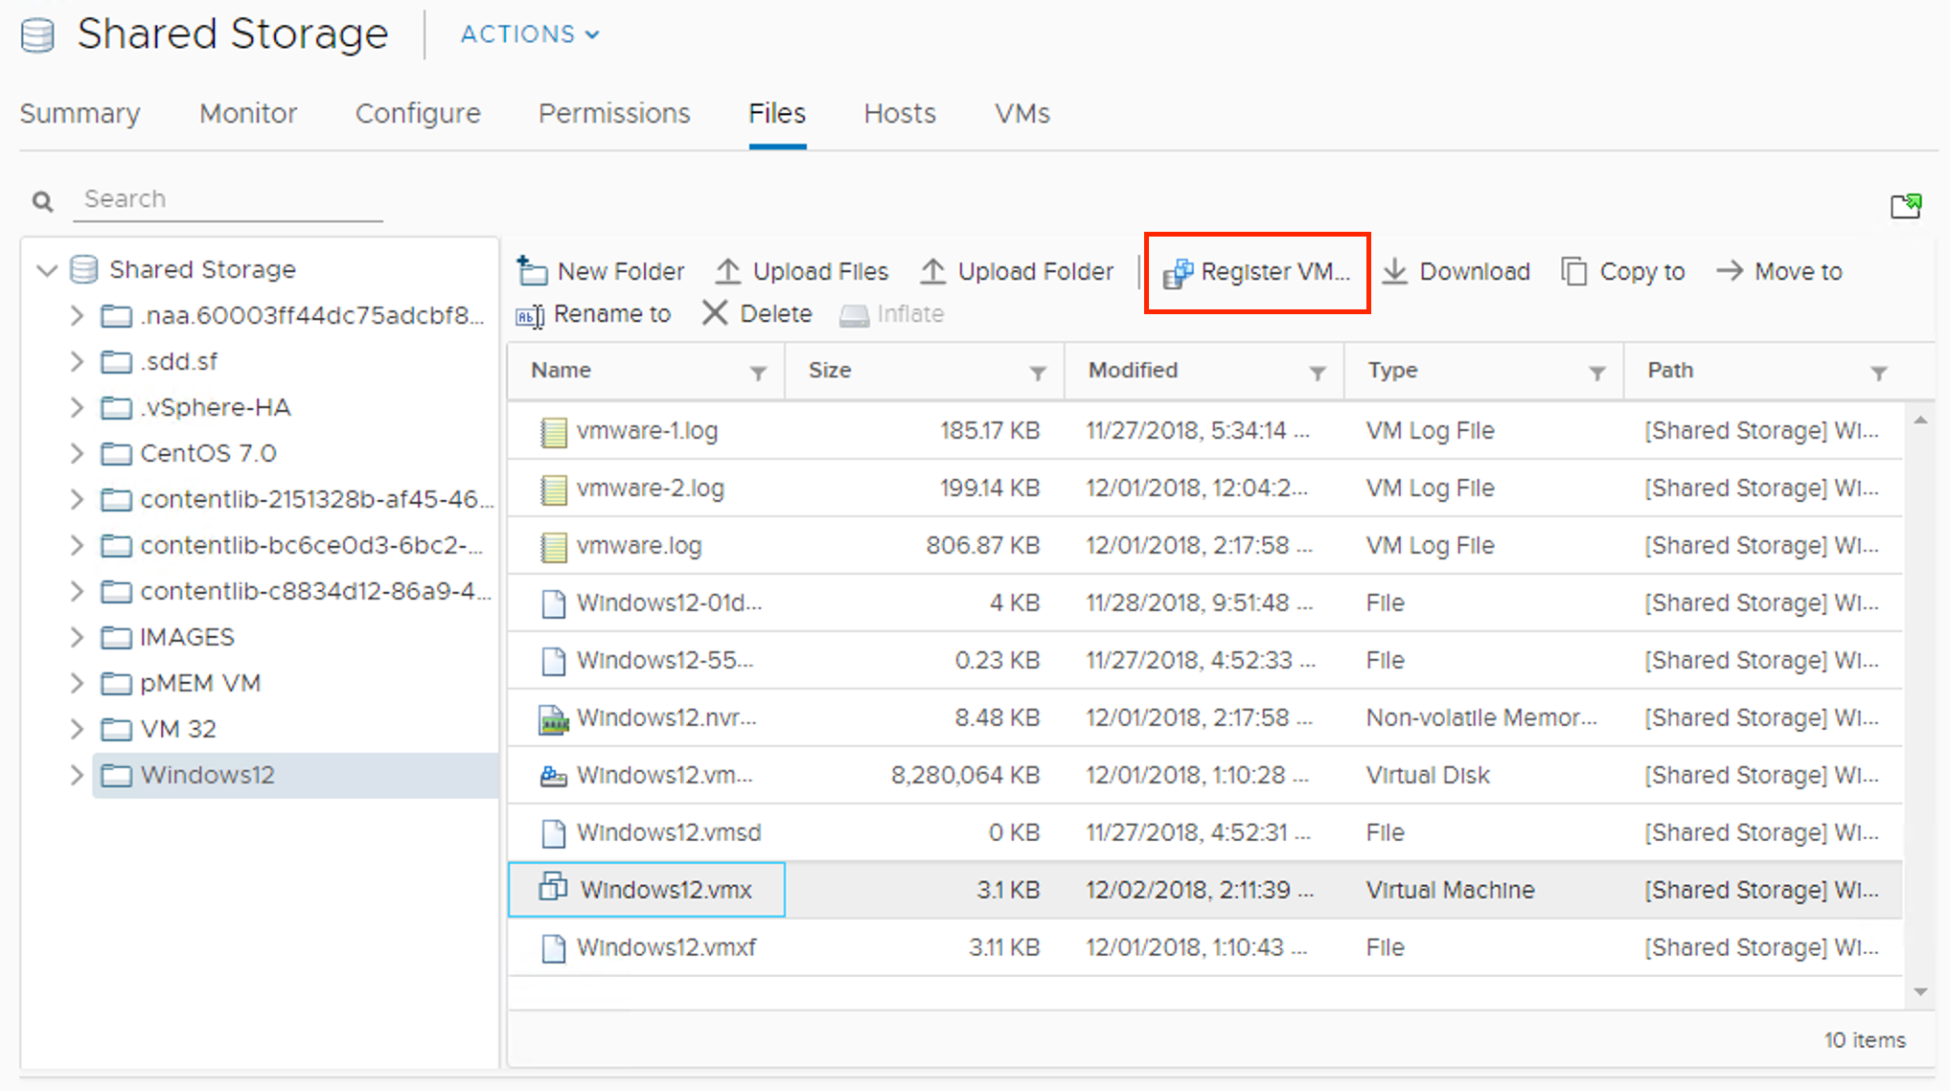
- From the vSphere Client, log in to the vCenter Server and select the Storage view.
- Select the storage and the folder in which the VM has been stored.
- From the available files in the selected folder, select the file with the .vmx extension and click Register VM... to register the VM to the inventory:
- By default, the system populates the virtual machine name field, reading the info from the .vmx file. Enter a different name if you want to change the default value. Specify a location in which to run the VM and click Next.
- Select the compute resource the VM will access to get the resources. If the compatibility checks succeed, click Next to continue.
- When you are ready to complete, click Finish to register and add the VM to the inventory.
When the VM has been added to the inventory, you can power it on and manage it as you would do with other VMs.