To create a snapshot, follow these steps:
- From the vSphere Client, right-click on the VM you want to process and select Snapshots | Take Snapshot.
- Enter a name and provide a description. If the VM is powered on during snapshot creation, you have the option to snapshot the virtual machine's memory (grayed out if the VM is off). If this option is enabled, the RAM of the VM is also included in the snapshot. The quiesce guest file system option, which is only available if Virtual Machine Tools is installed, brings the on-disk data into a state that is suitable for backups, ensuring that backups are consistent and work as appropriate.
- Click OK to take a snapshot of the selected VM.
When a snapshot is taken, multiple new files are created in the VM folder. These include .vmdk, -sparse.vmdk, .vmsd, and .vmsn, as shown at the following screenshot:
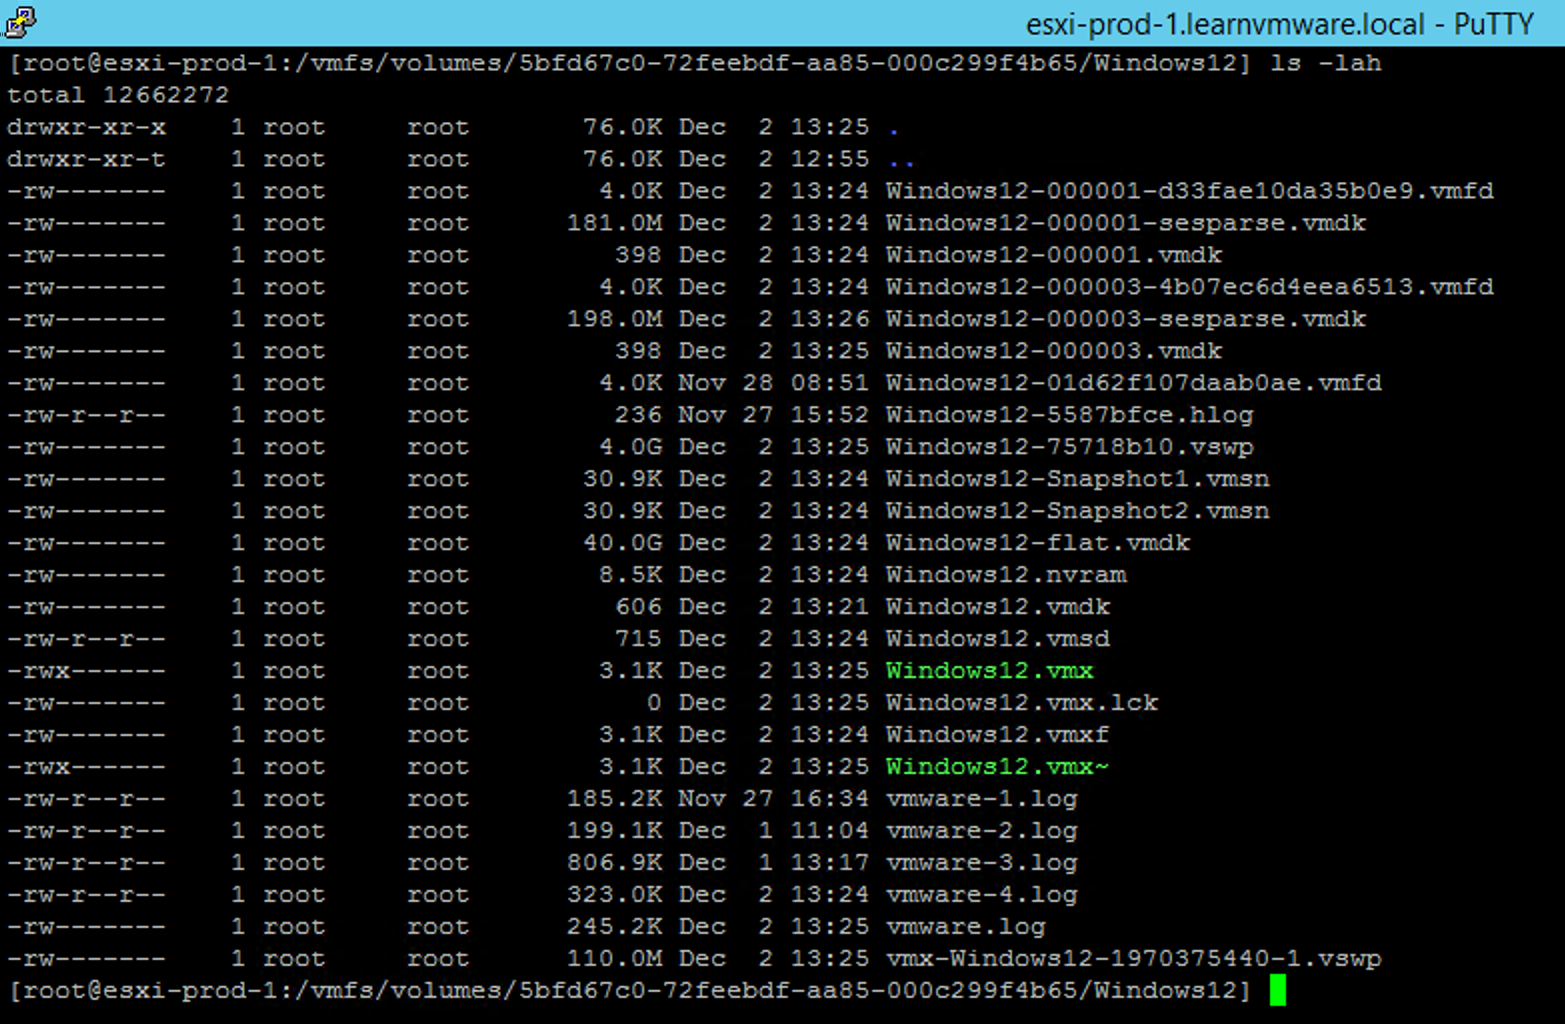
Let's have a look at the files created when a snapshot is taken and their roles:
- vmname-00000#.vmdk: This is a text file that contains info about the snapshot and snapshot disks. For every snapshot taken, this file is created for each of the .vmdk files.
- vmname-00000#-sparse.vmdk: This is the delta disk file that represents the difference between the current state of the VM and the state at the time of snapshot creation.
- vmname.vmsd: This file holds snapshot information such as names, descriptions, and relationships between snapshots.
- vmname.snasphot#.vmsn: This stores the memory state of the VM when the snapshot is taken, and it is created each time you take a snapshot.
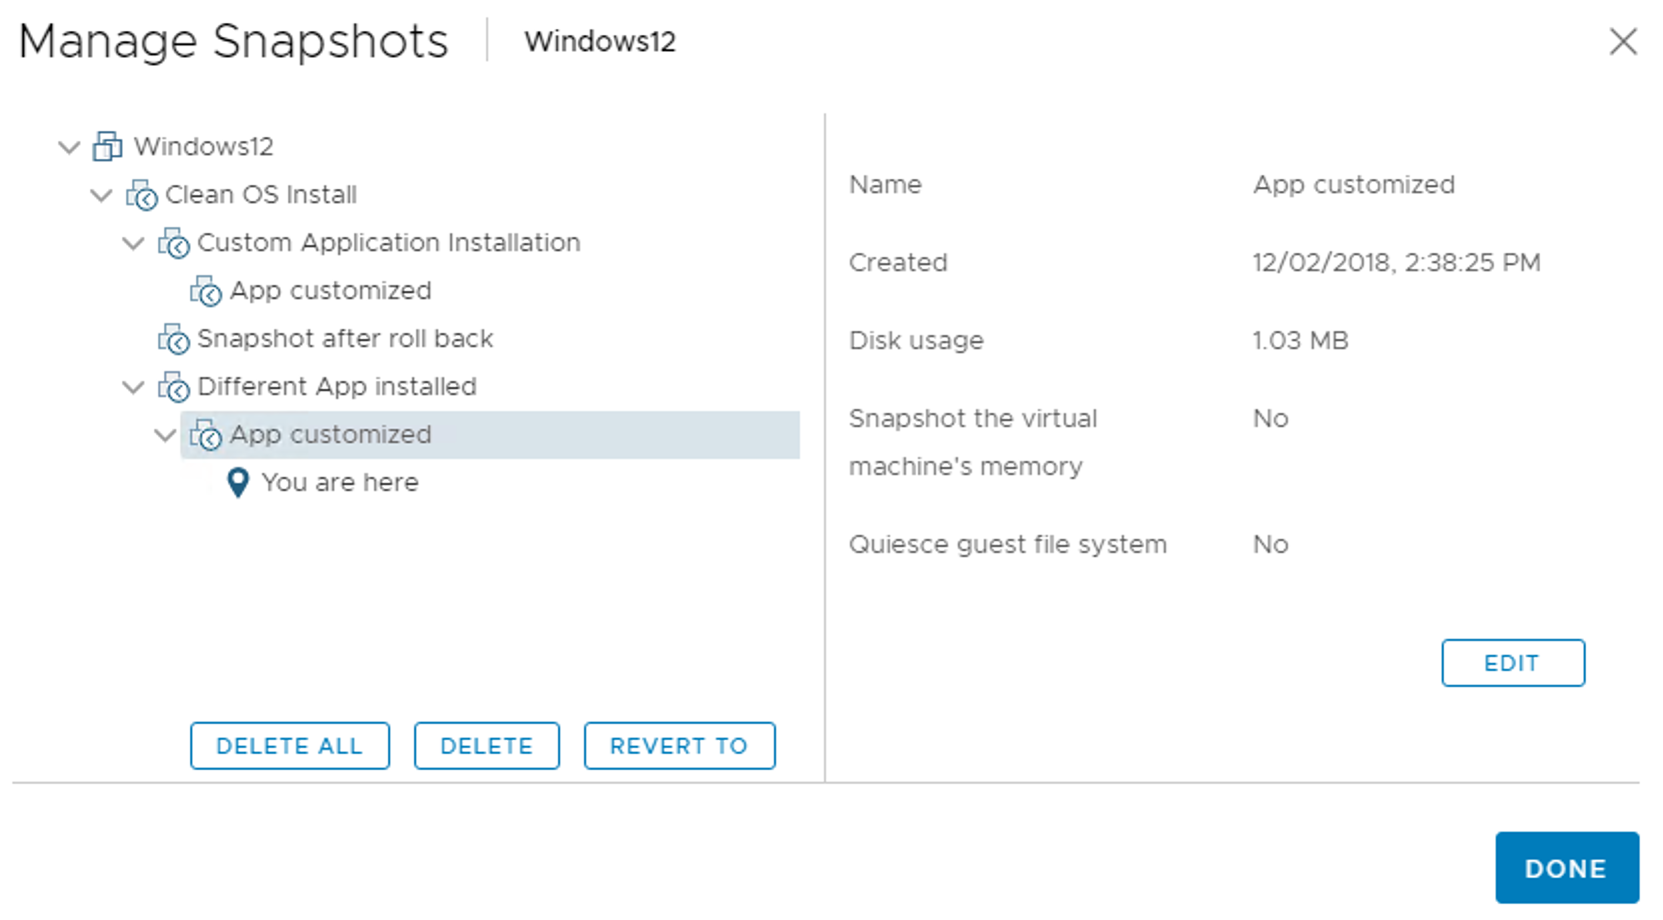
You can have a complex snapshot tree based on your requirements, and a snapshot chain does not need to be linear, as shown at the following screenshot: