
Host profiles are a feature of vSphere that allow you to include the ESXi configuration in a profile (template) to ensure that all hosts installed across the infrastructure have the same configuration and are compliant with the setup policy you have in your organization.
Generally, after completing the deployment of an ESXi host, there are several settings you should configure to ensure the host's services match your infrastructure:
- Network configuration: Creating VMkernels and VM port groups, assigning IPs to VMkernels, setting up NIC-teaming, and mor
- Storage configuration: Configuring software iSCSI adapters, port bindings, and CHAP.
- Time synchronization: Configuring and enabling the NTP service
- Enable services: Enabling services such as SSH and shell
- Firewall: Opening specific ports that are required by some services
If you have just a few hosts to install, you can quickly and easily use the interactive ESXi installation method and once, completed, manually set up the required host's parameters. If the environment to build is large and you have 100-1,000 hosts to set up, manually performing the configuration for each hypervisor is a tedious and time-consuming task, and human error can occur at any moment: incorrect IP addresses assigned, wrong NIC to a VMkernel port group mapping, and so on.
Using host profiles mean we can avoid these kind of configuration errors. You profile a host by creating a template containing the configuration extracted from a reference host, and then you apply this template to any host of the infrastructure to ensure consistency. Once created, the host profile can be edited to change, enable, or disable properties. If a host profile is applied to a cluster, all the member hosts are affected, ensuring a consistent configuration.
Host profiles can also be used together with the Auto Deploy feature (Auto Deploy was covered in Chapter 10, Deployment Workflow and Component Installation) to automate the provisioning process fully.
The overall process can be summarized as follows:
- Set up and configure the reference host. Because the configuration will be saved to the host profile, make sure the ESXi setup is correct and verified.
- Create the master host profile, extracting the configuration from the reference host.
- Attach the created host profile to a host or cluster to apply the standard configuration.
- Check the compliance of processed hosts to the host profile to ensure they all have the same configuration.
- Remediate the host to apply the settings. The ESXi host attached to the selected host profile modifies its configuration only at this stage.
To create a host profile, perform the following steps:
- From the vSphere Web Client, right-click on the hypervisor used as a reference host and select Host Profiles | Extract Host Profile.
- Enter a profile name and a description. The description is useful to identify the scope of the profile but is optional. Click Next when done.
- Click Finish to start the host profile creation. When the process has completed, the created profiles can be found in the Home | Policies & Profiles | Host Profiles area of the vSphere Web Client.
To apply settings saved in the profile to a host or cluster, you need to attach the created host profile. To attach the host profile, proceed as follows:
- From the vSphere Web Client, right-click on the host to process and select the Host Profiles | Attach Host Profile option.
- Select the host profile to attach and click OK. At this stage, you can customize the host (for example, configure the IP address and DNS server) or enable the Skip Host Customization option to avoid host customization during the process.
Once a host profile is attached to a host, the configuration is not automatically applied, but you must perform a compliance check first to compare the current host configuration with the configuration stored in the profile.
To run the compliance check, follow these steps:
- Right-click on the host to check and select Host Profiles | Check Host Profile Compliance. If the checked host is found to be non-compliant, a warning message is displayed in the Summary tab, as demonstrated in the following screenshot:
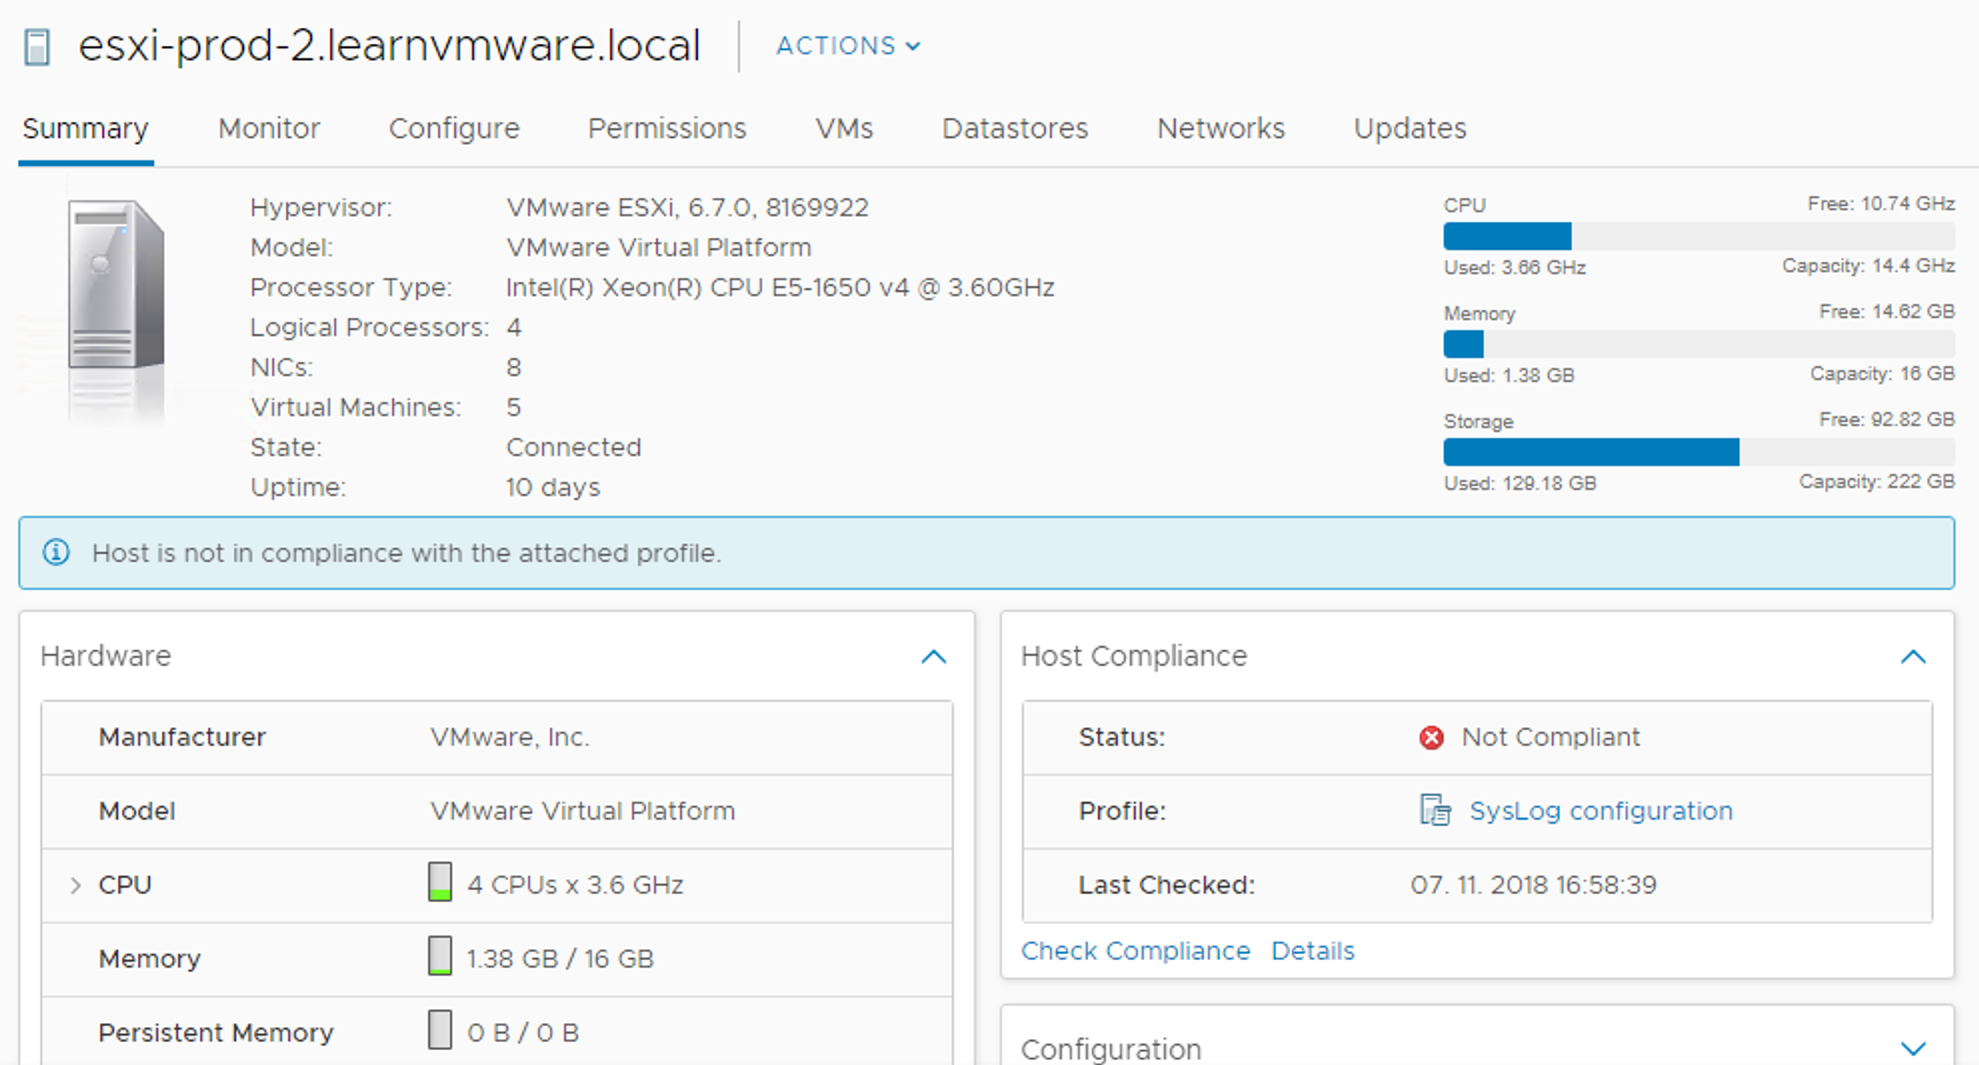
- If you click on Details, you will see which configurations are done differently compared to the host profile. In this case, the ESXi server, esxi-prod-2, does not have the syslog server configured (advanced configuration option Syslog.global.logHost).
- You can remediate the host to match the Host Profile (the configuration from the host profile will be applied to the host) using the Remediate button.
Host profiles can be modified to change some settings by editing the desired profile. To modify a host profile, proceed as follows:
- From the vSphere Web Client, go to Home | Profiles & Policies | Host Profiles
- Select the profile you want to modify from the list and click on the Edit Host Profile