Printing pages or an entire section
Using the standard Print command, you can print all or some of the pages in a section. The Print dialog box offers options for printing all the pages in a section, pages you select (select the pages before giving the Print command), or specific pages and page ranges.
Before you print a section, you can see what it will look like on the printed page. In the Print Preview And Settings dialog box, you can choose what size paper on which to print, resize data to fit exactly on the page, put page numbers on the pages you print, and print in landscape or portrait mode.
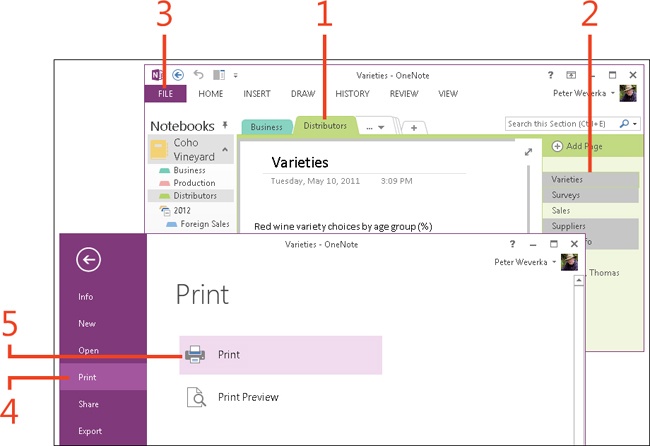
Print pages or an entire section
-
Click the section tab (or the section name in the Notebooks pane) with the pages that you want to print.
-
Select pages (by Ctrl+clicking if you want to print some but not all of the pages in the section. (If you don’t select pages first, you can enter a page range to print later.)
-
On the ribbon, click the File tab to display the Backstage view.
-
Click the Print tab.
-
Click the Print button.
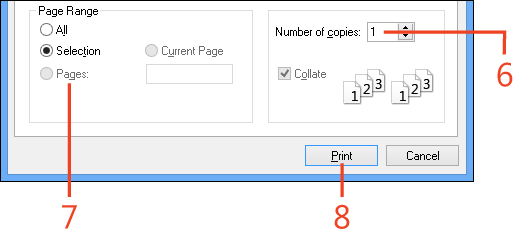
The Print dialog box opens.
-
Choose how many copies to print.
-
Choose All to print all the pages in a section. Choose Selection to print the pages you selected. Choose Pages and type the page range to print individual pages and page ranges without selecting them first.
-
Click Print.
Tip
To enter a page range, type the first page in the range, a hyphen, and then last page. Use commas to separate pages or page ranges. For example, enter 4-6 to print A quick overview, A few assumptions, and What’s new in OneNote 2013, or The path of least resistance, A few assumptions, Caution-Navigating the Backstage view to print The path of least resistance, A few assumptions, Caution, Starting OneNote in Windows 7, and Navigating the Backstage view.
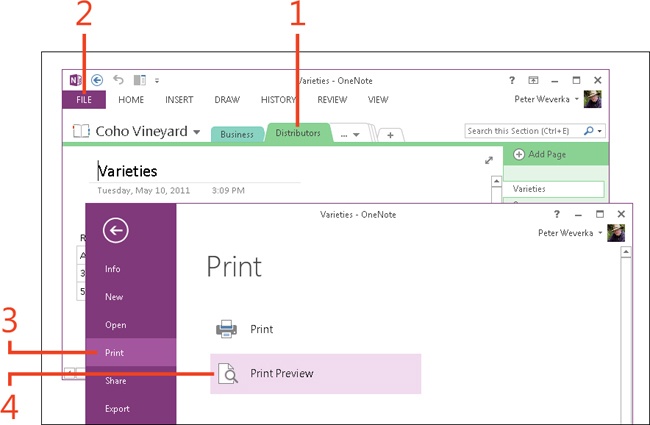
Preview a section before printing
-
Click the section tab (or the section name in the Notebooks pane) that you want to preview.
You can select specific pages to preview if you want.
-
On the ribbon, click the File tab to display the Backstage view.
-
Click the Print tab.
-
Click the Print Preview button.
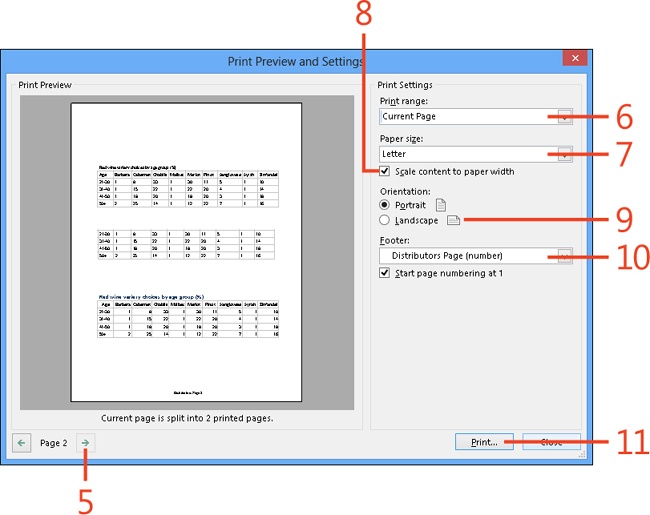
The Print Preview And Settings dialog box opens.
-
Click the Next Page (or Previous Page) button to examine different pages.
-
Open the Page Range list and choose to print a section, page group (a page and its subpages), or the current page.
-
Open the Paper Size list and choose the dimensions for the paper on which you want to print.
-
Select the Scale Content To Paper Width check box to enlarge or reduce the pages you print, if necessary, so each page fits on a single page of paper.
-
Choose Landscape to change the page orientation so that the pages print across the length of the paper.
-
Open the Footer list and choose whether to print the section name, page number, or both at the bottom of every page.
-
Click Print if you decide, after previewing, to print the section or selected pages. Otherwise, click Close.