Creating or removing a ribbon group
Within each tab on the OneNote 2013 ribbon are different groups of commands. For example, the Home tab has six groups: Clipboard, Basic Text, Styles, Tags, Email, and Meetings. Commands of similar purpose are grouped on a tab to make locating them easier. You can create a new group on any tab, not just tabs that you create yourself. Create a new group so that you can place commands in it later on.
If you no longer need a group, you can remove it from a tab. When you remove a group, you remove its buttons, as well. You can remove any group, even a default group.
Create a ribbon group
-
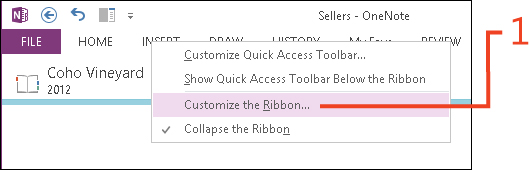
Right-click anywhere on the ribbon. On the shortcut menu that appears, click Customize the Ribbon.
-
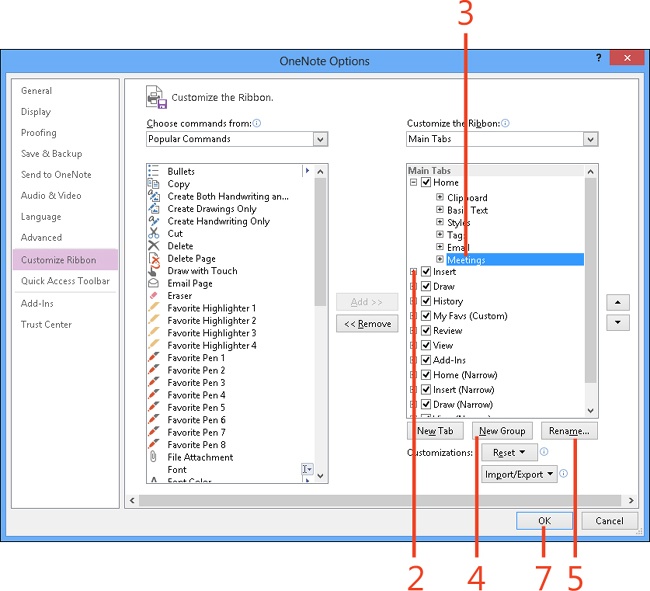
In the Customize The Ribbon window of the OneNote Options dialog box, in the Customize The Ribbon section on the right, click the expand button next to the tab into which the new group will go.
-
Select the group that your new group will follow.
-
Click New Group. OneNote creates a group called “New Group (Custom).”
-
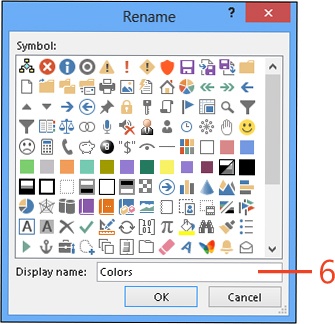
Click Rename.
-
In the Rename dialog box, enter a name and click OK.
-
Click OK to save the settings and close the OneNote Options dialog box.
See Also
To learn how to add commands to a ribbon group that you created, read Adding or removing commands from a ribbon group.
See Also
To learn how to restore the default ribbon, read Resetting your ribbon customizations.
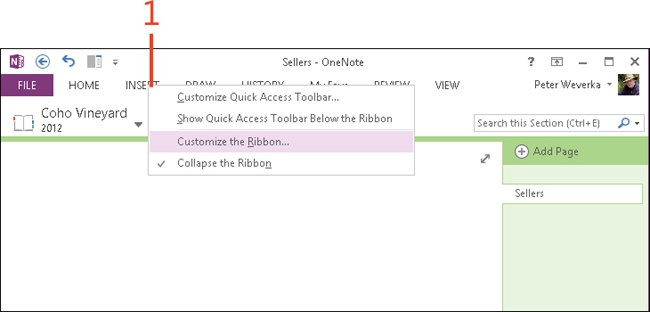
Remove a ribbon group
-
Right-click anywhere on the ribbon. On the shortcut menu that appears, click Customize The Ribbon.
-
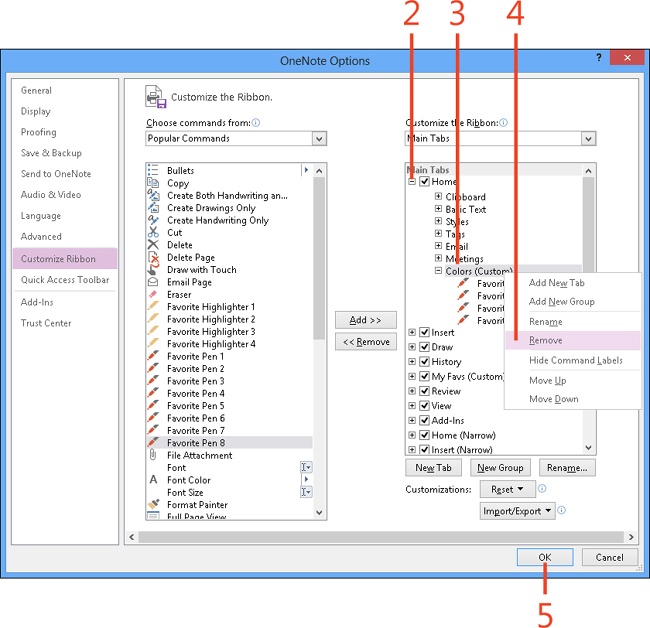
In the Customize The Ribbon window of the OneNote Options dialog box, in the Customize The Ribbon section on the right, click the expand button next to the name of the tab that holds the group you want to remove.
You see a list of groups on the tab.
-
Select the group that you want to remove.
-
Right-click the group and then, on the shortcut menu that appears, click Remove.
-
Click OK to remove the group, along with its commands, from the ribbon.