
The first thing that we will do is create some new hosts in Zabbix. To brush up your memory, hosts are devices that are connected to our network which need regular monitoring.
To get started and add some hosts to our system, we need our Zabbix server up and running with a standard admin account; we will login with this admin account in order to create hosts. It's also useful if you understand the definitions in Zabbix, if you need to go over them again, return to the Zabbix definitions section of Chapter 2, for a quick revision of the same.
- Let's start by logging into our frontend with the admin, super administrator or a different admin account in Zabbix.
- In the menu, go to Configuration | Hosts and click in the upper right corner on Create host or click on the hostname of an existing host to edit one:
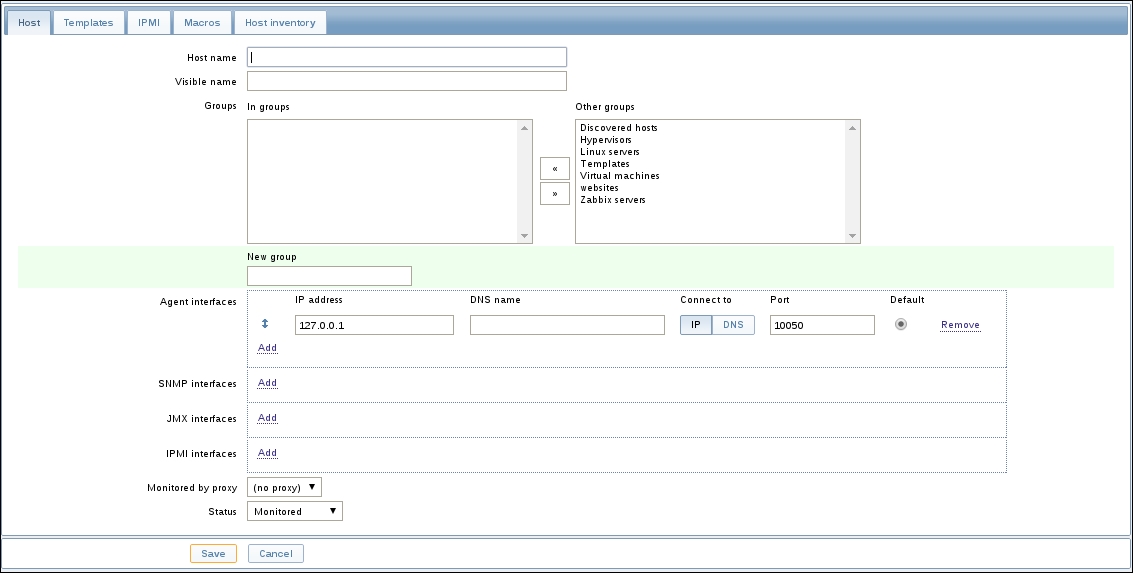
The Host tab contains the basic settings that we need to configure our host. The first box is Host name here we need to use a unique name. We need to use this hostname in our
zabbix_agentd.confagent configuration file for our active checks to work. - Visible name is a name that we can but do not have to give to our host. We can use it in case the real hostname is not really easy to remember. When we set the Visible name, this name will be the only visible name in screens, maps, filters, and so on.
- From Groups, we select from the column Other groups the group to which our host belongs. A host must belong to at least one group. In the field New group, we can add a new group if the group that we want to use is not available yet. The host will then be added immediately to this new group.
- Next we have a list of all kinds of interfaces such as agent interface, Java Management Extensions (JMX), Intelligent Platform Management Interface (IPMI), and Simple Network Management Protocol (SNMP). Here we need to give for each interface that we want to use the correct IP address or DNS name. Next we fill in the correct port that we want to use for the interface.
- With the Add button, we are able to add extra interfaces to our host. We will need it in case we have multiple network cards to choose from. With the Remove button, we can remove an interface again. If the Remove button in grayed out, it means that the interface is still active in an item.
- Our host can be monitored by one of the Zabbix proxies or by the Zabbix server itself. When we want it to be monitored by a proxy, we select the correct proxy from the list Monitored by proxy.
- From the Status button, we are able to choose Monitored and Not Monitored. When Not Monitored is chosen, our host will be disabled and won't be monitored.
Tip
It is also possible to make use of the Clone and Full clone buttons at the bottom of the host page to create a new host. When we click on clone all templates linked to our host will be kept on our cloned host. Full clone on the other hand will also clone directly attached entities applications, triggers, items, and so on.
- From the Templates tab we are able to choose a template and link it to our host. To add a template, we just type in the name in the Link new templates box. We then press Add. We can now add another template the same way or click Save to save our settings:
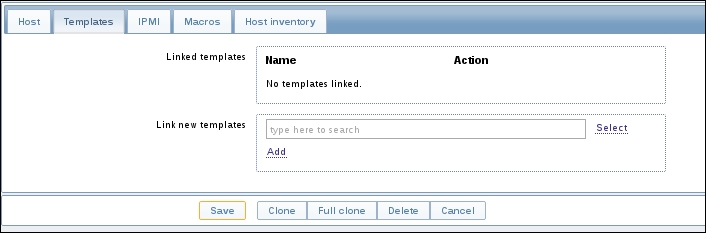
- When we link our host with a template, the host will inherit all items, triggers, graphs and so on, from the template.
- The IPMI tab will bring us to the window with the settings for our IPMI connection:
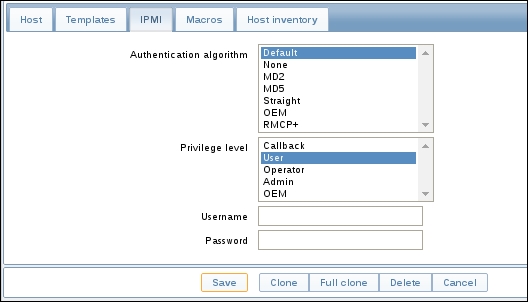
- In the box Authentication algorithm, we select the correct authentication algorithm for our IPMI interface. Next, we select the correct Privilege level for our user and finally we put the Username and Password for our user to log in to the IPMI interface.
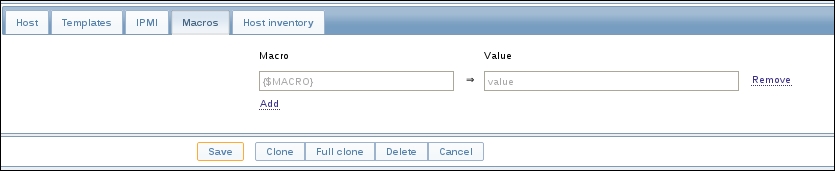
- The next tab Macros, allows us to set some host-level user macros. In the first column Macro we put our macro {$SOME-NAME} and in the Value field we put the value we want to give to our macro. Example: Macro {$COMMUNITY} with Value: public to define the community string for our switch:
- Our next and last tab Host inventory can be used to check the inventory of our host. The host inventory can be in the Disabled state if you don't like to use it; else we can put it in the Manual or Automatic state. Manual means that we fill in all the fields by hand. If we want to have an automated inventory system, we have to set the host inventory on Automatic. Based on the item that we create, we can select the inventory field in each item. Data will then be populated automatically.
Note
Some items that are especially useful when making use of the automated inventory solution are:
system.hw.chassis[full|type|vendor|model|serial]: Root permissions needed
system.hw.cpu[all|cpunum,full|maxfreq|vendor|model|curfr eq]
system.hw.devices[pci|usb]
system.hw.macaddr[interface,short|full]
system.sw.arch
system.sw.os[name|short|full]
system.sw.packages[package,manager,short|full].
When we want to monitor our infrastructure, Zabbix needs to be aware of course, of what is available in our infrastructure and more importantly, what devices do we need to monitor. That's why the first step is to add devices to the Zabbix hosts list.
For each device that we monitor we also have to tell Zabbix what interfaces there are available on our host, what IP they use and on what port the communication passes.
This way our monitoring solution is aware of what we want to monitor and what the IP address, port, and so on is.
We will see later that when we add items, we can define in our item what interface to use from our host.