
Zabbix will search for custom alert scripts in the directory specified by AlertScriptsPath in the zabbix_server.conf file. In the case of a default install, this would be ${datadir}/zabbix/alertscripts, and in Red Hat, it is set to /usr/lib/zabbix/alertscripts/.
This is where we will put our script called rt_mkticket.py. The Zabbix action that we configured earlier will call this script with the following three arguments in this order:
- Recipient
- Subject
- Message
As we have seen, the content of the subject and the message is defined in the action operation and depends on the specifics of the event triggering action. The recipient is defined in the media type configuration of the user receiving the message, and it is usually an e-mail address. In our case, it will be the base URL of our Request Tracker installation.
So, let's start the script by importing the relevant libraries and parsing the arguments:
#!/usr/bin/python2
from pyzabbix import ZabbixAPI
from rtkit.resource import RTResource
from rtkit.authenticators import CookieAuthenticator
from rtkit.errors import RTResourceError
import sys
import re
lines = re.findall(r'^(?!(Host:|Event:|Item:|Trigger severity:))(.*)$', message, re.MULTILINE)
desc = '
'.join([y for (x, y) in lines])

rt_url = sys.argv[1]
rt_api = rt_url + 'REST/1.0/'
trigger_name = sys.argv[2]
message= sys.argv[3]
Now, we need to extract at least the event URL, trigger severity, list of host names, and list of item names from the message. To do this, we will use the powerful regular expression functions of Python:
event_id = re.findall(r'^Event: (.+)$', message, re.MULTILINE)[0]
severity = re.findall(r'^Trigger severity: (.+)$', message, re.MULTILINE)[0]
hosts = re.findall(r'^Host: (.+)$', message, re.MULTILINE)

items = re.findall(r'^Item: (.+)$', message, re.MULTILINE)
lines = re.findall(r'^(?!(Host:|Event:|Item:|Trigger severity:))(.*)$', message, re.MULTILINE)

desc = '
'.join([y for (x, y) in lines])
While the event ID has to be unique, a trigger can reference more than one item and, thus, more than one host. The preceding code will match any line beginning with Host: to build a list of hosts. In the preceding action message, we just put one Host: {HOST.NAME} line for readability purposes, but your actual template can contain more than one (just remember to use {HOST.NAME1}, {HOST.NAME2}, {HOST.NAME3}, and so on, or you'll end up with the same host value repeatedly). Of course, the same goes for item names. The rest of the message is then extracted with the opposite of the regexps used before and joined back in a single multiline string.
Now, the macro we used for trigger severity is {TRIGGER.SEVERITY}. This means that it will be substituted by a string description and not a numerical value. So, let's define a simple dictionary with severity labels and RT ticket priority values mapped, as explained earlier in the chapter:
priorities = {
        'Not classified': 0,
        'Information': 20,
        'Warning': 40,
        'Average': 60,
        'High': 80,
        'Disaster': 100 }
We also need to know in advance the name of the queue we are creating the ticket in or, better yet, its ID number:
queue_id = 3
Now that we have everything we need, we can proceed to build the request to create a new ticket and then send it over to Request Tracker:
ticket_content = {
        'content': {
         'Queue': queue_id,
         'Subject': trigger_name,
         'Text': desc,
         'Priority': priorities[severity],
         'CF.{Hosts}': ','.join(hosts),
         'CF.{Items}': ','.join(items),
         'CF.{Trigger}': trigger_name
  }
}

links = {
        'content': {
         'RefersTo': event_url
  }
}
First, we create two dictionaries, one for the main ticket content and the second for the links section, which must be edited separately.
Then, we get to the main part of the script: first, we log in to the RT API (make sure to use your actual username and password credentials!), create a new ticket, get the ticket ID, and input the link to the Zabbix event page:
rt = RTResource(rt_api, 'root', 'password', CookieAuthenticator)
ticket = rt.post(path='ticket/new', payload=ticket_content,)
(label,ticket_id) = ticket.parsed[0][0]
refers = rt.post(path=ticket_id + '/links', payload=links,)
We are almost done. All that is left to do is acknowledge the Zabbix event with a link back to the ticket we just created:
event_id = re.findall(r'eventid=(d+)', event_url)[0]
ticket_url = rt_url + 'Ticket/Display.html?id=' + ticket_id.split('/')[1]
print(ticket_url)
zh = ZabbixAPI('http://localhost/zabbix')
zh.login(user='Admin', password='zabbix')
ack_message = 'Ticket created.
' + ticket_url
zh.event.acknowledge(eventids=event_id, message=ack_message)
This preceding code is fairly straightforward. After extracting the eventid value and creating the URL for the ticket, we connect to the Zabbix API and edit the acknowledge field of the event, effectively closing the circle.
Now that the script is complete, remember to give ownership to the zabbix user and set the executable bit on it:
$ chown zabbix rt_mkticket.py
$ chmod +x rt_mkticket.py
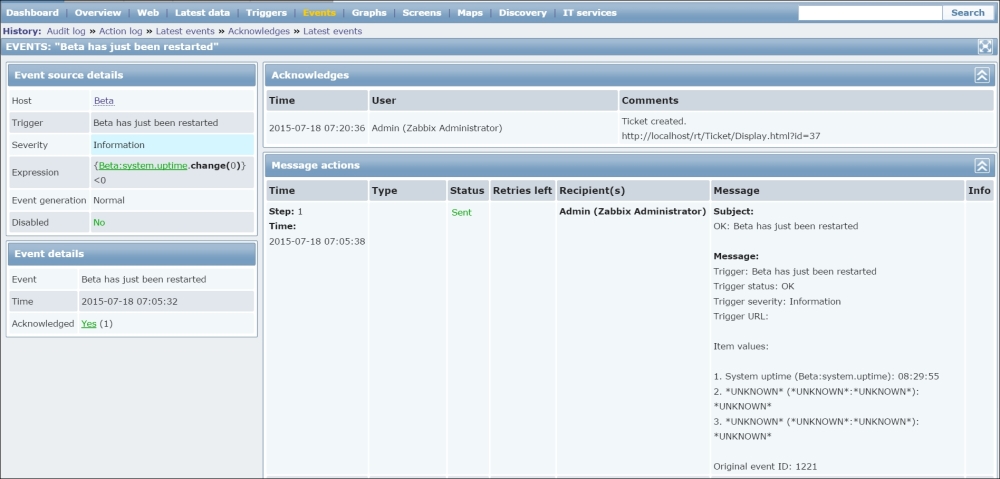
The next time the action condition that you defined in your system returns true and the action operation is carried out, the script will be executed with the parameters we've seen before. A ticket will be created with a link back to the event, and the event itself will be acknowledged with a link to the ticket.
Here is an example event. The link in the acknowledgement field corresponds to the URL of the ticket:
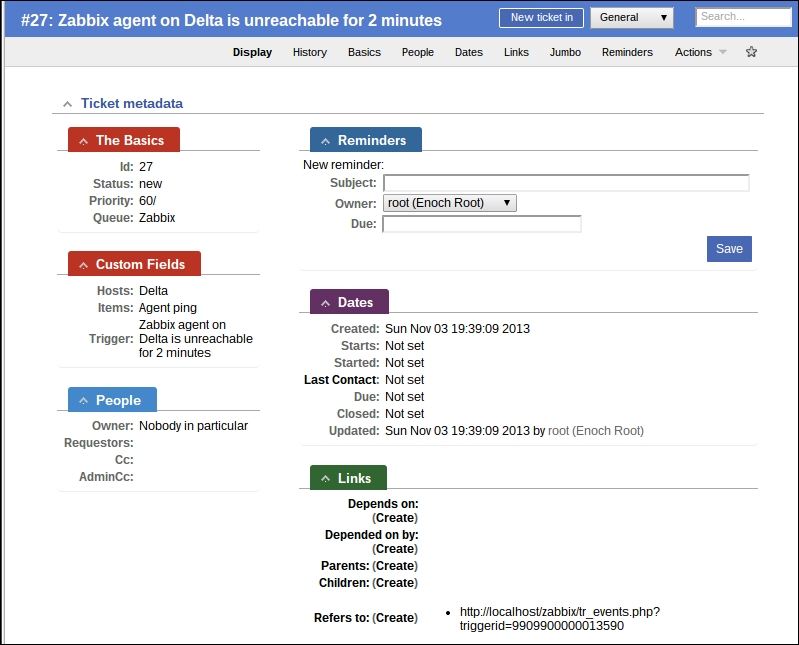
Here is the corresponding ticket. The Refers to: field contains a clickable link to the event shown earlier, while the Custom Fields section reports the host, item, and trigger information, just as expected:
The script, in much the same way as those explained in Chapter 9, Extending Zabbix, is little more than a proof of concept, with as much focus on the readability and ease of explanation as on pure functionality. Make sure that you add as many condition checks and error-reporting functions as possible if you want to use it in a production environment.