
Let's take a look at how to detect ARP poisoning attacks. First of all, we need to gain an understanding of the ARP table. On our Windows device, which is the device that we always attack, we are going to run the arp -a command to list all the entries in the ARP table. Each computer has an ARP table, and that table associates IP addresses with MAC addresses. We have the IP address of a router, which is 10.0.2.1 and is associated with the MAC address 52-54-00-12-35-00, as shown in the following screenshot:

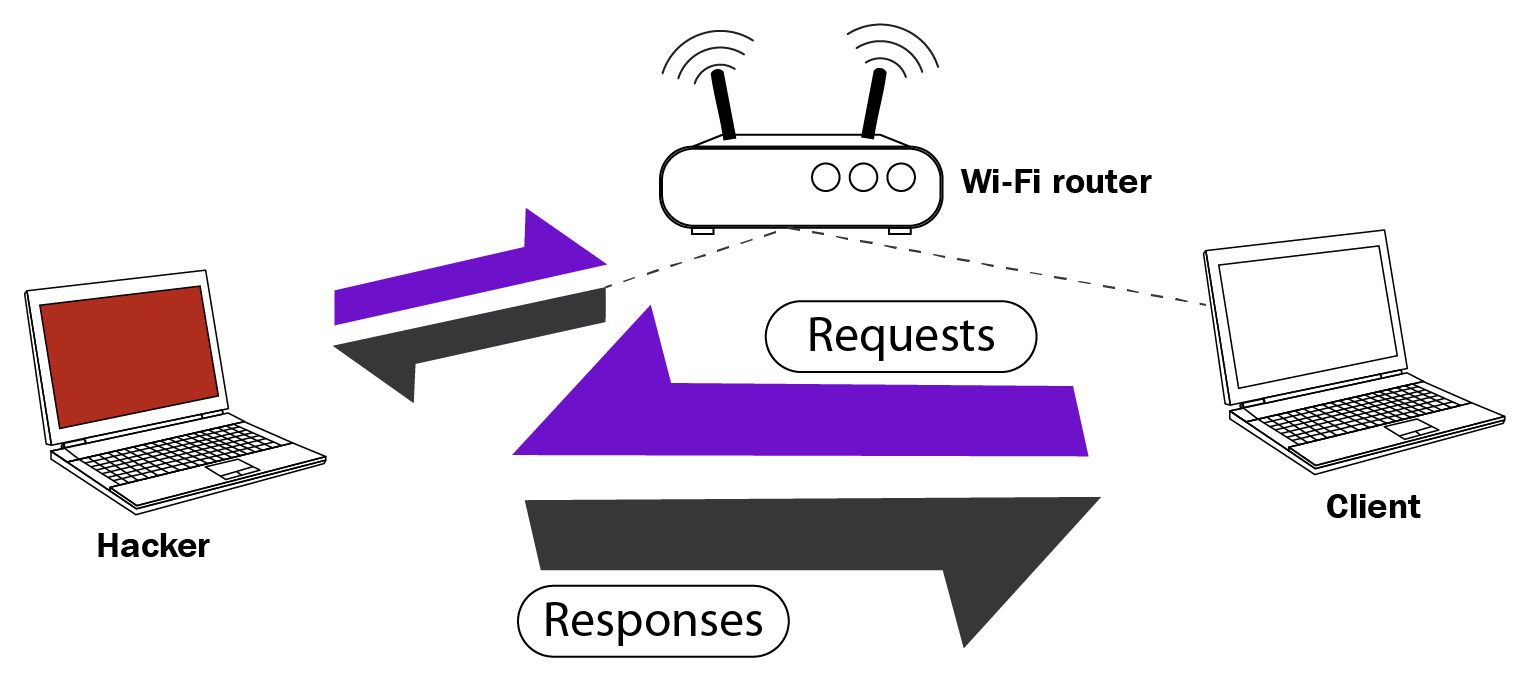
ARP poisoning works via trusted requests; as you can see in the previous screenshot, when a request is trusted, responses are accepted by the client even if a request isn't actually sent. The hacker sends a response to the client telling them that they are the router, which is automatically trusted and then accepted. Hacker will now send another response to the router, telling it that we're the client. This will modify the entries in the ARP tables for both the router and the client, associating the hacker's MAC address with the router's IP address. In other words, the router's MAC address is now the attacker's MAC address. By doing this, the hacker will be able to read, analyze, and modify any packets flowing through the device, as shown in the following diagram:
We'll now run a normal ARP poisoning attack from Kali machine. Following is the command:
mitmf --arp --spoof --gateway 10.0.2.1 --target 10.0.2.5 -i eth0
When we return and execute the same command as earlier, arp -a, we should see a different MAC address, as illustrated in the following screenshot:
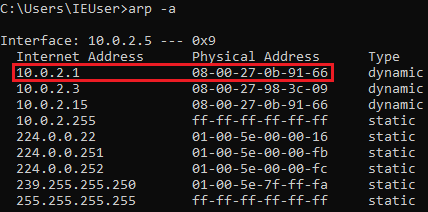
The MAC address for the router used to be 52-54-00-12-35-00 but that has since changed to 08-00-27-0b-91-66, the MAC address of the network card the attacker is using.
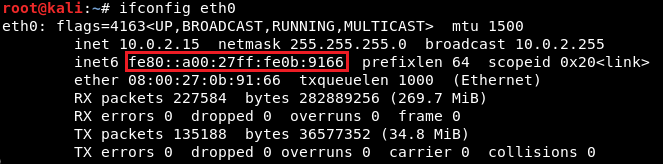
If we run ifconfig eth0 on Kali machine, we will get the same MAC address, as shown in the previous screenshot:
This is the simplest way to detect ARP poisoning attacks but not the most efficient. To save time, it is recommend to use a tool called XArp, which performs the ifconfig command for us. XArp is available on Linux and Windows and can be downloaded from the web. When XArp stops an attack, the altered IP address is reverted back to the original value; in this case, the router's MAC address returns to the default address.
Running XArp triggers a similar process to the arp -a command, as shown in the following screenshot:
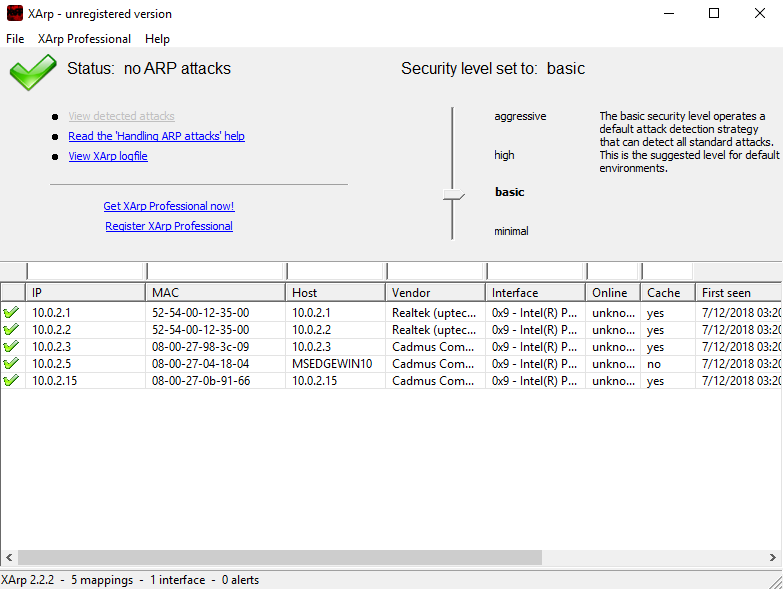
As we can see in the previous screenshot, the XArp tool has provided us with an IP address and the MAC address associated with it. The tool will then automatically monitor these values, notifying the user of any changes or duplicates.
If we run an ARP poisoning attack similar to the one we did earlier, XArp should display an alert, as shown in the following screenshot:
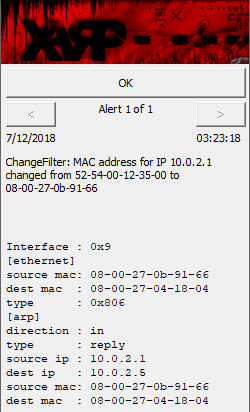
The notification will convey a message that the MAC address for IP changed from 52-54-00-12-35-00 to 08-00-27-0b-91-66.
Once we click OK, we can see that the affected machines are the router, our Windows machine, and our attacker Kali machine as shown in the following screenshot:

The preceding screenshot tells us that the machine at 10.0.2.15 is trying to perform an ARP poisoning attack because that's the value the router's MAC address has changed to.
As we can see, the XArp tool is really handy because not only does it automatically monitor your machine, it also tell you when someone is trying to ARP poison your network.