
In this part of the chapter, we will see how to connect a USB device to a virtual machine. As an example, we are going to connect a wireless adapter to a Kali machine, but the same method can be used to connect any USB device. We will need a wireless adapter for the cracking section of the network penetration test, because in later chapters, we will learn how to crack passwords for Wi-Fi networks. Other than that, we can do everything else without a wireless adapter.
A wireless adapter is a USB device that connects to the computer through the USB and allows us to communicate with wireless networks. Most computers and laptops now come with built-in wireless cards. The only problem is, first of all, that we can't access built-in wireless cards from a virtual machine. Also, even if you install Kali as a main machine, the built-in wireless cards are not good for hacking, because we need a powerful adapter that supports monitor mode and packet injection (we will go into what these mean). Basically, the built-in wireless adapter does not support these modes, and can't be used for hacking.
Now, we will connect adapters to Kali by using the following steps:
- We have to open VirtualBox (if it's open, it can be seen on the left-hand side of the screen) and click on the machine that we want to connect the adapter to.
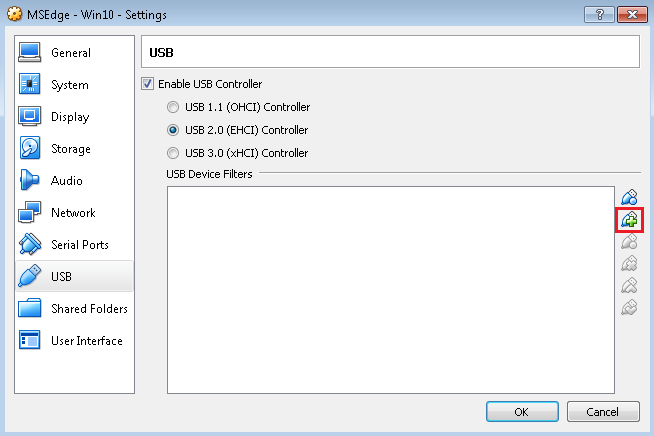
- Then, we go to Settings | USB, and make sure that Enable USB Controller is checked; if not, just click on Enable USB Controller:

- Now, we have to pick the USB hardware type that is used by our adapter—either USB 1.0, 2.0, or 3.0. Then, we go to the plus (+) sign, and click on it:
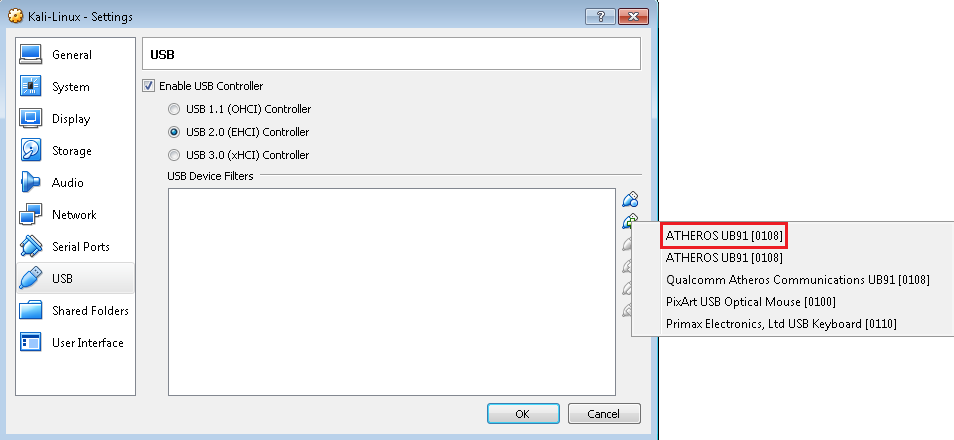
- We will see that we have a number of devices that can be attached to the Kali machine. We connect to the adapter, first of all, just to have a look at the available devices. The name that we see is the name of the chipset that was used inside the adapter, not the brand name of the adapter itself. When we click on it, we see a new entry called ATHEROS—this is actually my wireless adapter, an Alpha AWS 036NHA. We click on it; then we click on OK, and the adapter is added to Kali:
Before we can start Kali, we have to install extensions to allow VirtualBox to use the USB device. They can be downloaded at https://www.virtualbox.org/wiki/Downloads, and you can see that there is a link for the VirtualBox Extension Pack. This will only work for VirtualBox 5.1.22 and up.
Once it's downloaded, it will be available in your default download location. You just have to double-click on it to install it. If you have already installed it, it will show a popup for reinstalling; otherwise, it will show an Install button. If you are reinstalling, you'll need to scroll down and Agree, including your password. After that, the Extension Pack will be installed.
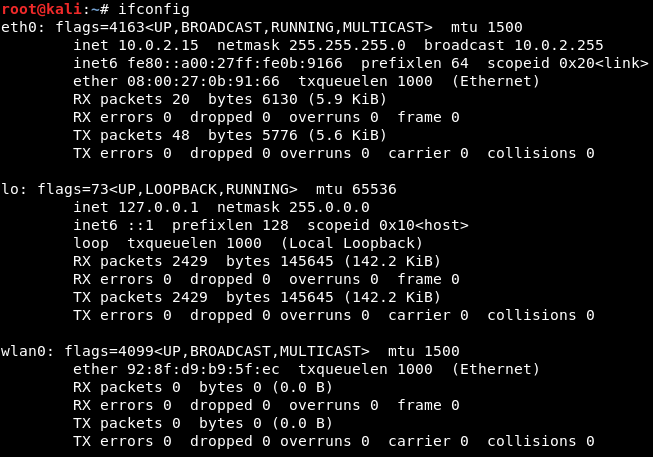
Before starting the virtual machine, we are going to physically disconnect the wireless adapter, and then connect the adapter once Kali fully loads. Boot up the Kali virtual machine, put in the username, which is root, and the password, which is toor. Now, Kali is fully loaded, and we can physically connect the wireless adapter. This is done to avoid conflicts. Once the adapter is connected and virtual machine is up, we will confirm that the adapter is connected by opening Terminal and typing ifconfig. This command lists all of the interfaces that are connected to the machine, and, as we can see in the following screenshot, it should list an adapter called wlan0, which is the wireless adapter:
If you go to the top-right corner of the screen and click on power icon, you'll see a Wi-Fi Not Connected option, which can be used to connect to Wi-Fi networks:

We don't need to connect to any Wi-Fi connection, because we have set up a NAT network, and Kali already has internet access through that NAT network. We only need the wireless adapter to hack into other networks and crack their passwords.