OK, now that we have installed Nexpose successfully, let's see how we can run it and see what it is. We've spoken about it a lot and we went through the installation process, but we still haven't seen what the tool does. The first thing to do before we can run the tool is to make sure that the database that comes with Kali Linux is turned off, because Nexpose uses its own database. If we have both of them running on the same port, they'll conflict with each other. The first thing we're going to do is stop the postgresql service; make sure that we have it in our mind that every time, before we run Nexpose, we turn off our database. We do it using the same command that we used in Chapter 10, Gaining Access to Computer Devices. It's service postgresql stop, and it will make sure that the service is stopped.
Now, we're going to navigate to the location where we installed Nexpose. Unless we changed the location during the installation process, it should be installed in the /opt/rapid7/nexpose/ directory. The file that runs the server is stored in the directory called nsc, and the file that we want to run is called nsc.sh. We run it just the same way we ran the installer before. As we said before, to run an executable, always use ./ and then write the name of the executable. It's nsc.sh:

Running this for the first time might take some time. Just let it do its thing until it runs, and once it finishes loading the framework we'll see how we can access it and use it.
The tool has loaded successfully, and as you can see, it's telling us that we can navigate to it using the https://localhost:3780 URL :
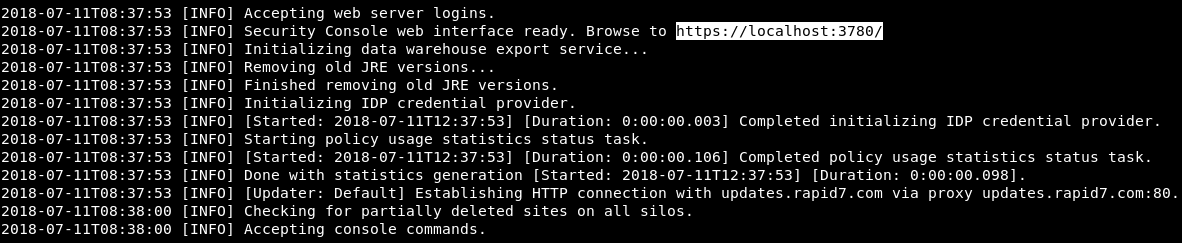
What we're going to do now is launch our browser and copy the URL that it just gave us. Now it's asking us to log in. Log in using the username and password that you created when you installed the tool:

After logging in successfully, we can see in the following screenshot that the first thing it asks us to do is to enter the product key:

Now, we know this is a free version, and when we downloaded the tool we had to fill out a form. In that form we put our email address, and then they send the product key to our email. Go to your email and get the product key and paste it. After pasting it, click on ACTIVATE WITH KEY. As we can see, the activation is successful. It's going to refresh now. As we can see in the following screenshot, it is just showing us information about the license. Everything is activated and we're good to go:

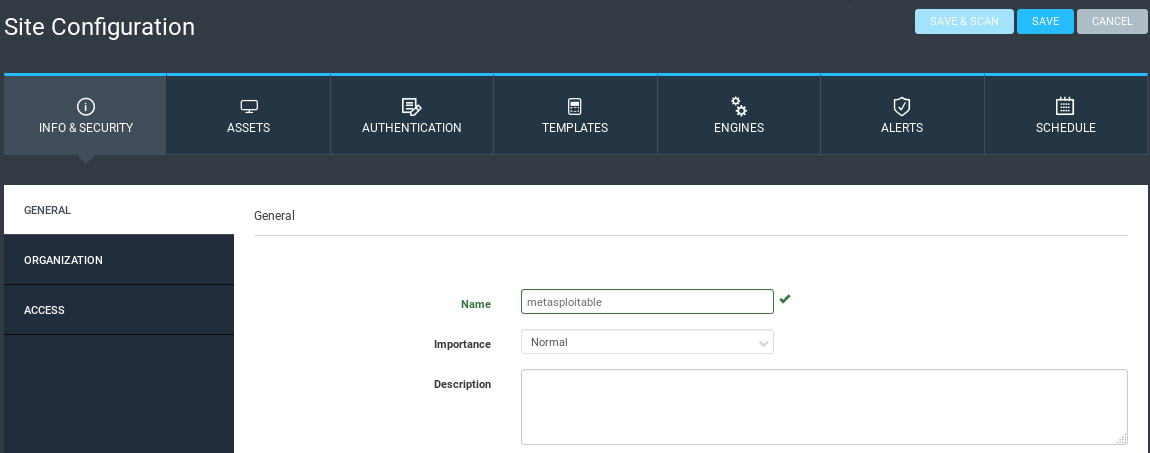
We are going to go to Home from the left menu. We can see in the preceding screenshot that everything is empty. It is the home page of the tool. Before we start talking about what everything means, let's go ahead and add a target, and then we'll do a test and we'll see because this stuff will be filled after we do a test. The first thing we are going to do is click on Create and click on Site to add a target:

We are going to set the Name to metasploitable:
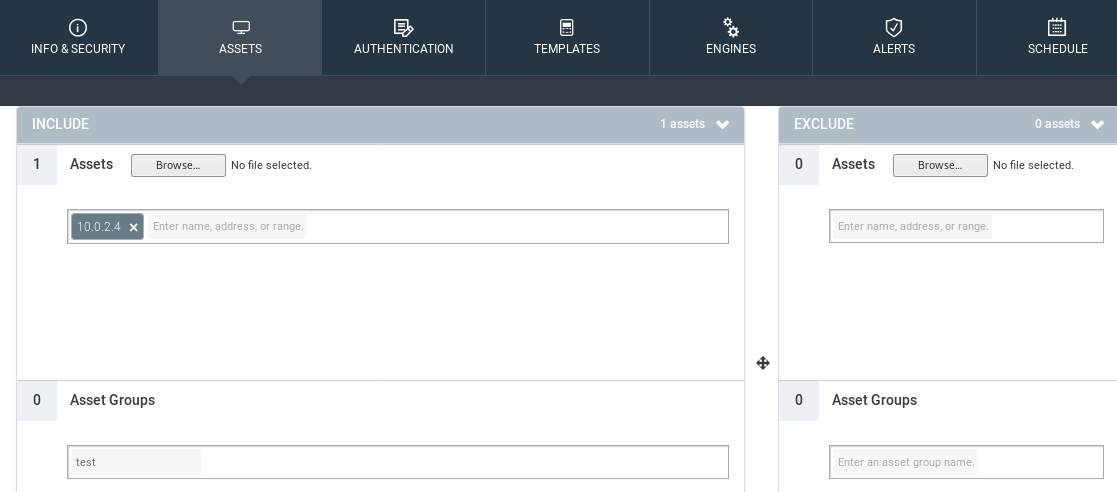
We are going to go to the ASSETS tab and we're going to add the target. The target can be arranged the same way we added it when we were doing the network penetration things with Zenmap. We can add a range, or we can add a specific IP. In our example, we are actually targeting the Metasploitable machine. We're going to add our target, which is 10.0.2.4, and we're going to add this to a group, and we'll call that test, our group name:
Now, in the AUTHENTICATION tab, if the target uses some sort of authentication, nobody can access the target unless they need to authenticate with some sort of a service, such as an FTP service, a web HTTP authentication, a Telnet, or an SQL server. We can pick it from the AUTHENTICATION tab, enter the domain, username, and password, confirm your password, and that way the framework will be able to authenticate with that service and test the security of your server. Now, our server doesn't use any type of authentication. We don't need it. Also, if we are targeting a web application that has a login page, for example for users of Facebook, then we won't have access to most of Facebook's features unless we log in using a certain username and a password. Using this feature here, we can log in and then test the security of our target.
The TEMPLATES tab is where we select the scan type. It's very similar to the scan type with Zenmap. We've seen in Zenmap we had a quick scan, quick scan plus, and intense scan. It is the same. Each one of these profiles is different. It scans different things. For example, we have the Full audit, which takes a lot of time but pretty much checks for everything. Then we have Full audit enhanced logging without Web Spider:

A Web Spider is a tool or a script that finds all the files and directories in our targets. The default one is the Full audit without Web Spider. We also have network-specific profiles, and we have web audits as well. I really encourage you to try most of them, and get familiar with them.
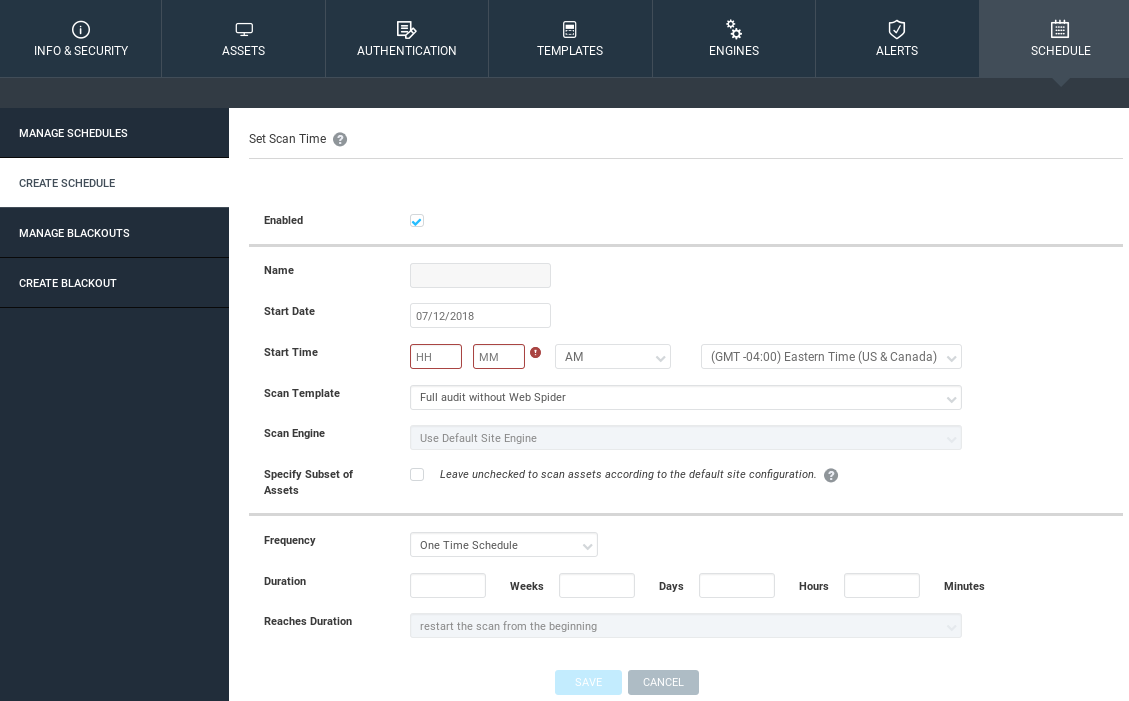
We're only going to try Full audit enhanced logging without Web Spider because using them is the same. We will be scanning for ICMP, TCP, and UDP ports. We are leaving it the same. We are going to leave the ENGINE tab the same as well, which means it's going to use the local engine that we installed instead of using the one that is provided by Rapid7. In the ALERTS tab, we can set up custom alerts so that when a vulnerability is found, we get a notification. The SCHEDULE is a really cool feature. Now, say we are working for a company or for an enterprise that keeps pushing code, new code every day, or maybe we do a test today and everything we are working on is good; our web servers, our programs, your applications, everything is up to date and there's no vulnerabilities in them. Let's say tomorrow we pushed a new vulnerable code, or maybe tomorrow someone discovers a new vulnerability with a program that we are using on our web server. We are not secure any more. This feature allows us to schedule this test so that it runs every week, or every hour, or every month, depending on how critical it is. Go into Create Schedule and create the schedule. We can set a Start Date, and we can set the Frequency to Every Day, every Thursday, every 26th, depending on what we want:
We create that schedule, and then the scan will run every interval that we specify, and we can even get it to produce a report for us. When we can go over the report and see what's changed, or what has been discovered.
The most important part is that we put our target in the ASSETS tab. Then we select a template from the TEMPLATES tab. We have both of these tabs configured, we're going to click on Save and Scan, which will save this configuration and start a scan for us. As we can see, our asset discovery is in progress, and after that we will talk about the results that we got:
