You have now seen the basics of sniffing. Once we have a network (or a group of networks) to target, it's useful to run airodump-ng on that network only, instead of running it on all of the networks around us. In this section, we'll see how to do that.
We are currently running airodump-ng on all of the networks around us; we are going to target the network with the BSSID, EC:1A:59:5A:E1:46. That's our test network, the Test. We are going to sniff on that network only.
To do this, we're going to use the same program. The command will be as follows:
airodump-ng --channel 10 --bssid EC:1A:59:5A:E1:46 --write test-upc wlan0
We need to specify the channel. The --channel here is number 10, as you can see in the preceding code snippet; the --bssid should be the MAC address of the target network. We are going to add a --write option; this tells airodump-ng to log all of the packets that it captures into a file. We also need a filename, so let's call it test-upc. We then put the name of our Wi-Fi card (in monitor mode), and it's wlan0.
Then, we press Enter, and, as you can see, the only network that shows up is Test; we don't have any other networks listed. In the previous screenshot (in the Targeted packet sniffing section), we had too many networks, so not all of the information was visible.
In the following screenshot, as we can see, all the parameters that we saw in the previous part of this chapter contains all the APs that are within our Wi-Fi range, this section here:

Now, the preceding screenshot contains all of the clients that are associated with the APs; when we see EC:1A:59:5A:E1:46, that's the MAC address of the network that the client is connected to. The MAC address in the first section is the same as the MAC address in the second section. That means that this client is connected to network EC:1A:59:5A:E1:46. The STATION is the MAC address of the client—the MAC address of the device that is connected to the network. The PWR is the distance between us and the device, and the Rate is the maximum speed that the device is running on. Lost is the number of packets that we have lost (that we couldn't capture from the target device), and Frames is the number of useful packets that we collected from that device. We will talk more about frames and data when we study WEP cracking in Chapter 6, Network Penetration Testing – Gaining Access.
The first main part of airodump-ng is the APs that are within our Wi-Fi range, and the second part is the clients that are associated with those APs. We also have the MAC address of the AP and the MAC address of the actual client. Now, we are going to use Ctrl + C to stop sniffing. All of the data has been logged into a file called test-upc, and we will use ls, which is a command to list files in Linux; if we add * after it, we will see that airodump-ng automatically created four file formats:

In our command, we only specified the filename as test-upc; airodump-ng automatically added a 01 to the filename, just in case there was another file that had the same name. We can see four different file formats—CAP, CSV, KISMET, and KIDMET XML.
If we execute pwd, we will see that we're in the root directory. After we sniff the packets, we can use a program, such as Wireshark, to analyze the packets and see what information was gathered. The problem with this specific network is that it uses WPA2 encryption, so all of the packets are encrypted, and we can't decrypt them unless we have a key. We're going to discuss how to crack the key in later chapters of this book.
We're going to discuss how to use Wireshark in Chapter 7, Post Connection Attacks, of this book, so for now, we are just going to run Wireshark to give you a quick look at how the packets show up. They're not going to be useful, because they're encrypted.
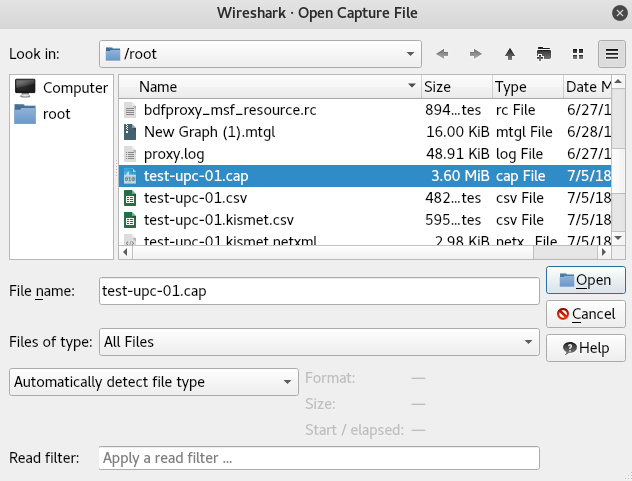
We'll open the Wireshark tool by implementing the wireshark command, then go to the option File | Open, as shown in the following screenshot:

Look for the test-upc.cap file in the /root directory:
After opening the capture file, we can see some information—for example, that the source device is a Belkin device in the following screenshot:

We can also see (in the preceding screenshot) that there is a device communicating with Belkin; the MAC addresses; the devices; and the manufacturers. This is very simple information, because the network is encrypted. If it were an open network, we could connect straight away, and jump to further sections about penetration testing. For now, we just wanted you to see how the packets look when the network is encrypted. In the future, you will learn more about it.