
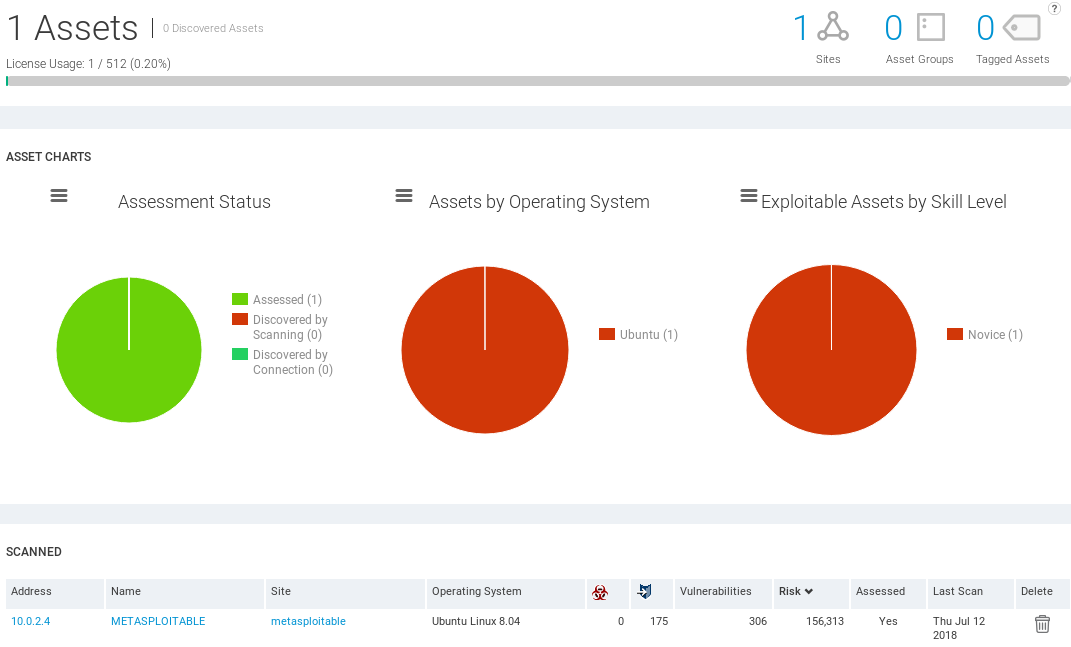
Our scan is over and we are on the Assets page, and as we can see in the following screenshot we have one asset scanned. We can see that the asset is running Ubuntu, and the skill that we need to hack into this asset is Novice:
From the preceding screenshot, we can see that Nexpose shows us much more information than Metasploit Community, and it's a much more advanced vulnerability management framework.
We can see that we scanned one target, METASPLOITABLE, and the site is global. It's running on Ubuntu Linux 8.04, and we discovered no malware, 175 exploits, and 306 Vulnerabilities. Remember that with Metasploit Community we only discovered 1 exploitable vulnerability and 8 modules that can be used. Here, we discovered 306 vulnerabilities. We discovered many more vulnerabilities and exploits.
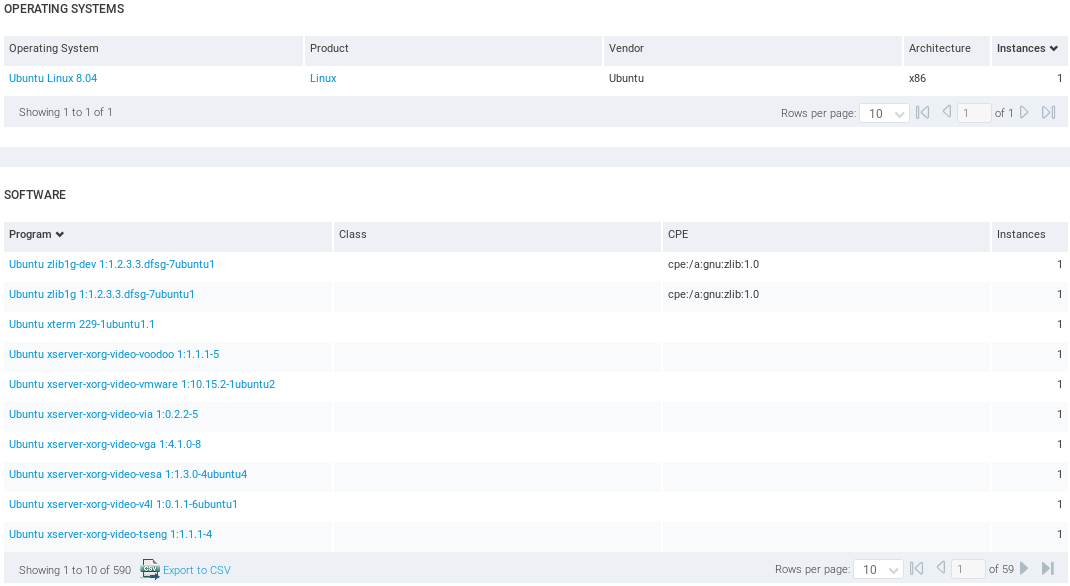
We can see that there is a risk factor, and the last time that the scan was done. If we scroll down, we can see the OPERATING SYSTEMS that we discovered. Again, it's Ubuntu Linux 8.04. We can see the SOFTWARE that is installed on the target computer, not only the services that's running on ports. We can see actual software installed on the target computer:
This can be very useful after we hack the computer. After we've managed to hack into it, it's very useful to find local exploits that can be used to increase our privileges. For example, if we manage to, if we got a normal user and you wanted to become a root, then we can use a local buffer overflow to increase our privileges or to do other kinds of stuff. These are very useful in terms of post-exploitation.
If we go down, we'll see the SERVICES that are installed on the target computer. Just like Nmap gave it to us, we can see that HTTP is running, DNS, and so on:
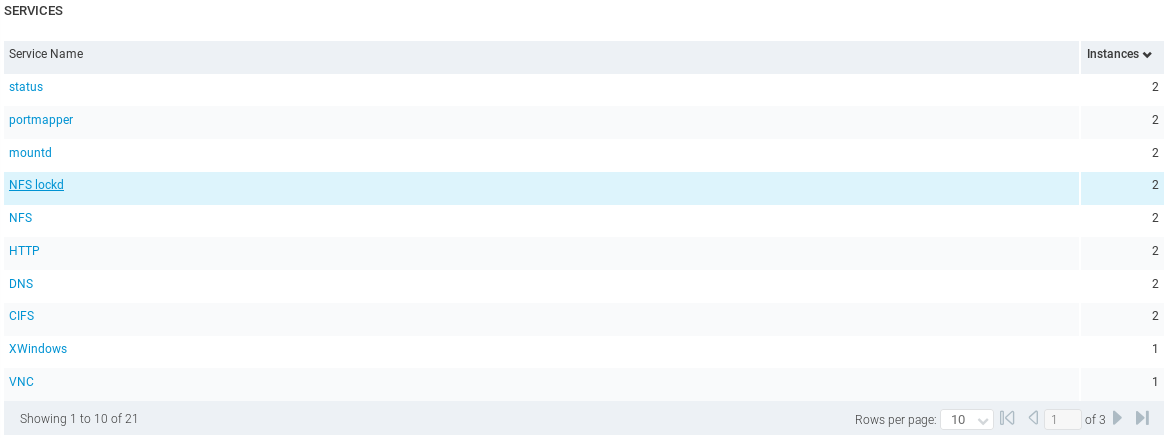
If we click on any of these services we will see more information about them. For example, with an HTTP service, we have a description about it, and the ports that it's running on. We can see that HTTP is running on port 80 and on port 8180:

Now, let's scroll up, and if we want to have a closer look at the vulnerabilities we can go to the Vulnerabilities page:
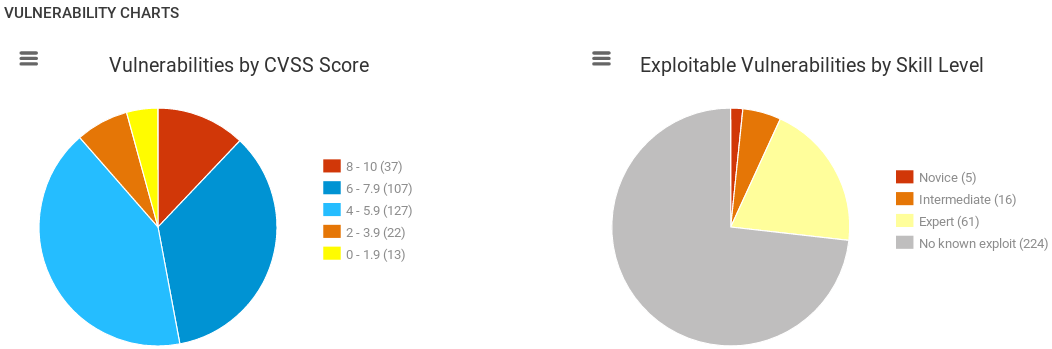
As you can can see in the preceding screenshot, we have a graph about the vulnerabilities categorized based on their risk factor on the left, and on the right they're categorized based on the skill level needed in order to exploit them. As we scroll down, we can see a list of all of vulnerabilities, and we can switch between them using the arrows:

Again, if there is any malware we will see it under the malware icon, and if there is an exploitation we will see under the exploit icon. Now, all of the top vulnerabilities listed don't have an exploitation using a tool, but they are ordered based on the risk. The listed vulnerabilities are very risky, and as we proceed through them the risk decreases.
We can see in the preceding screenshot that we discovered that the VNC password is "password". We can go in and try to connect using VNC. VNC is a service that's very similar to Remote Desktop. Basically, it will show us the desktop and it will allow us to gain full access to the target computer, just like Remote Desktop. It's telling us that the password for login is password. It's also telling us that there is a back door Shell Backdoor Service running, and we used that already.
Now, let's look at something that can be exploitable. We are going to click on the exploit icon to order them by the exploit, and we can see that all of these have an M logo, which means that they can be exploited using Metasploit:
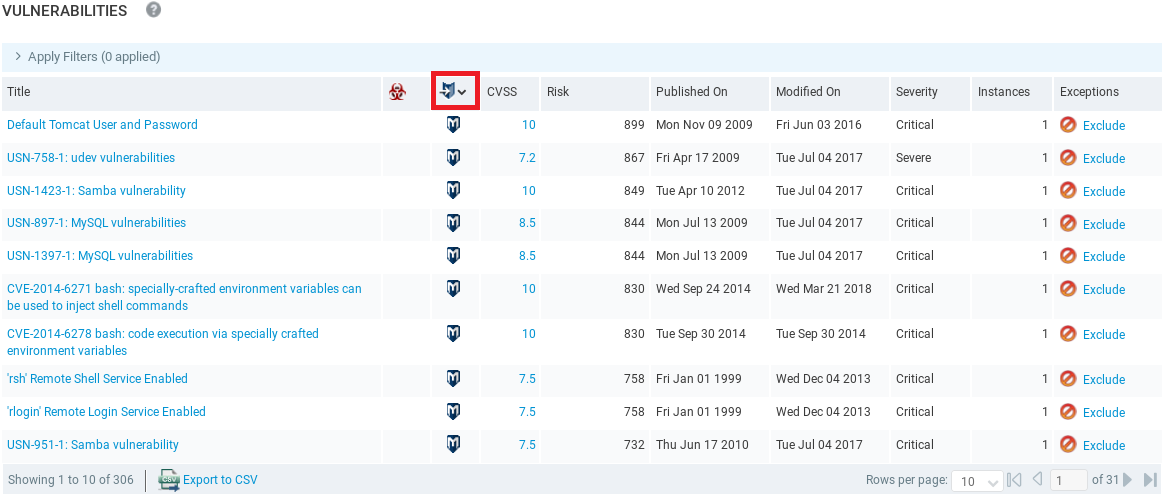
As you can see in the preceding screenshot we have the Remote Shell Service that we can use, and there is the Remote Login Service that can be used as well, which we have already had a look at. Let's click on something that we haven't seen before, for example, Default Tomcat User and Password. In the following screenshot we can see a description of this vulnerability:

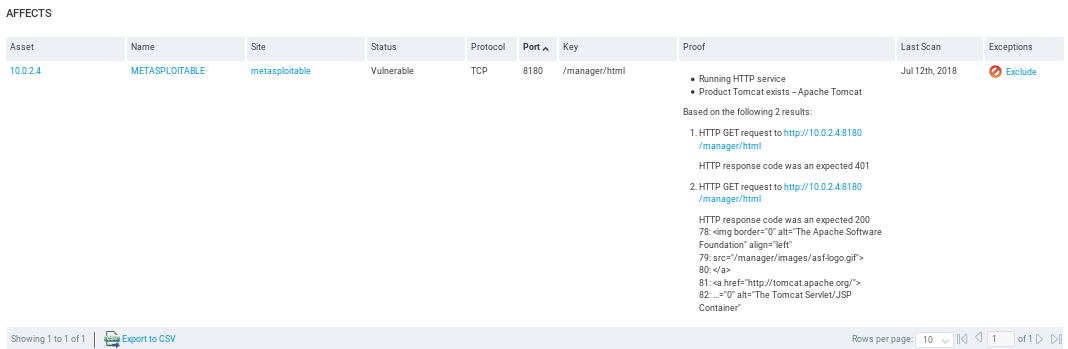
Again, we can see the port that it's running on, and you can see why it thinks that this particular target is vulnerable to this exploit:
If we scroll down, it will show you how we can exploit it:
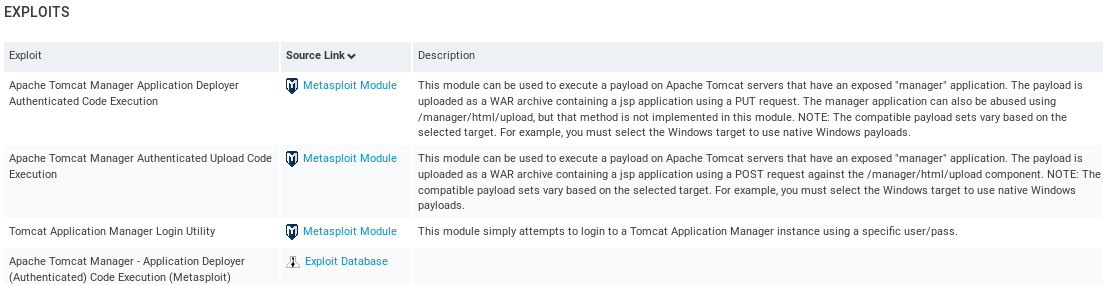
There are three different modules that can be used to exploit it, but it doesn't really have to exploit it. Sometimes we just see modules that can be used to verify the existence of this exploit, but basically these are the modules associated with it. If we click on the Source Link of any Exploit, it will take us to the Rapid7 page that we used to see when we Googled stuff:

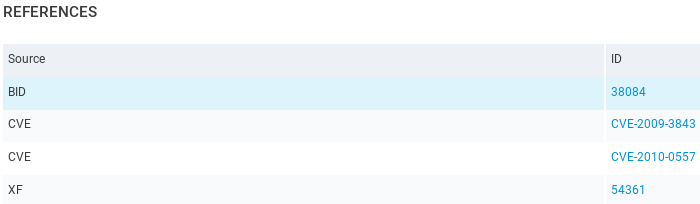
We see the Module Name, which we can just copy and paste into Metasploit, where we can run show options and then use the exploit the same way that we've seen it in previous chapters. Scrolling down further reveals the REFERENCES to the particular exploit:
At the bottom, it'll show us the REMEDIATIONS on how we can fix this exploit:

For this vulnerability, all we need to do is just change the administrator password and not use the default configuration.
Another useful thing is in the Reports tab:

This framework allows us to generate reports for each scan that we do, and there are different types of template for the reports. Inside Create a report, we can see that there is an Audit Report that contains a lot of detailed information for the programmers or for the technical people. We can use an Executive Report, which has less information and is made for the managers or for the top-level people that don't have much experience with technical stuff. We can select any template we want and name it anything. We will call this report metasploitable report, as shown in the preceding screenshot. If we scroll a little we can select the format that we want:
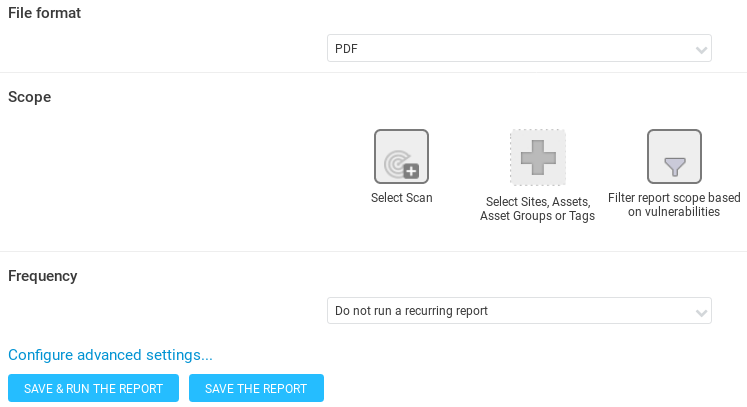
It's set to PDF in the preceding screenshot. Then, we are going click on Select Scan, select our target scan that we want to generate a report for, and select metasploitable:

Then, we click on SAVE & RUN THE REPORT to generate the report:

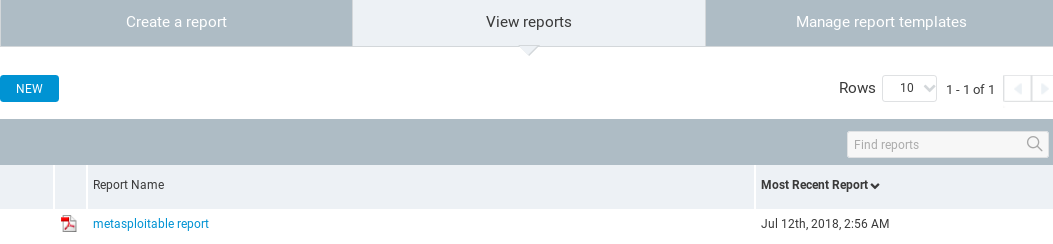
We can also generate reports automatically every time, because we can schedule reports, schedule scans, and we can also schedule an automatic report each time a scan is done. For example, if we are scanning every week, you can also generate a report every week, every time that scan's done. Now, just download the report by clicking on the report, and let's see what it looks like:
As we can see in the following screenshot, it has the date, it has the title, it has all the exploits that have been found, but this is the executive report. It has small details about the exploits and more graphical stuff to show the executives the risks that have been found and how critical they are:

As we can see in the preceding screenshot, Nexpose shows us much more detail and it's much more advanced. It's directed towards bigger companies, bigger infrastructures, where we need to always make sure everything is up to date, everything is installed, and there aren't any exploits.