
Now, we are going to implement a program to generate a node that filters the point cloud from the Kinect sensor. This node will apply a filter to reduce the number of points in the original data. It will make a down sampling of the data.
Create a new file, c8_kinect.cpp, in your chapter8_tutorials/src directory and type in the following code snippet:
#include <ros/ros.h>
#include <sensor_msgs/PointCloud2.h>
// PCL specific includes
#include <pcl_conversions/pcl_conversions.h>
#include <pcl/point_cloud.h>
#include <pcl/point_types.h>
#include <pcl/filters/voxel_grid.h>

#include <pcl/io/pcd_io.h>

ros::Publisher pub;
void cloud_cb (const pcl::PCLPointCloud2ConstPtr& input)
{
  pcl::PCLPointCloud2 cloud_filtered;
  pcl::VoxelGrid<pcl::PCLPointCloud2> sor;
  sor.setInputCloud (input);
  sor.setLeafSize (0.01, 0.01, 0.01);
  sor.filter (cloud_filtered);
  // Publish the dataSize
  pub.publish (cloud_filtered);
}

int main (int argc, char** argv)
{
  // Initialize ROS
  ros::init (argc, argv, "c8_kinect");
  ros::NodeHandle nh;
  // Create a ROS subscriber for the input point cloud
  ros::Subscriber sub = nh.subscribe ("/camera/depth/points", 1,
   cloud_cb);
  // Create a ROS publisher for the output point cloud
  pub = nh.advertise<sensor_msgs::PointCloud2> ("output", 1);
  // Spin
  ros::spin ();
}
This sample is based on the tutorial of Point Cloud Library (PCL).
All the work is done in the cb() function. This function is called when a message arrives. We create a sor variable with the VoxelGrid type, and the range of the grid is changed in sor.setLeafSize(). These values will change the grid used for the filter. If you increment the value, you will obtain less resolution and fewer points on the point cloud:
cloud_cb (const sensor_msgs::PointCloud2ConstPtr& input)
{
  ...
  pcl::VoxelGrid<sensor_msgs::PointCloud2> sor;
  ...
  sor.setLeafSize(0.01f,0.01f,0.01f);
  ...
}
If we open rviz now with the new node running, we will see the new point cloud in the window, and you will directly notice that the resolution is less than that of the original data, as shown in the following screenshot:
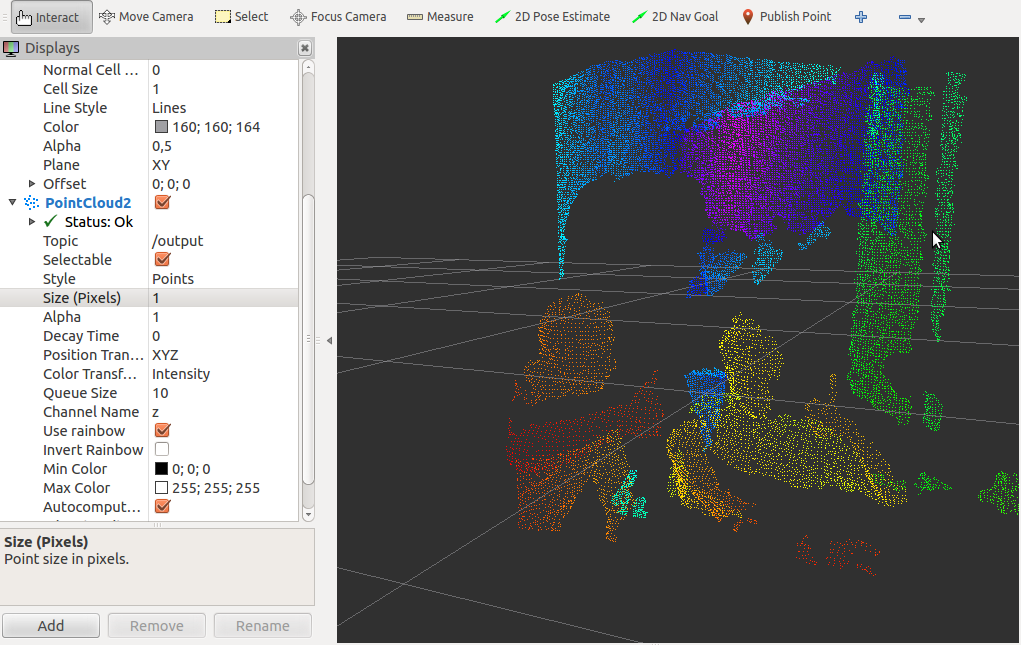
On rviz, you can see the number of points that a message has. For original data, we can see that the number of points is 2,19,075. With the new point cloud, we obtain 16,981 points. As you can see, it is a huge reduction of data.
At http://pointclouds.org/, you will find more filters and tutorials on how you can use this kind of data.