
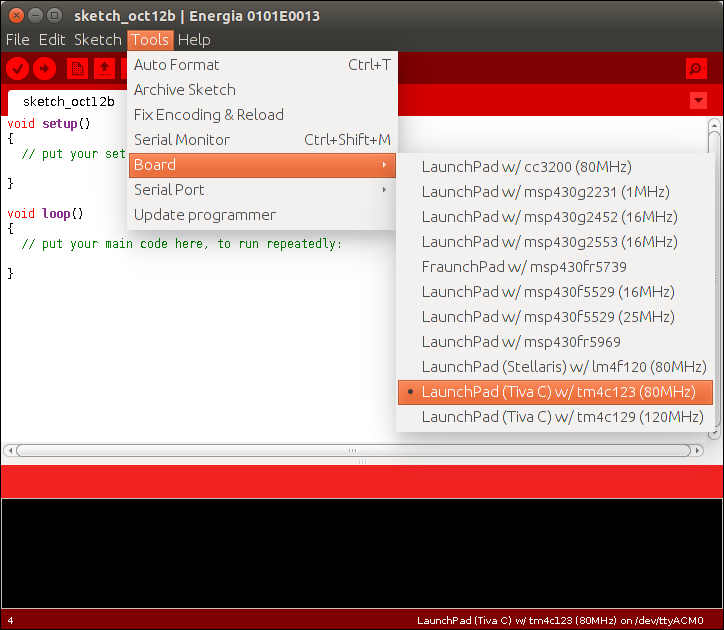
The programming of the Tiva C Launchpad is done using the Energia IDE, which is the customized version of the Arduino IDE. You can download it from http://energia.nu/. As with Arduino, you can choose the serial port of the board and the board name.
The embedded code is placed in the chapter_9_codes/ chefbot_code/tiva_c_energia_code_final folder. Let's look at some important snippets from the main embedded code.
Here are headers files of the main code. We need to include the following MPU 6050 headers to reading values from it. The MPU6050 library for Energia is also given along with the section's code:
    #include "Wire.h"
    #include "I2Cdev.h"
    #include "MPU6050_6Axis_MotionApps20.h"
The Messenger library is used to handle serial data from the PC:
    #include <Messenger.h>
    #include <limits.h>
In the following code, the first line is the object of the MPU6050 class for handling data from the IMU, and the second one is the object of the Messenger library for handling serial input:
    MPU6050 accelgyro(0x68);

    Messenger Messenger_Handler = Messenger();
The following is the main setup() function of the code. This will initialize all sensors and motors of the robot. The setup() function will initialize the serial port with a baud rate of 115200 and initialize encoders, motors, ultrasonic, MPU6050, and the messenger object. You can see the definition of each function in the code itself.
    void setup()
    {

      //Init Serial port with 115200 baud rate
      Serial.begin(115200);

      //Setup Encoders
      SetupEncoders();
      //Setup Motors
      SetupMotors();
      //Setup Ultrasonic
      SetupUltrasonic();
      //Setup MPU 6050
      Setup_MPU6050();
      //Setup Reset pins
      SetupReset();
      //Set up Messenger
      Messenger_Handler.attach(OnMssageCompleted);


    }
The following is the main loop() function of the code. It will read sensor values and send motor speed commands to the motor driver. The speed commands are received from the PC.
    void loop()
    {

        //Read from Serial port
        Read_From_Serial();


        //Send time information through serial port
        Update_Time();

        //Send encoders values through serial port
        Update_Encoders();

        //Send ultrasonic values through serial port
        Update_Ultra_Sonic();


        //Update motor values with corresponding speed and send speed
     values through serial port
        Update_Motors();


        //Send MPU 6050 values through serial port
        Update_MPU6050();

        //Send battery values through serial port
        Update_Battery();


    }
We can compile the code and upload it into the board using Energia. If the upload is successful, we can communicate with the board using the miniterm.py tool.
Assume that the serial port device is /dev/ttyACM0. First, change the permission using following command:
$ sudo chmod 777 /dev/ttyACM0
We can communicate with the board using the following command:
$ miniterm.py /dev/ttyACM0 115200
If everything is successful, you will get values like these:
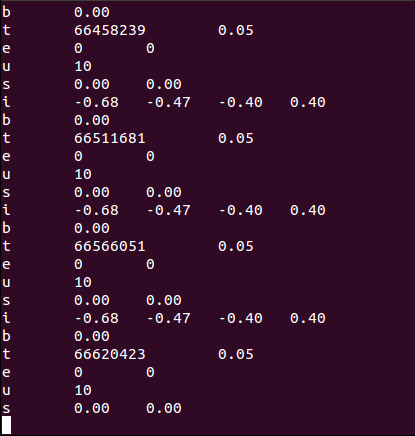
The messages that you are seeing can be decoded like this: the first letter denotes the device or parameter. Here is what the letters mean:
| Letter | Device or parameter |
| b | Battery |
| t | Time |
| e | Encoder |
| u | Ultrasonic sensor |
| s | Motor speed |
| i | IMU value |
The serial messages are separated by spaces and tabs so that each value can be decoded easily.
If we are getting serial messages, we can interface the board with ROS.