
There is another open source self-driving car project by Udacity (https://github.com/udacity/self-driving-car) that was created for teaching their Nanodegree self-driving car program. The aim of this project is to create a complete autonomous self-driving car using deep learning and using ROS as middleware for communication. The project is split into a series of challenges, and anyone can contribute to the project and win a prize. The project is trying to train a convolution neural network (CNN) from a vehicle camera dataset to predict steering angles. This approach is a replication of end-to-end deep learning from NVIDIA (https://devblogs.nvidia.com/parallelforall/deep-learning-self-driving-cars/), used in their self-driving car project called DAVE-2.
The following is the block diagram of DAVE-2. DAVE-2 stands for DARPA Autonomous Vehicle-2, which is inspired by the DAVE project by DARPA.
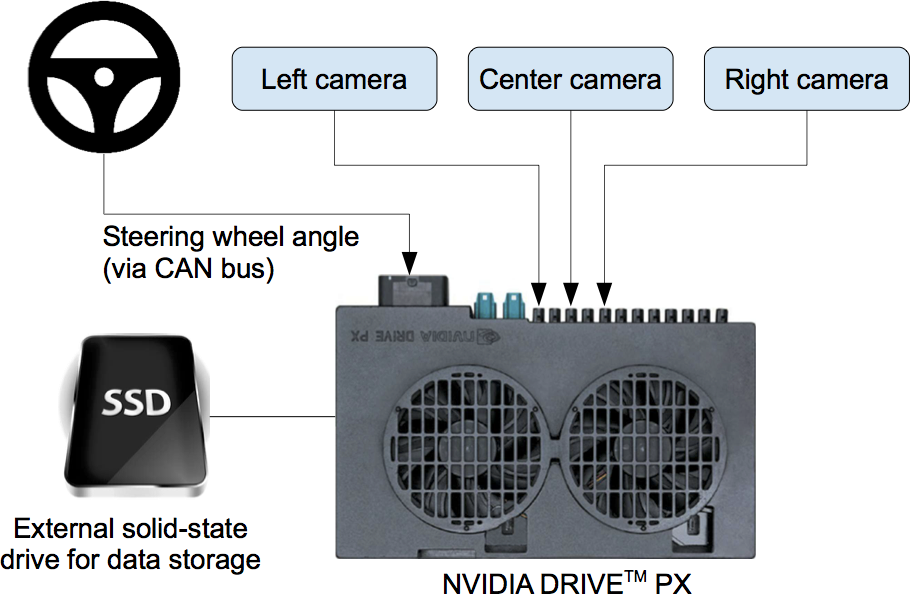
This system basically consists of three cameras and an NVIDIA supercomputer called NVIDIA PX. This computer can train images from this camera and predict the steering angle of the car. The steering angle is fed to the CAN bus and controls the car.
The following are the sensors and components used in the Udacity self-driving car:
- 2016 Lincoln MKZ: This is the car that is going to be made autonomous. In the previous section, we saw the ROS interfacing of this car. We are using that project here too.
- Two Velodyne VLP-16 LiDARs
- Delphi radar
- Point Grey Blackfly cameras
- Xsens IMU
- Engine control unit (ECU)
This project uses the dbw_mkz_ros package to communicate from ROS to the Lincoln MKZ. In the previous section, we set up and worked with the dbw_mkz_ros package. Here is the link to obtain a dataset for training the steering model: https://github.com/udacity/self-driving-car/tree/master/datasets. You will get a ROS launch file from this link to play with these bag files too.
Here is the link to get an already trained model that can only be used for research purposes: https://github.com/udacity/self-driving-car/tree/master/steering-models. There is a ROS node for sending steering commands from the trained model to the Lincoln MKZ. Here, dbw_mkz_ros packages act as an intermediate layer between the trained model commands and the actual car.
Open source self-driving car simulator from Udacity
Udacity also provides an open source simulator for training and testing self-driving deep-learning algorithms. The simulator project is available at https://github.com/udacity/self-driving-car-sim. You can also download the precompiled version of a simulator for Linux, Windows, and Mac from the same link.
Here are the screenshots of this simulator. We can discuss the working of the simulator along with the screenshots.
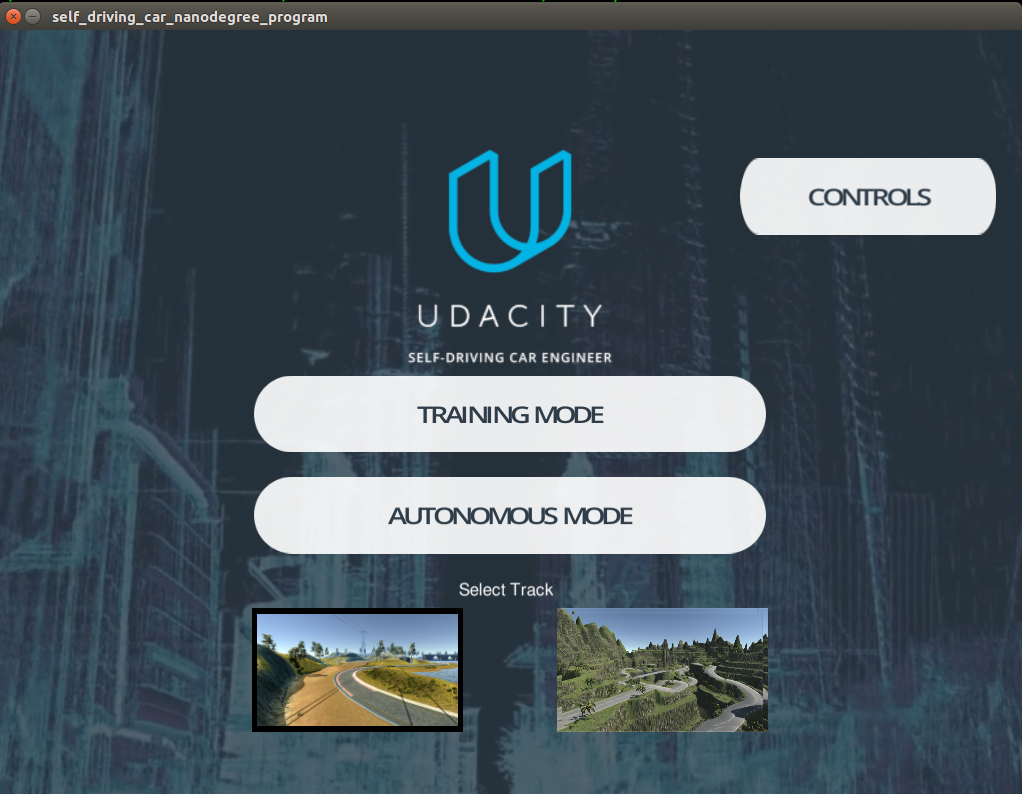
You can see two options in the simulator; the first is for training and the second is for testing autonomous algorithms. We can also select the Track in which we have to drive the vehicle. When you click on the Training Mode button, you will get a racing car on the selected track. You can move the car using the WASD key combination, like a game. Here is a screenshot of the training mode.
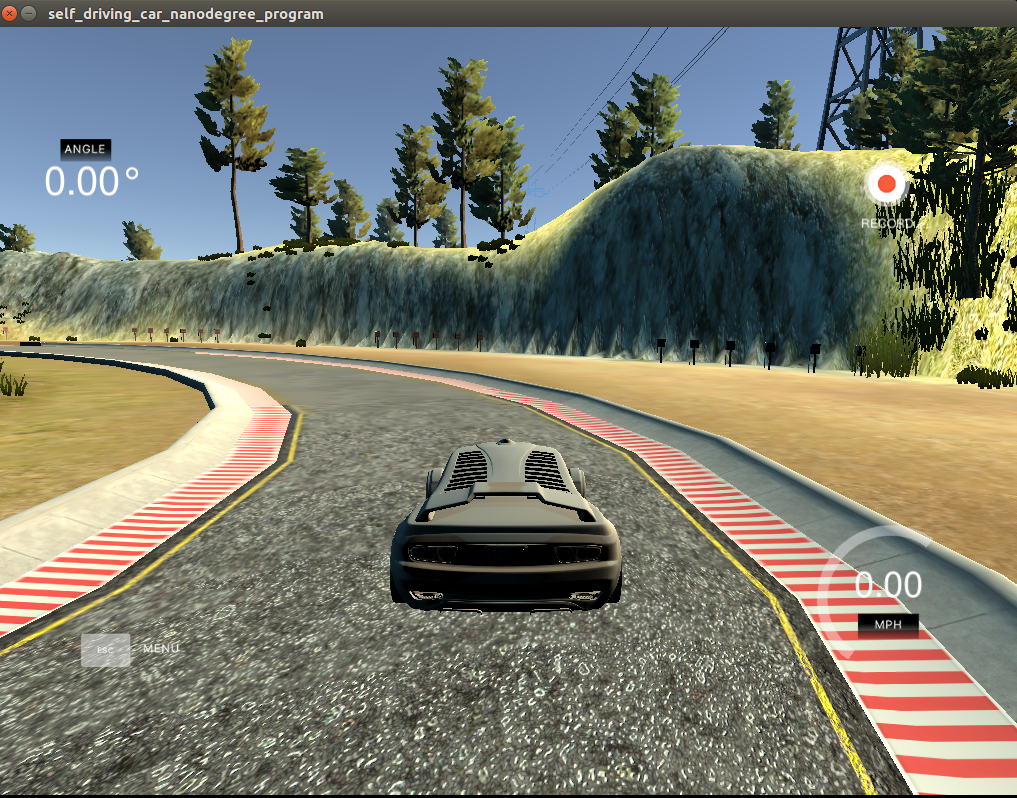
You can see a RECORD button in the top-right corner, which is used to capture the front camera images of the car. We can browse to a location, and those captured images will be stored in that location.
After capturing the images, we have to train the car using deep-learning algorithms to predict steering angle, acceleration, and braking. We are not discussing the code, but I'll provide a reference for you to write it. The complete code reference to implement the driving model using deep learning and the entire explanation for it are at https://github.com/thomasantony/sdc-live-trainer. The live_trainer.py code helps us train the model from captured images.
After training the model, we can run hybrid_driver.py for autonomous driving. For this mode, we need to select autonomous mode in the simulator and execute the hybrid_driver.py code.
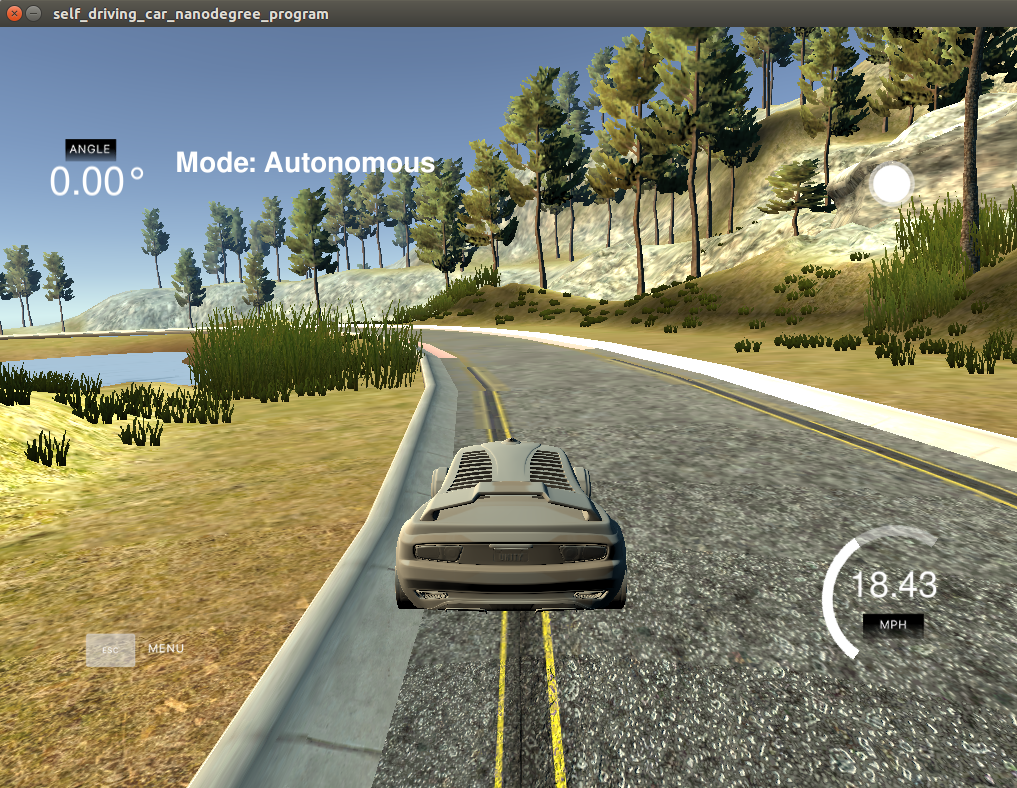
You can see the car moving autonomously and manually override the steering control at any time.
This simulator can be used to test the accuracy of the deep learning algorithm we are going to use in a real self-driving car.