
We can also write launch files to load more than one instance of the nodelet class. The following launch file will load two nodelets with the names test1 and test2, and we can save it with a name hello_world.launch:
<launch>

<!-- Started nodelet manager -->

  <node pkg="nodelet" type="nodelet" name="standalone_nodelet"  args="manager" output="screen"/>

<!-- Starting first nodelet -->

  <node pkg="nodelet" type="nodelet" name="test1" args="load nodelet_hello_world/Hello standalone_nodelet" output="screen">
  </node>

<!-- Starting second nodelet -->

  <node pkg="nodelet" type="nodelet" name="test2" args="load nodelet_hello_world/Hello standalone_nodelet" output="screen">
  </node>

</launch>
The preceding launch can be launched using the following commands:
$ roslaunch nodelet_hello_world hello_world.launch
The following message will show up on the terminal if it is launched successfully:
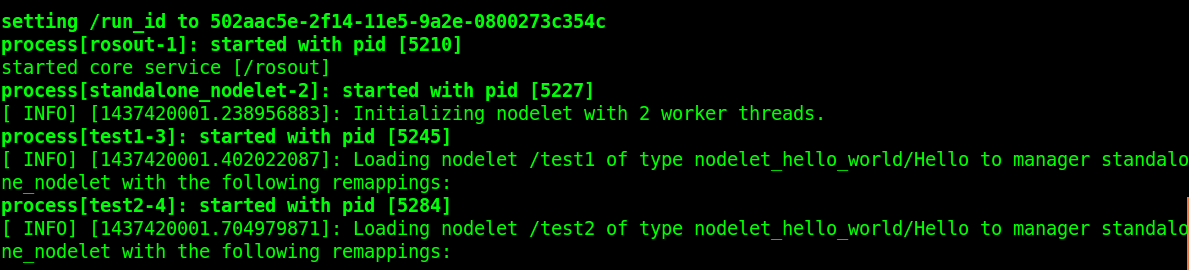
Figure 8: Launching multiple instances of the Hello() class
The list of topics and nodes are shown here. We can see two nodelets instantiated and we can see their topics too.

Figure 9: Topics generated by the multiple instances of Hello() class
The following diagram shows how to interconnect these nodelets:
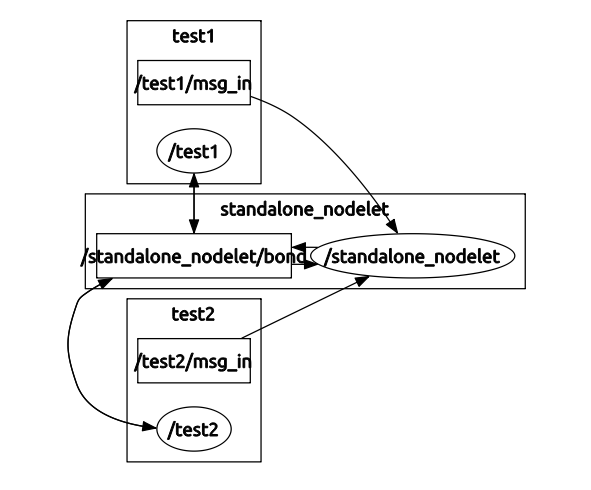
Figure 10: A two-node instance of a nodelet
Run the rqt_graph tool to view the preceding node graph view:
$rosrun rqt_gui rqt_gui
Load the Node Graphplugin from the following option Plugins | Introspection | NodeGraphand you will get a graph as shown in the preceding figure.