
Create a new file in chapter5_tutorials/src with the name odometry.cpp, and write a code to publish odometry, you can use the following code snippets or check the code repository to have the entire code:
#include <string>
#include <ros/ros.h>
#include <sensor_msgs/JointState.h>
#include <tf/transform_broadcaster.h>
#include <nav_msgs/Odometry.h>

int main(int argc, char** argv) {

  ros::init(argc, argv, "state_publisher");
  ros::NodeHandle n;
  ros::Publisher odom_pub = n.advertise<nav_msgs::Odometry>("odom",
  10);
  ...

  while (ros::ok()) {
    current_time = ros::Time::now();

    double dt = (current_time - last_time).toSec();
    double delta_x = (vx * cos(th) - vy * sin(th)) * dt;
    double delta_y = (vx * sin(th) + vy * cos(th)) * dt;
    double delta_th = vth * dt;

    x += delta_x;
    y += delta_y;
    th += delta_th;

    geometry_msgs::Quaternion odom_quat;
    odom_quat = tf::createQuaternionMsgFromRollPitchYaw(0,0,th);

    // update transform
    odom_trans.header.stamp = current_time;
    odom_trans.transform.translation.x = x;
    odom_trans.transform.translation.y = y;
    odom_trans.transform.translation.z = 0.0;
    odom_trans.transform.rotation =
     tf::createQuaternionMsgFromYaw(th);

    // filling the odometry
    nav_msgs::Odometry odom;
    odom.header.stamp = current_time;
    odom.header.frame_id = "odom";
    odom.child_frame_id = "base_footprint";
    // position
    odom.pose.pose.position.x = x;
    odom.pose.pose.position.y = y;
    odom.pose.pose.position.z = 0.0;
    odom.pose.pose.orientation = odom_quat;

    // velocity
    odom.twist.twist.linear.x = vx;
    odom.twist.twist.linear.y = vy;


    ...
    odom.twist.twist.angular.z = vth;

    last_time = current_time;

    // publishing the odometry and the new tf
    broadcaster.sendTransform(odom_trans);
    odom_pub.publish(odom);

    loop_rate.sleep();
  }
  return 0;
}
First, create the transformation variable and fill it with frame_id and thechild_frame_id values in order to know when the frames have to move. In our case, the base_footprint will move relatively towards the frame odom:
geometry_msgs::TransformStamped odom_trans;
odom_trans.header.frame_id = "odom";
odom_trans.child_frame_id = "base_footprint";
In this part, we generate the pose of the robot. With the linear velocity and the angular velocity, we can calculate the theoretical position of the robot after a while:
double dt = (current_time - last_time).toSec();
double delta_x = (vx * cos(th) - vy * sin(th)) * dt;
double delta_y = (vx * sin(th) + vy * cos(th)) * dt;
double delta_th = vth * dt;

x += delta_x;
y += delta_y;
th += delta_th;

geometry_msgs::Quaternion odom_quat;
odom_quat = tf::createQuaternionMsgFromRollPitchYaw(0,0,th);
In the transformation, we will only fill in the x and rotation fields, as our robot can only move forward and backward and can turn:
odom_trans.header.stamp = current_time;
odom_trans.transform.translation.x = x;
odom_trans.transform.translation.y = 0.0;
odom_trans.transform.translation.z = 0.0;
odom_trans.transform.rotation = tf::createQuaternionMsgFromYaw(th);
With the odometry, we will do the same. Fill the frame_id and child_frame_id fields with odom and base_footprint.
As the odometry has two structures, we will fill in the x, y, and orientation of the pose. In the twist structure, we will fill in the linear velocity x and the angular velocity z:
// position
odom.pose.pose.position.x = x;
odom.pose.pose.position.y = y;
odom.pose.pose.orientation = odom_quat;

// velocity
odom.twist.twist.linear.x = vx;
odom.twist.twist.angular.z = vth;
Once all the necessary fields are filled in, publish the data:
// publishing the odometry and the new tf
broadcaster.sendTransform(odom_trans);
odom_pub.publish(odom);
Remember to create the following line in the CMakeLists.txt file before compiling it:
add_executable(odometry src/odometry.cpp)
target_link_libraries(odometry ${catkin_LIBRARIES})
Compile the package and launch the robot without using Gazebo, using only rviz to visualize the model and the movement of the robot. Use the following command to do this:
$ roslaunch chapter5_tutorials display_xacro.launch model:="'rospack find chapter5_tutorials'/urdf/robot1_base_04.xacro"
Now, run the odometry node with the following command:
$ rosrun chapter5_tutorials odometry
The following output is what you will get:
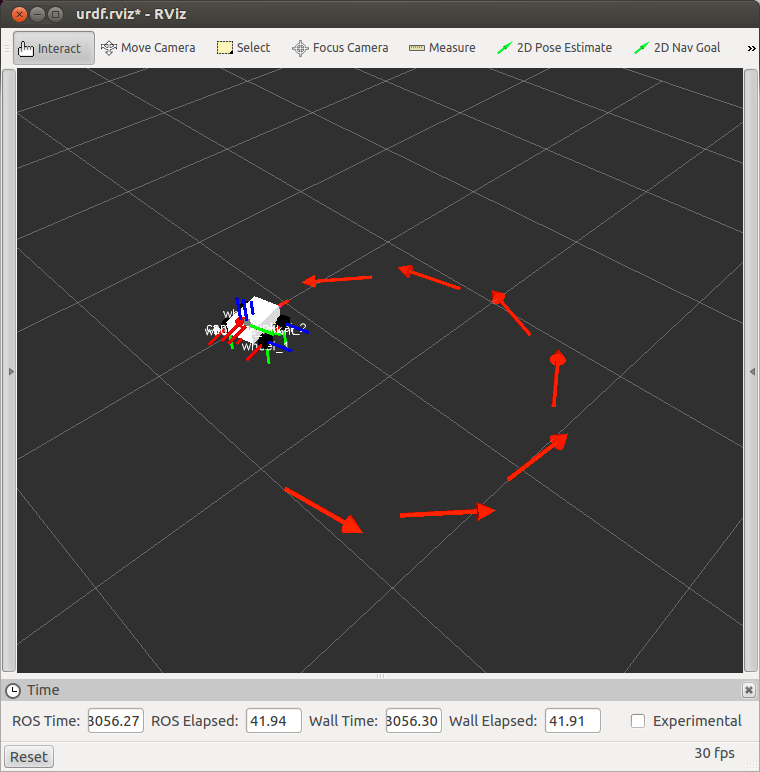
On the rviz screen, you can see the robot moving over some red arrows (grid). The robot moves over the grid because you published a new tf frame transform for the robot. The red arrows are the graphical representation for the Odometry message. You will see the robot moving in circles continuously as we programmed in the code.