One of the trending areas in robotics is autonomous cars or driverless cars. One
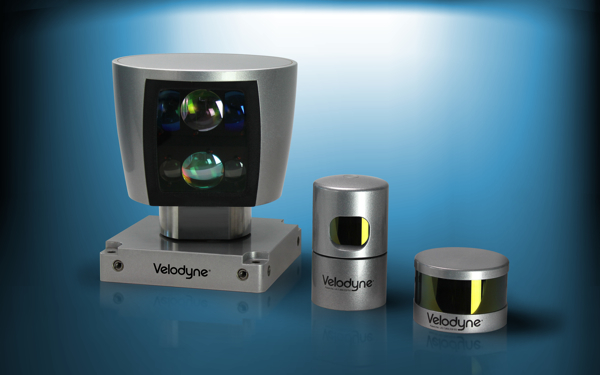
of the essential ingredients in this robot is a Light Detection and Ranging (LIDAR). One of the commonly used LIDARs is Velodyne LIDAR. Velodyne LIDARs are used in Google driverless cars and also in most of the research in driver less cars. There are three models of Velodyne LIDAR available in the market. Following are the three models and their diagrams:
Velodyne HDL-64E, Velodyne HDL-32E, and Velodyne VLP-16/Puck.
Velodyne can interface to ROS and can generate point cloud data from its raw data. The link for the velodyne ROS package for model HDL-32E is http://wiki.ros.org/velodyne.
We can install the velodyne driver in Ubuntu using the following command:
- In Jade:
$ sudo apt-get install ros-jade-velodyne
- In Indigo:
$ sudo apt-get install ros-indigo-velodyne
After installing these packages, connect the LIDAR power supply and connect Ethernet cable from the PC to Velodyne.
Assign a static IP of the PC in the range 192.168.3.x using the following command:
$ sudo ifconfig eth0 192.168.3.100
After setting the static IP of the PC, assign a route to Velodyne. The IP of LIDAR will be present on the CD gotten along with the Velodyne.
$ sudo route add 192.168.XX.YY eth0
After setting the network, we need to calibrate generate calibration data in YAML file. The following command will generate the calibration data in a YAML file from the standard Velodyne XML file:
$ rosrun velodyne_pointcloud gen_calibration.py 32db.xml
Launch the point cloud generation nodes from the raw data of LIDAR. We have to mention the generated calibration YAML file along with the launch file:
    $ roslaunch velodyne_pointcloud 32e_points.launch
 calibration:=/home/robot/32db.yaml
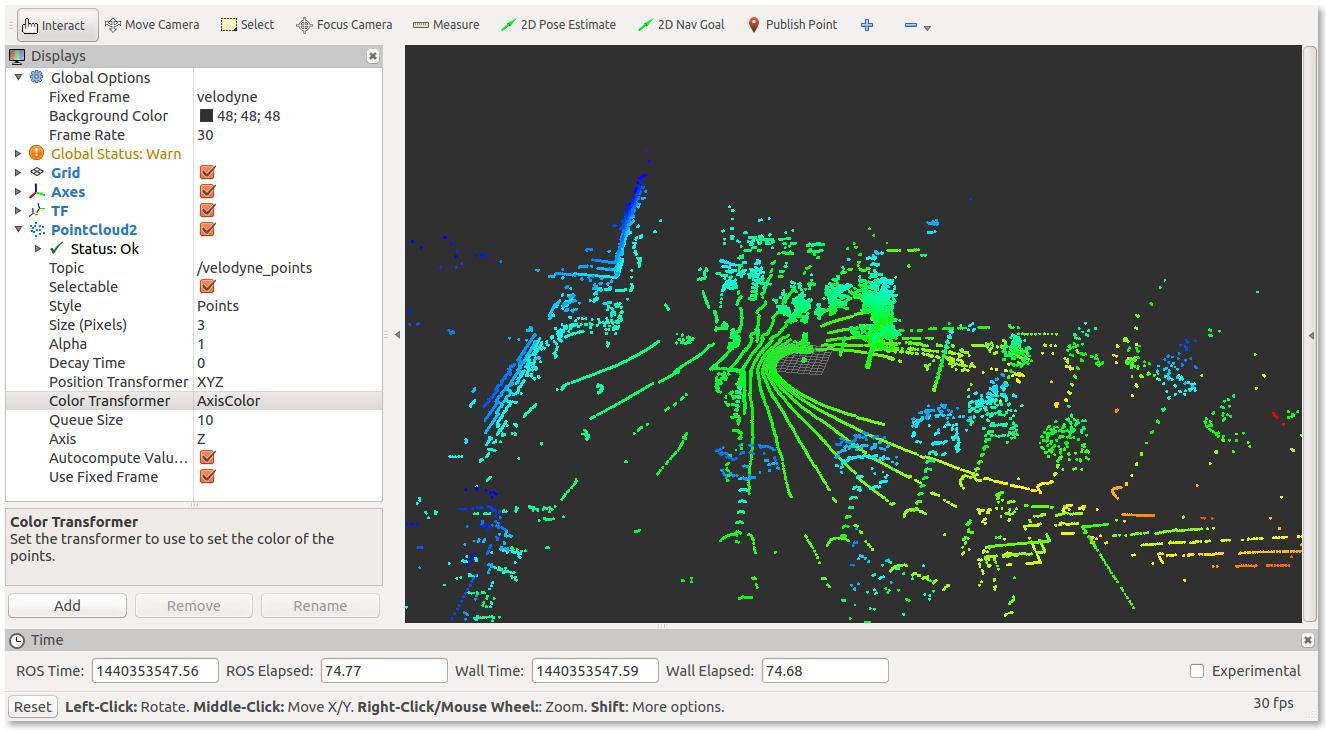
After launching the converter nodes, we can start RViz to view the point cloud data generated from LIDAR using the following command. Set the Fixed Frame as Velodyne and Add display Point Cloud 2 and set Topic as /velodyne_points:
$ rosrun rviz rviz -f velodyne