The first step is to configure controllers.yaml, which is inside the cool5000_moveit_config/config folder. The definition of this file follows. We are only focusing on moving the arm and not on handling the gripper control for now.
So the configuration only contains the arm group joints:
controller_list:
  - name: cool5000_trajectory_controller
    action_ns: follow_joint_trajectory
    type: FollowJointTrajectory
    default: true
    joints:
      - joint1
      - joint2
      - joint3
      - joint4
      - joint5
      - joint6
      - joint7
The following is the definition of cool5000_description_moveit_controller_manager.launch.xml inside cool5000_moveit_config/launch:
<launch>
<!--
 Set the param that trajectory_execution_manager needs to find the controller plugin
-->
<arg name="moveit_controller_manager" default="MoveIt_simple_controller_manager/MoveItSimpleControllerManager"/>


<param name="MoveIt_controller_manager" value="$(arg MoveIt_controller_manager)"/>


<!--  load controller_list  -->


<rosparam file="$(find cool5000_moveit_config)/config/controllers.yaml"/>
</launch>
After configuring MoveIt!, we can start working on the arm. Apply proper power supply on the arm and connect it to USB To Dynamixel. Plug the USB TO Dynamixel to a PC. We will see a serial device generate; it may be either /dev/ttyUSB0 or /dev/ttyACM0. According to the device, change the port name inside the controller launch file.
Start the cool5000 arm controller using the following command:
$ roslaunch cool5000_controller cool5000_controller.launch
Start the RViz demo and start path, planning. If we press the Execute button,
the trajectory will execute on the hardware arm:
$ roslaunch cool5000_moveit_config demo.launch
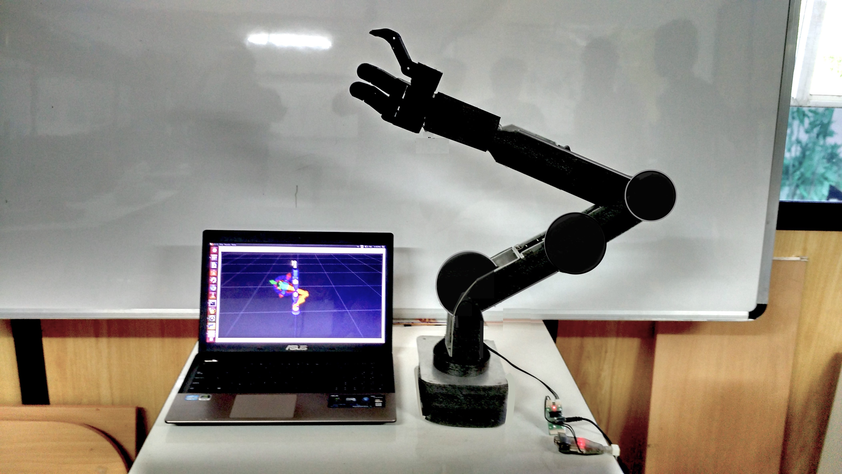
A random pose, which is shown in RViz, and the cool arm is shown in the following image: