
To create a collaborative glossary:
- Go to the community course and Turn editing on.
- In the section where you want to add the glossary, select Glossary from the Add an Activity menu.
- On the adding a new Glossary screen, give the glossary a name. You can be a bit more generic with the name in this instance and simply call it Glossary.
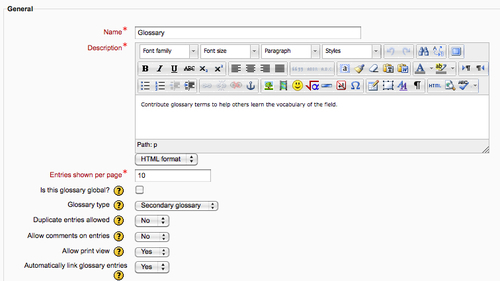
- In the description field, describe the purpose of the glossary and give special instructions, if any.
- The entries shown per page can be left at the default 10, or changed as desired.
- Only select Is this glossary global? if you want the glossary to be available throughout the site. Most glossaries are only used in a given course.
- Leave the glossary type on Secondary glossary, unless you plan on combining glossaries later. Secondary glossaries can be imported into a primary glossary, but there can only be one primary glossary per site.
- For a community glossary, it might be useful to set the Duplicate entries allowed to Yes, in order to allow multiple community members to create different definitions of the same term. You can use ratings to allow the members of the community to vote on which definition is more accurate or popular.
- In a community glossary you should set Allow comments on entries to Yes, to enable community members to comment on each other's entries.
- Keep Allow print view set to Yes in order to allow community members to print the glossary for reference.
- The Approved by default option determines whether a submitted definition must be approved by someone with the Approve Entry privilege. In a community site, this should either be set to Yes or there should be a group of more experienced community members with this privilege.
- The next four options determine how the glossary is displayed by default. You can leave these as they are.
- Edit always enables contributors to always go back and edit their contributions. If you set this to No, contributors will have 30 minutes to edit their contribution.
- If you want to enable voting on glossary terms, set the Aggregate type in the Ratings area to either Average or Sum of ratings. Then set the Scale to a numeric value, usually something small like 10. This will give raters a 10 point scale to rate other contributions.
- When you have set up the glossary options, select Save and display to save your settings and see the glossary.
You've now created a glossary activity for everyone in the community to add terms and definitions. While you may also want to create glossaries that are only editable by course authors, a collaborative glossary can be a great tool for community members to contribute their perspective on the vocabulary of the community. As new terms emerge, the community will probably be faster to recognize and define them than a central editor.
Create a database for an annotated bibliography.
One of the most basic interactions for a community is to share resources with each other. Most corporate communities will want to share intellectual resources like articles and whitepapers. You could simply create a forum to allow users to attach articles and copy URLs but a structured entry format would make the collection much more useful to your end users.
The database module will allow users to add entries, list other users' entries, comment and rate entries, and download resources. It takes a bit of work to get the database set up and look good, but it will make a big difference in the usability of the collection in the long run.
You've had some experience creating a database in Chapter 3, Rollout Products and Services with Moodle. This time, we are going to create a slightly more complex database. In the next step, we will look at how to edit the display templates in order to customize the look and make the database more useable.