
Make sure you have returned to your course page by clicking on the short name in the navigation block. When creating a course I usually remove all of the blocks except for the Navigation and Settings blocks. This forces you to justify to yourself on which blocks to add from a teaching/learning point of view.
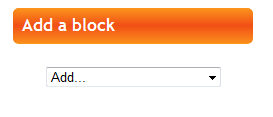
- To add this new block we need to scroll down so we can see the Add a block option:
- Click on the drop down and select the Random glossary entry from the list (it is near the bottom of the list).
- Once it is added you will need to configure it using the edit icon, so click on the edit icon in the new block immediately above the Add a block menu box.
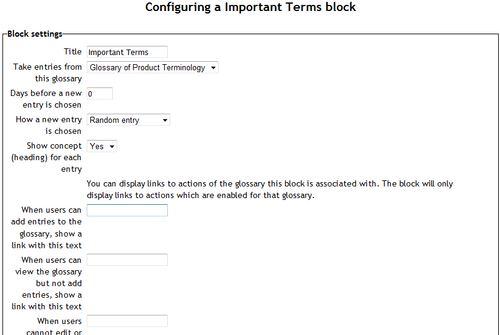
- Some of the settings are already filled in, and in fact you don't need to change many settings. However, to start, change the Title to Important terms. This is the name that the block has in the course view page. Often people choose to have no block name, but this may not work with your theme.
- The second field Take entries from this glossary allows you to select which glossary to use as the source of content for this block. This is great when you have more than one glossary available.
- If the course is running over a lengthy period, and you want to have the same content item appear in the block for a few days, put that number of days in the Days before a new entry is chosen field. I seldom do this as I like the dynamic daily changes.
- How a new entry is chosen is a very powerful option. If you have a set of ordered content (such as daily steps to achieve a task), then selecting Next Entry from the drop down is the best choice. If you are having students create entries, then using the last modified entry option from the drop down is the most appropriate to use.
- If the entry is a definition, then you should leave Show concept (heading) for each entry set to Yes. However, if it is a quote, image, or different context, you may wish to set this to No.
- The three text options When users can add entries, When users can view the glossary, and When users cannot edit can be removed, so the links to add quotes or browse quotes don't show. This is what I have done below. However, if you want to prompt users to submit entries, or browse around the content from the block, leave the text in, although you will probably want to edit it.
- Click on Save changes and you return to the course.
Now when you look at the course page, you can see a glossary entry appearing on the bottom-right, below the other active blocks. This randomly-changing content block not only provides extra content on the page, but also helps to keep the page fresh and new.
We have talked about different types of entries that you may have in your glossary. However, even just with terminology, you may want to enable the participants to separate the different terms and browse them by category. By default there are no categories, so you will need to decide what categories you want and then create them.