
To begin creating a database, we need to set up the basic activity.
- With the course in editing mode, select Database from the Add an Activity menu.
- On the next screen Adding a new Database to Topic, enter the name of the database. For now, let's just call it Annotated Bibliography.
- In the Introduction area, be sure to tell the community members what the database is for.
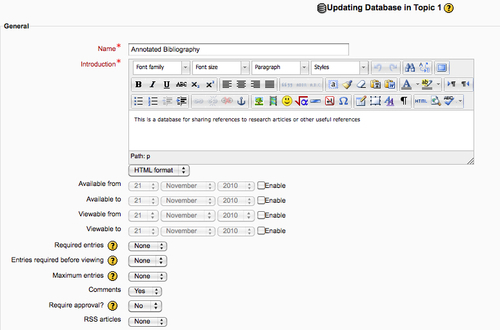
- The Available and Viewable dates should probably be left disabled for a community shared resource. If you want to restrict availability of the database, you will select the Enable checkbox next to the setting, and then select the date.
- The Required entries setting allows you to require community members to submit a certain number of entries before the activity can be considered complete. If you want to formally recognize contributors by checking off the activity when they have contributed a pre-defined level of resources, then you could use this setting. Otherwise, leave it set to None.
- The Entries required before viewing setting allows you to require the user to submit one or more entries before being allowed to see other users' entries. This setting is usually used for a graded submission where the user is required to submit their own work before they can see others'. For a community database, leave this set to None.
- If you are opening your database to community members outside of your organization, you can prevent database entry spam by setting a maximum number of entries. Otherwise, you probably want to leave this set to None to encourage community members to submit as many resources as possible.
- Set the Comments setting to Yes. This will enable community members to comment on each other's entries.
- If you want the community moderators to approve entries before they are visible to other users, set the Require approval to Yes.
- You will need to think carefully about using ratings in your database. Ratings can be useful to allow community members to judge the usefulness of a particular entry, but they can also discourage people from submitting entries that might not get a high rating.
- If you do decide to use ratings, set the Aggregate type on the rating to either Sum of ratings or Average of ratings. The Average rating will probably be more useful for community members looking for the best resources.
- Set the Scale to a numeric rating, most likely somewhere around 5. This gives raters enough variation to make a judgment without overwhelming them with too many choices.
- If you are going to allow ratings for a community, do not restrict the ratings to entries with a certain date range. Entries may change in value over time, so a continuous rating will allow the community to signal when a resource has outlived its usefulness.
- If you are using groups in your community, for example, special interest groups (SIG), then you may want to set the Group mode on your database, to enable each SIG to have its own collection. If you are going to set up a group specific database, I would recommend setting up two databases, one for the whole community, and another for the SIGs. Most of the time, you will set the group mode to Visible groups, to enable the SIG members to see the resources from other groups.
- Make sure the Visible setting is set to Show to enable community members to see the database.
- For a community database, you will not want to enable any of the settings to restrict availability.
- When you have adjusted all the settings, click Save and display.
..................Content has been hidden....................
You can't read the all page of ebook, please click here login for view all page.