
Now that you know that you need a glossary, the steps for creating a glossary for your course terminology is straightforward.
- Ensure that editing is turned on (click Turn Editing On).
- In Topic 1 (Introduction) click on the Add an activity drop down, and select Glossary from the options.
- This glossary will be for Product Terminology, so fill this in as the Name of the glossary.
- Description is very important in most activities, and the glossary is no different. This provides the context around the content which appears in the glossary. So fill in some text explaining why the glossary is here and for what purpose it is added.
- Leave the default Entries shown per page, as ten is a good amount. However, you may want to change this to more or less depending on the size of each entry to avoid too much scrolling.
- As this glossary is related to the Mahara course, leave the Is this glossary global un-ticked. With a Global glossary you can have the terminology auto-linked from throughout Moodle and not just this one course. However, as that can lead to confusion if lots of courses have global glossaries, let's keep it local.
Auto-linking is a powerful feature of Moodle. When this is enabled, any time the wording appears in the Moodle course content, it will automatically become a link to the entry in the glossary. This helps users get immediate access to words they don't understand.
- You can leave all of the other settings as they are, except for Approved by default which you will want to set to No before the course is live. This is just in case you encourage participants to add in entries that you have to approve before they are seen by others.
- Click on Save and display to create the empty glossary:
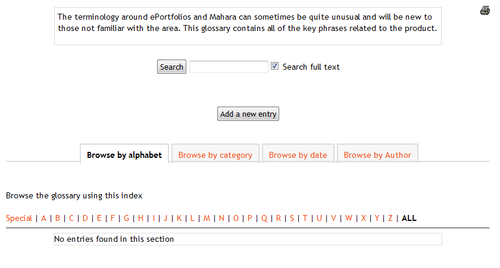
Now you have added in a glossary to your course. It has no entries yet, but it provides the framework for you to add entries in and should you want to, you can allow participants to add entries in as well.
You will see in the image before that it is possible to browse by alphabet, category, date, and author. This helps users get access to the information that they want in a direct manner.