
Follow the steps below to enable self registration:
- Log in to your Moodle site as the admin.
- On your home page, go to the Site administration menu under the Settings block, and select Plugins, as shown in the next screenshot:
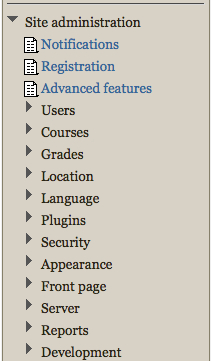
- Then select Authentication and then Manage authentication. You will then be at the screen shown below:
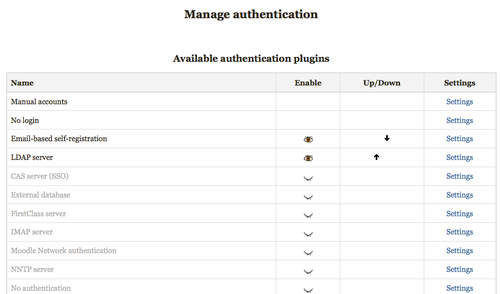
- In the Manage authentication screen, first make sure that the Email-based self-registration is enabled. You will know if something is enabled if the eye next to it is open.
- Click the Settings link to the right of the Email-based self-registration setting. This will take you to the settings page for the plugin.
- On the plugins setting screen, set the Enable reCAPTCHA element to Yes. ReCAPTCHA is a system for preventing spammers from using programs to create accounts on your system. It generates a random string of numbers and letters that are difficult to process with code.
- Next, on the same screen, scroll down to the Common Settings and set the Self registration option to Email-based self-registration.
- At the bottom of the form are two fields ReCAPTCHA public key and ReCAPTCHA private key. You will need to register your site on the ReCAPTCHA site to get these keys. Go to http://www.recaptcha.com and fill in the registration form. You will then be given the two keys. Copy and paste them into these fields.
- Then scroll down further on the same screen to the Instructions field. The instructions that you type here will appear on the log in screen. You will want to remind users to follow the instructions to create a new account or to log in if they have already created an account. Once you have written your instructions, select the Save Changes button at the bottom of the screen.
Tip
Avoiding spam filters
When your site goes into production, you will need to make sure your Moodle e-mail configuration is properly set up. In the Site Administration menu, under the Server heading you will find the Email settings form. Talk to your IT department to make sure you have the proper settings here to make sure Moodle is using the right e-mail server. If this isn't set up, Moodle will use its internal e-mail method which is much more likely to be caught by a spam filter.
Now let's set the site up so that once the applicants have created an account and logged on to the site, they will see the list of courses/open positions:
- Under the Site administration menu, from step 2 above, select Front page, and then select Front page settings.
- You will then be on the Front Page Settings screen. Scroll down to Front page items when logged in and select List of courses from one of the menus.
- Remember to scroll down to the bottom of the page and click Save changes.
Before we can test this we need to make sure that the course is set up for self-enrolment.
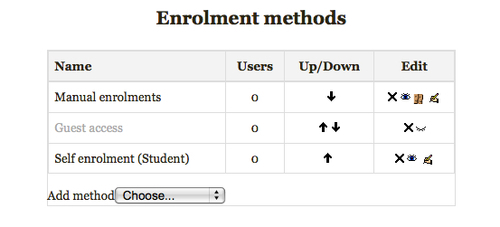
- Go to the course and under the settings block find the Course administration menu. Select Users, and then Enrolment methods.
- You will then be at the Enrolment methods screen. Make sure that Self enrolment (Student) has been enabled. The eye should be open if it is enabled as shown in the next screenshot:
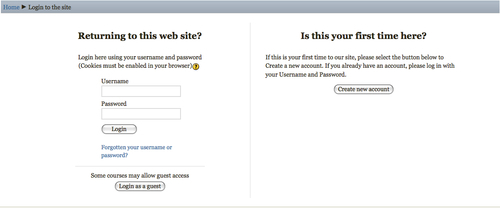
- Let's see if it worked. Log out of the admin account and then select the Login link at the top right-hand corner of your screen where it says, You are not logged in. (Login). You should now be at the login page. Following is an example of what it should look like:
Tip
When we were writing the book, we frequently had two different browsers open (Firefox and IE on Windows, Firefox and Safari on Mac). If you login as a student user in one browser, you can log in to Moodle as the admin in the other browser, so it's easy to switch back and forth between users. You need to use two separate browsers, and not the windows or tabs of the same browser.
You just set up your Moodle site so users can self enroll. When a potential applicant goes to your site now they will be able to create an account and enroll in any of the available position courses you created.
Standard Moodle is focused on education and the standard labels reflect this. When using Moodle for business purposes, you may want to change these labels to something more applicable to the context. For example, in this chapter we are creating a course for each open position and when you choose to show the available courses on the home page the heading is "Available Courses", but for this case a heading such as "Available Positions" would be more appropriate. It is possible to change these language strings and we cover how to do this when we discuss creating custom themes in Chapter 9, Integrating Moodle into Enterprise.