The most basic use of Moodle is to share files with other people. While there are many ways to distribute files to other people (file servers, e-mail, websites), Moodle does have some advantages over those methods. Moodle has fine grained control over who can access your content, and it's easy for people to get the latest copy of the document.
To add a file to a course:
- Go to your course and click on the Turn editing on button at the top-right corner of the course.
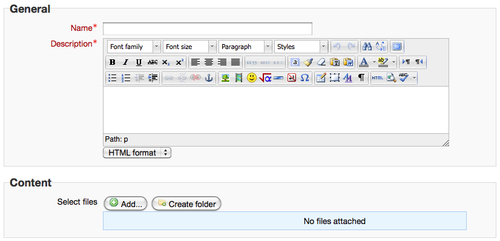
- In the section where you want to add your file, select the Add a resource menu, and then select File from the drop-down list.

- Enter the name of your resource. This will be the link your users will click on to access the file.
- Add a description of the file in the Description box. The description should briefly indicate the purpose of the file.
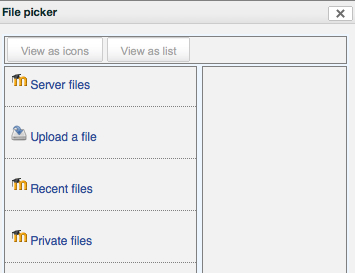
- Click the Add button to bring up the file selection dialog:

- To add a new file, select Upload a file from the menu on the left. Browse for the file you want to add. You can also edit the Author input box and choose a license for distribution. Most of the time, you will want to leave the license on All rights reserved.
Tip
Moodle 2.0 enables you to select a copyright license for the material you are uploading. By default, any content in Moodle is yours and you keep all rights to the content. The open source license does not extend to your content, just the Moodle code. The other licensing options allow users of your course some rights. Public Domain allows the users to do whatever they want with the content. The Creative Commons licenses allow the users to do more with the content, but reserve some rights to the authors. You can get more information about the Creative Commons licenses at http://www.creativecommons.org.
- You can then select a display option for your file. The options are:
- Automatic: Moodle will select the display option automatically.
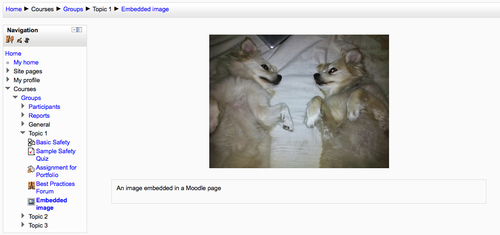
- Embed: Your file is displayed within the page, using a plugin if necessary. Moodle wraps the file with its own navigation.
- Force download: The user must always download the file to their personal computer.
- Open: The file is displayed in the window, with no Moodle navigation around it.
- In pop-up: The file is displayed in a new browser window with Moodle underneath.
- The display resource name option allows Moodle to display the original file name (along with the name of the resource you just set).
- The other settings determine who can see the file. We will cover these in a later chapter. For now, click on Save and display to see your file in Moodle.
- The example below shows an image file with the embedded option and display description turned on.

We just uploaded a single file to Moodle that can be viewed by anyone with access to the course. The link to the file appears in the section where we added the resource.
Now that you have uploaded a single resource, you can begin to experiment with the file system in Moodle. Your challenge is to add three different resource types, and select the appropriate display option. Word Docs, PowerPoint files, and PDF files are common file types, but experiment with media files such as MP3s as well.
