
You now have eight interviews with potential new hires scheduled for the available position. As the HR manager, you will need to make sure you have provided the interviewers with the materials they need. Depending on the interview style this may entail a list of topics to be covered during the interview. If it's a structured interview it will include a predetermined set of questions to be asked of all applicants. If it's a non-directive interview, then it will contain a set of less structured, broad questions. You get the idea. There may also be other resources such as the organization's mission statement, information regarding the culture of the company, and information regarding the position for hire. These are all easy to make available in your course using the Add a resource... feature. In the first chapter you already learned how to create a file resource so you know how easy that is. This time we are going to put all of our documentation for the interviewer in a folder and upload a folder resource to the new section we created entitled "Resources for the Interview".
- From the course home page, select Folder from the Add a resource... drop-down menu in Section 4.
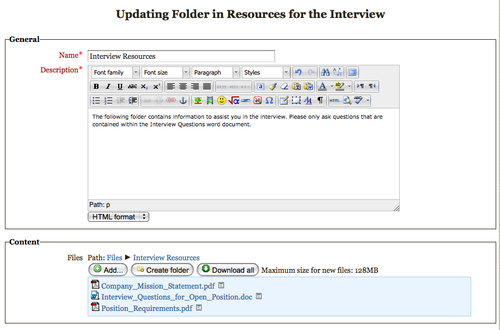
- You will now be on the Adding a new Folder page. In the General section, enter the name of the folder and a description. For this example, we will name the folder Interview Resources and in the description list some simple instructions for the interviewer.
- Next is the Content section. Click the Create folder button. A pop-up window will open asking you to Please enter folder name. I am going to use the same name I used in the General section in step 2.
- Once you have created your folder, make sure it is selected so that the Path shows Files | Folder Name; then in the same Content section click the Add button. A File picker window will pop up and from here you will follow the instructions to add your files. My files are on my computer so I will click on Upload a file button, then browse to locate the file I want to add. Once selected, click the Upload this file... button. You have now added one file to your folder and you will now see it listed in the Content section. Repeat this step until you have uploaded all the files you wish to upload to your Moodle course. The next screenshot shows you what the Adding a new Folder page should look like once you have filled in the first two sections:
- Don't worry if you have added the file, but forgot to add it to the folder. Or if you added the wrong file. All you need to do is select the file showing in the content section, and then a menu will pop up with four options: Download, Rename..., Move..., and Delete..., and you will be able to make any necessary changes.
- There is a Restrict access section in the Adding a new Folder page, but since this documentation is only being made available to the interviewers who would have more of a teacher/non-editing teacher role, then we are not going to restrict availability based on date or grade. We will leave this section blank.
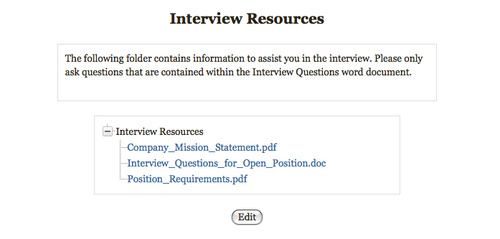
- The last step is to click Save and display. Your resource will look like the window shown in the following screenshot:
So far, in this chapter we have added four sections to our course, Available Position. The first three sections, Resume Submittal, Competency Test, and Interviews, contain activities in which we want the applicant to participate. The fourth section, Resources for the Interview, is a section we do not want visible to the applicant. We only want the interviewers/teachers to see this last section. How do you make a section visible to interviewers/teachers and not to applicants/students? It's easy. First, turn on Editing. On the course home page, scroll down to the section you want to be only visible to teachers. Then on the right-hand side of the section you will see an eye icon. Select the eye. When the eye is shut, the section is only visible to teachers. When the eye is open, the section is visible to teachers and students. Note that every activity also has an eye icon next to it in case you want to hide just a particular resource, not an entire section.