Creating, Modifying, and Troubleshooting Framesets
A frameset enables you to add structure to your applications (whether Notes or Web) by dividing the main window into subwindows (frames). Each frame in a frameset can contain a form, folder, page, document, view, navigator, Web page, or even another frameset, and it is independently scrollable. Keep in mind that you can set a frameset to launch automatically when a database, form, or page opens so that the content of a database always appears in frames.
Creating Framesets
To create a frameset, follow these steps:
1. | In the Designer, open the database in which you want to create a frameset. | ||||||||
2. | Click Framesets in the Design Pane to see the list of existing framesets. | ||||||||
3. | Choose Create, Design, Frameset or click the New Frameset button. | ||||||||
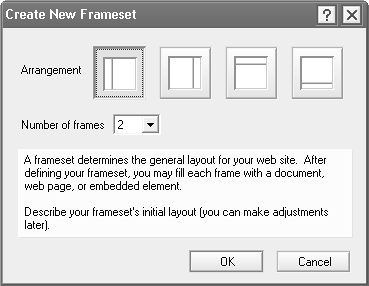
4. | In the Create New Frameset box that appears, as shown in Figure 9.4, select the number of frames you want to create in the Number of Frames drop-down box. (Your choices are two, three, or four frames.) Figure 9.4. The Create New Frameset dialog box makes generating a frameset quick and easy.
| ||||||||
5. | Click the Arrangement button that represents how you want the frames laid out within the frameset. | ||||||||
6. | Click OK, and the frameset is generated. | ||||||||
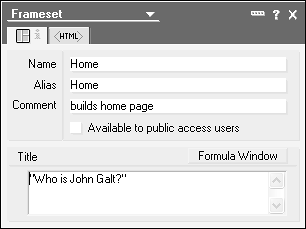
7. | Define the frameset properties. Choose Frame, Frameset Properties from the menu to open the Frameset properties box (displayed in Figure 9.5). The Info tab is where you can define the following important frameset properties:
| ||||||||
8. | (Optional) Click the HTML tab and define any necessary HTML attributes. | ||||||||
9. | Refine the frameset. You can use the Frame action buttons, the Frame menu options, or keyboard keys to tweak the appearance of your frameset, including adding new framesets within the existing frameset. | ||||||||
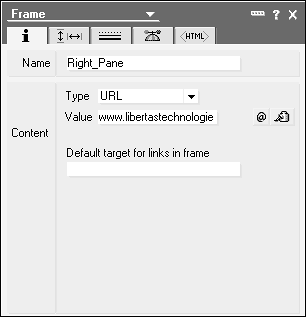
10. | Specify the content of each frame. Select Frame, Frame Properties from the menu to open the Frame properties box (see Figure 9.6). In the Info tab, you can define the following important properties:
Figure 9.6. The Frame properties box.
| ||||||||
11. | |||||||||
12. | Click the Frame Border tab (the third tab) to define the frame's border attributes. | ||||||||
13. | Click the Advanced tab (the fourth tab) to define the frame attributes, such as frame spacing, margin height, and margin width. | ||||||||
14. | Click the HTML tab (the final tab) to define any HTML-specific attributes needed for the frameset. | ||||||||
15. | Save the frameset. |
Modifying Framesets
To modify a frameset, follow these steps:
1. | In the Designer, open the database that contains the frameset you want to modify. |
2. | Click Framesets in the Design Pane to see the list of existing framesets. |
3. | Double-click the frameset you want to modify. |
4. | Make the necessary changes based on the steps outlined in the preceding section, “Creating Framesets.” |
Troubleshooting Framesets
The following is a list of common frameset problems and their resolutions:
The frameset displays no title or the title is incorrect. Open the Frameset properties box and enter a formula in the Title text box.
The wrong number of frames is displayed. Open the frameset and add or delete frames from the frameset.
The frame displays the wrong or no content. Open the frameset and select Frame. Open the Frame properties box and ensure that the frame is set to display the desired content in the Content section of the Basics tab.
The content is not targeted to the proper frame. Open the frameset and select Frame. Open the Frame properties box and check that the Default Target for Links in Frame setting is correct.
Frame scrolling, resizing, and size are incorrect. Open the frameset and select Frame. Open the Frame properties box and check the settings on the Frame Size tab. Also check the Autoframe settings of the design element.
The frame borders are incorrect or are not appearing. Open the frameset and select Frame. Open the Frame properties box and check the Frame Border settings.


