
What’s new in OneNote 2013
With each edition of OneNote, the makers of the application endeavor to improve it and add new features. OneNote 2013 is no different. Following is a rundown of new features in OneNote 2013.
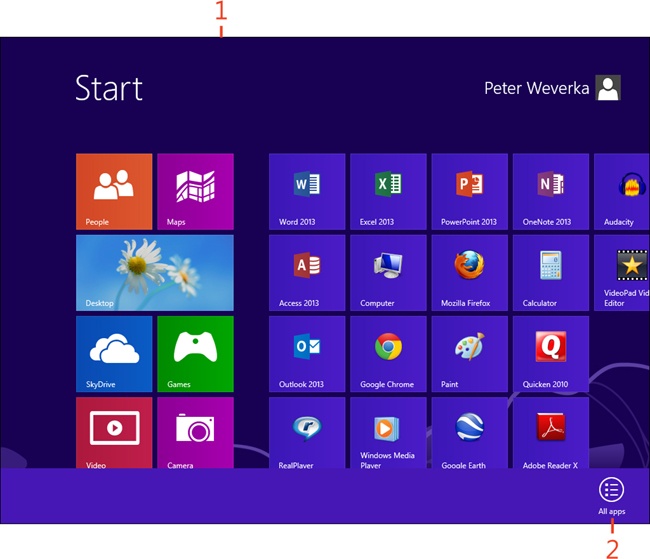
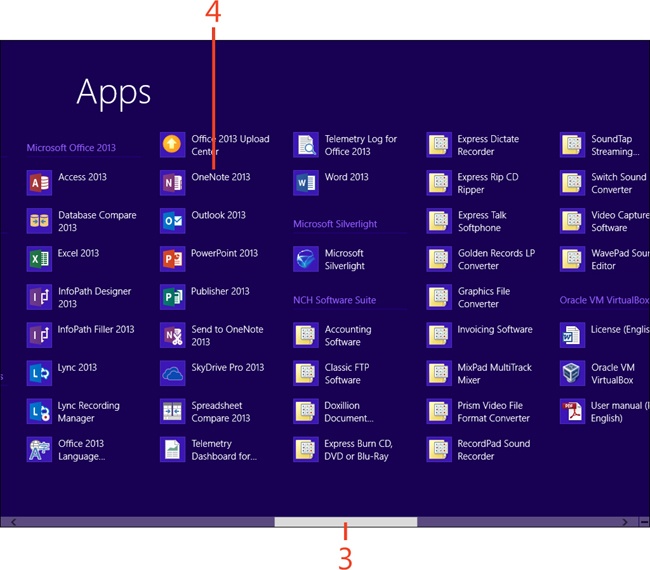
Starting OneNote in Windows 8
If your computer runs Windows 8, the procedure for starting OneNote is probably new to you. To start OneNote, click the OneNote 2013 tile on the Apps screen. The application opens on the Windows desktop.
Follow these steps to start OneNote from the Apps screen:
Caution
You might have installed another version of OneNote from the Windows Store—OneNote App for Windows 8. If so, it appears in the Apps list as simply OneNote. The version of OneNote described in this book appears grouped together with the other Microsoft Office 2013 apps tiles, with the name OneNote 2013. Make sure you click the OneNote 2013 tile to start the program.
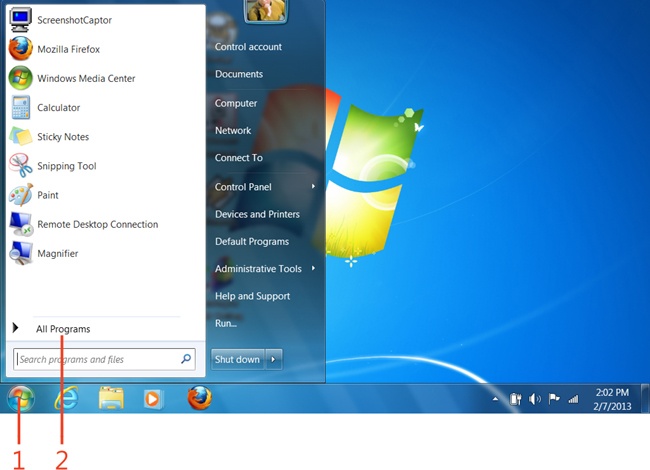
Starting OneNote in Windows 7
If your computer runs Windows 7, follow these steps to start OneNote:

To visit the Backstage view, on the ribbon, click the File tab. The Backstage view offers commands for creating, opening, printing, sharing, exporting, and sending OneNote notebooks. Click a tab on the left side of the Backstage view window and you see options on the right for performing different tasks. For example, click Info and you see information about the currently open notebook.
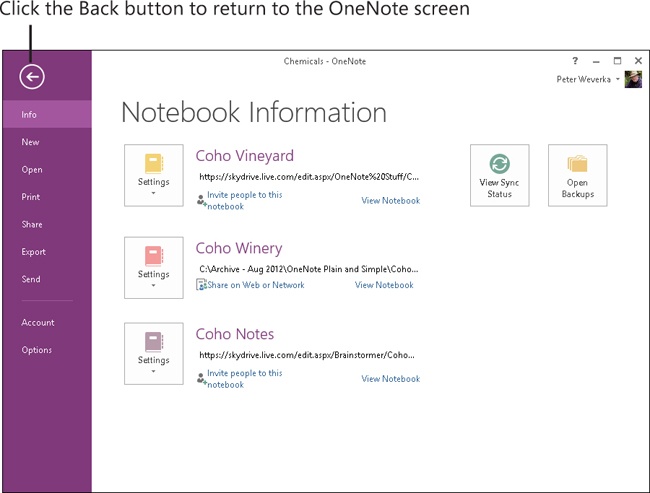
What is different about the Backstage view in OneNote 2013 is this: it now offers a convenient Back button. You can click this button to return to the OneNote screen.
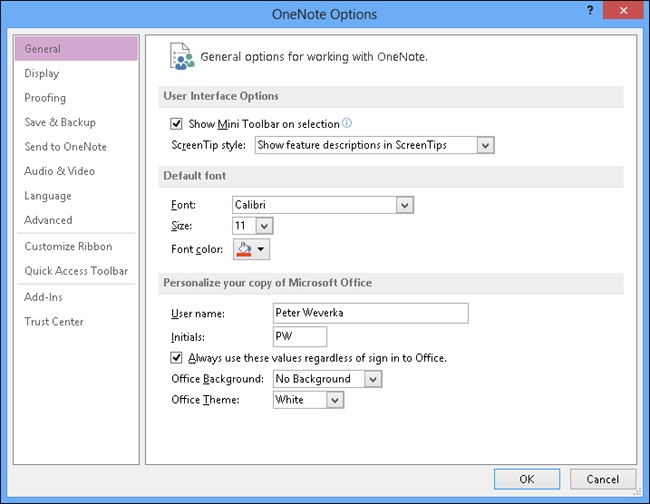
Clicking the Options tab opens the OneNote Options dialog box, in which you choose settings to make OneNote work your way.
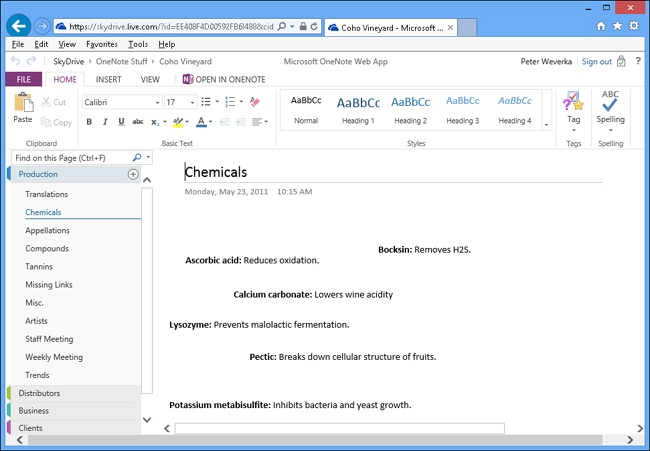
OneNote 2013 is optimized for sharing notebooks through SkyDrive. SkyDrive is an online cloud service from Microsoft for storing and sharing files. To use SkyDrive, you must sign up for a Microsoft Account. After signing up, you can store OneNote notebooks on SkyDrive so that you can access them from anywhere—through OneNote, OneNote Mobile, or a web browser (using OneNote Web App). You can also share notebooks stored on SkyDrive with your friends and colleagues when you need to work collaboratively.
You can also share notebooks through a SharePoint site, a company network, or Microsoft Office 365 (which provides a SharePoint site or SkyDrive for file collaboration). SharePoint is used by companies to share files. It provides a structured method for collaboration through blogs, wikis, and company news updates. To share notebooks through SharePoint, save the notebook to a folder on the SharePoint site. To share notebooks through a company network, save the notebook in a shared folder.
Office 365 is a subscription service that provides online storage of notebooks and other services. Depending on your subscription level, you can share notebooks through SkyDrive or through a SharePoint team site designed for collaboration.

See Also
To learn how to share notebooks through SkyDrive or SharePoint, read Sharing a notebook.
See Also
To learn how to create and share notebooks on Office 365, read Creating a notebook in Office 365.
Tip
You can sign up for a Microsoft Account at https://signup.live.com. After creating an account, you can log on to SkyDrive and access your files and OneNote Web App at www.skydrive.com.
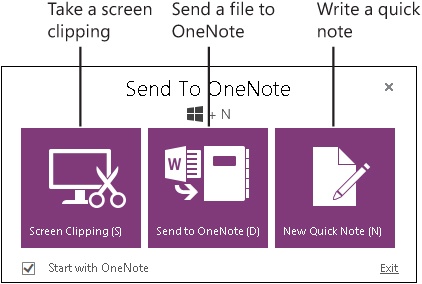
The Send To OneNote tool opens in its own window when you start OneNote. It offers a convenient way to access three OneNote commands:
-
Screen Clipping . Click Screen Clipping in the window to capture part of an open window on your computer screen as a screenshot. (You can also take a screen clipping on the Insert tab by clicking the Screen Clipping button.)
-
Send To OneNote . Click Send To OneNote to copy a Microsoft Word document, Microsoft Excel spreadsheet, or Microsoft PowerPoint presentation to a page in a notebook. Before clicking Send To OneNote, open the document, spreadsheet, or presentation.
-
New Quick Note . Click New Quick Note in the window to write a quick note—a note that you can move later to a page. Quick Notes are stored temporarily in the Quick Notes folder until you move them elsewhere.
Tip
If you prefer the Send To OneNote Tool not to appear when you start OneNote, clear the Start With OneNote check box located at the bottom of the Send To OneNote window.
Tip
You can also open the Send To OneNote window by clicking the Send To OneNote Tool icon in the notification area.
See Also
To learn all the details of taking screen clippings, read Taking a screen clipping.
See Also
To learn the details of sending files to OneNote with the Send To OneNote command, read Sending files to OneNote.
See Also
To learn all the details of writing quick notes, read Writing quick notes.
Office is available in two basic versions: Office 2013 and Office 365. Office 2013 is standard “boxed” software. It comes in different editions—Office Home and Student or Office Home and Business—that might or might not include Microsoft Outlook, Microsoft Publisher, and Microsoft Access.
Office 365, on the other hand, is a subscription service that provides various services (depending on your subscription level), such as cloud storage, email, shared calendars, instant messaging, online editing of Office documents (using Office Web App and/or streaming versions of the full programs—Office on Demand), public website, and a team site for document collaboration.
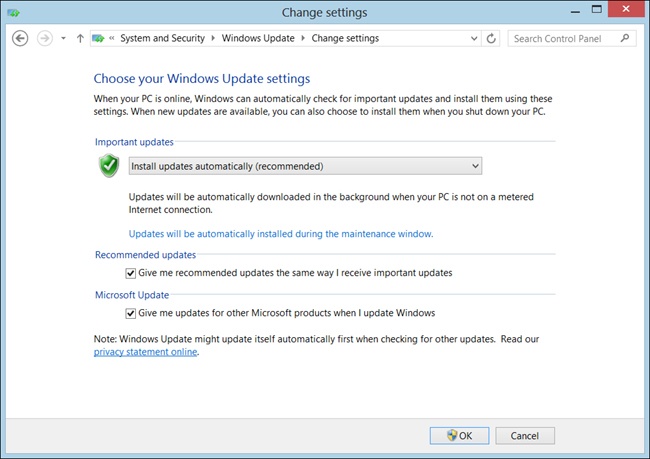
If you subscribe to Office 365 Home Premium or an Office 365 service that supplies Office, OneNote and your other Office programs are updated automatically during your subscription period. If you purchase Office 2013 as a classic software package, without the subscription and without the services, you will receive updates during the entire product cycle (approximately two years or so), as well. These updates will also install automatically, provided you’ve instructed Windows to do that. Display the Windows desktop by clicking the Desktop tile on the Start screen. Move the mouse pointer to the lower-right corner of the screen and click the Settings charm. Click Control Panel, click Systems And Security, click Windows Update, and then click Change Settings. In the Change Settings dialog box that opens, select the Give Me Updates For Other Microsoft Products When I Update Windows check box and click OK.
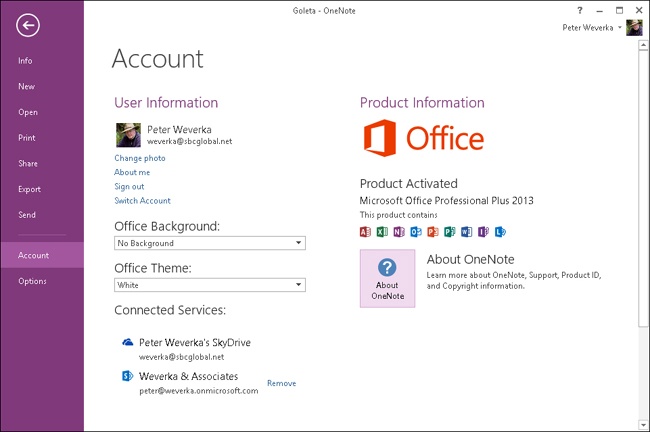
In the Account window in OneNote, you can view the list of services to which you are connected—SkyDrive, Office 365 SharePoint site, and others. To open the Account window, click File to display the Backstage view and then click the Account tab.
By clicking the About OneNote button in the Account window, you can open a dialog box that displays your Product ID number.
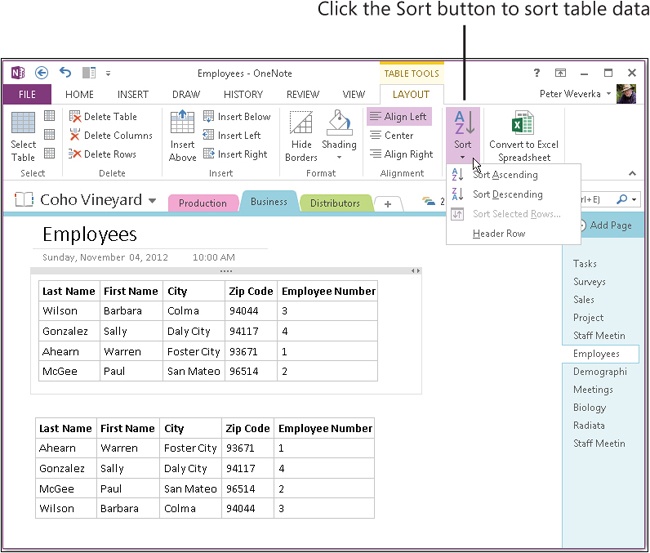
Sorting means to rearrange the information in a list or table in alphabetical or numerical order. In a table of names, for example, sorting the list in alphabetical order from A to Z makes finding a name easier. In a table of numbers, sorting the table in numerical order makes comparing the numbers easier.
With the Sort command, you can sort a table in ascending or descending order and make your table easier to understand.
See Also
To learn the ins and outs of sorting information in a table, read Sorting data in a table.
OneNote tables are nice indeed, but they don’t offer all the tools for analyzing data that you find in Excel. If you want to perform data analyses on the information in a OneNote table, consider converting your table to an Excel spreadsheet.
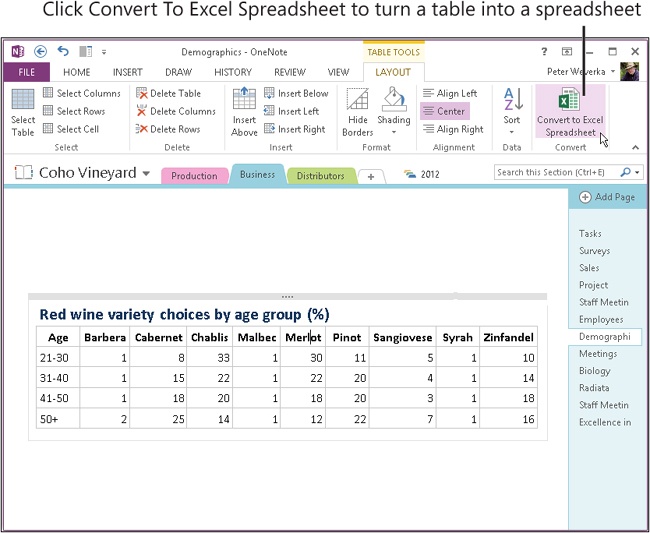
OneNote offers the Convert To Excel Spreadsheet command for doing just that.
After a table is converted, you can click its Edit button to display Excel tools for editing, formatting, sorting, and analyzing table data.
See Also
To learn how to edit an embedded Excel spreadsheet in OneNote, read Edit an Excel spreadsheet in a note.
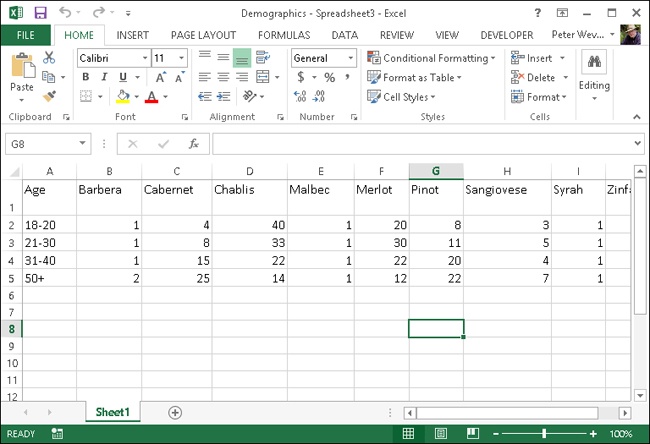
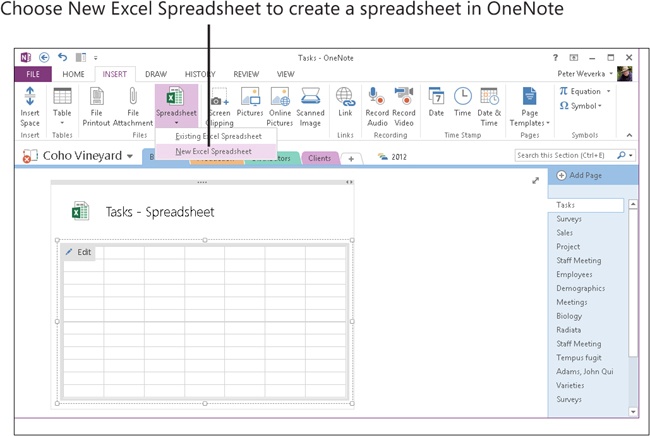
If you know that you will need to crunch the numbers in the notes that you write, create an Excel spreadsheet in a note before you enter the numbers. This way, you can take advantage of all the Excel features and commands for analyzing data as you enter it.
The Spreadsheet button offers an option to create an Excel spreadsheet right inside OneNote.
Click the Edit button in the embedded spreadsheet to access Excel tools for editing, formatting, sorting, and analyzing data.
See Also
To learn how to create spreadsheets in OneNote, read Creating an Excel spreadsheet in a note.
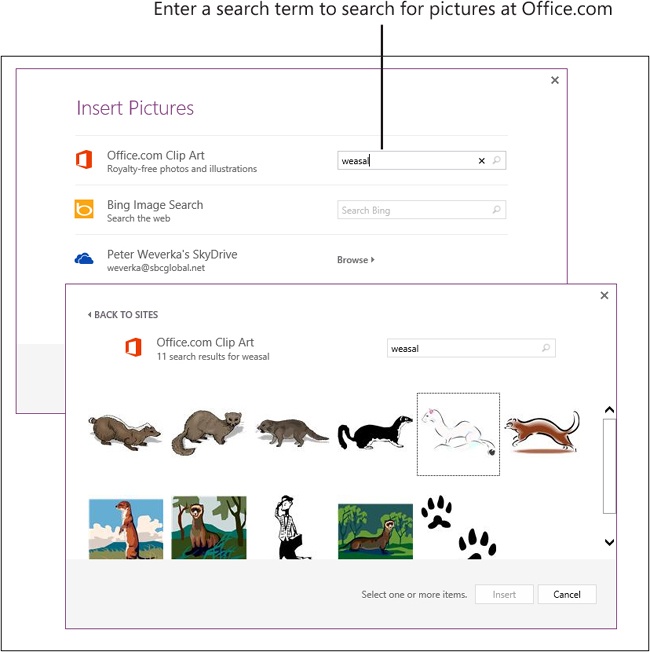
Pictures are great for illustrating ideas, and OneNote makes it easy to obtain pictures for notes. With the Online Pictures command, you can obtain pictures from Office.com, the Internet, a SkyDrive folder, or Flickr.com.
See Also
To learn how to search for pictures online and insert pictures in notes, read Inserting a picture from an Internet source.
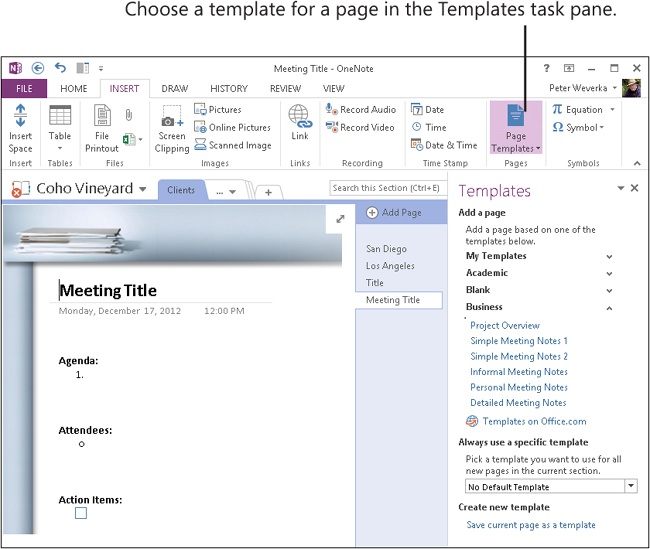
When you need a new page, you can create it by using a template—a page designed for a specific purpose, such as taking meeting notes or creating a to-do list. Although page templates are not new to OneNote 2013, they are certainly easier to use.
As well as choosing a template from OneNote, you can create a template of your own and use it to create as many new pages as you want.
See Also
To learn how to choose a template when creating a page, read Creating pages.
See Also
To learn how to create a template, read Creating and managing templates.
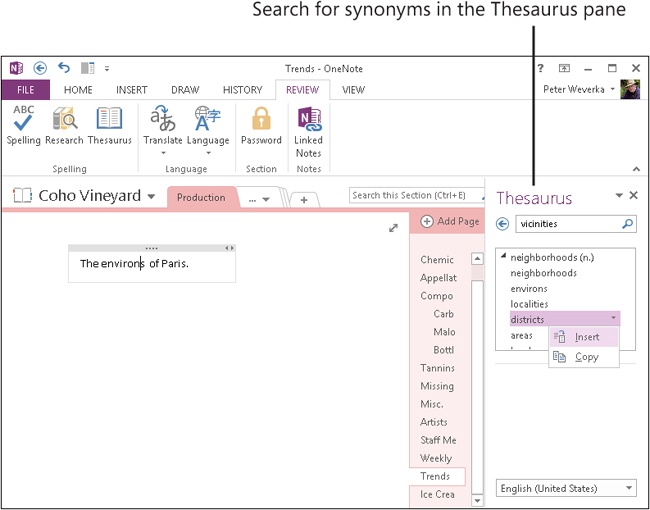
Rather than scratch your head when you can’t find the right word, you can give the Thesaurus a try. Although the Thesaurus existed in previous versions of OneNote, it wasn’t easy to locate and use.
The Thesaurus lists synonyms of a word you choose in a note. If one of the synonyms expresses your ideas better, you can insert it in a note in place of the word you chose. You can also search for words in the Thesaurus pane.
See Also
To find out whether the Thesaurus works for you, read Finding the right word by using the Thesaurus.