
Collage
Combine type, texture, and vintage clip art
The Brief
Create an evocative type-themed collage
Trim Size
12 × 12 inches (305 × 305 mm)
Learning Points
Layering and masking
Working with Photoshop Smart Objects
Working with texture
Tools
Photoshop, camera or scanner
Fonts Used
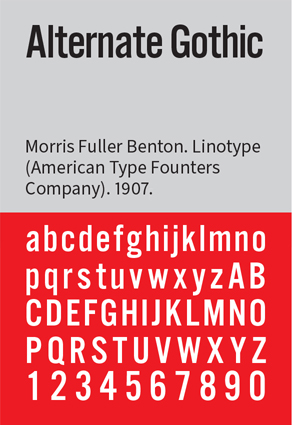
Alternate Gothic No 3
Inspiration
Check out the online portfolio of Alicia Buelow: aliciabuelow.com.
It is perhaps perverse to use state-of-the-art digital tools to create something that looks rough and handmade, where going the extra mile means making it look less “finished” and introducing more imperfections. But that’s exactly what we’re going to do here. Of course, doing it by hand is fun, tactile, and informative, but you don’t get to experiment with scale, blending modes, color, opacity, and masks, the way you do in Photoshop. And scissors and glue don’t come with an Undo button.
Start by rustling up any old newspapers, magazines, or printed material of any description that you have laying around. Going forward, it’s a good idea to keep a tickler file of such pieces, so that you have a ready source of inspiration. Any piece of charming ephemera you come across, toss it in the file, and rediscover it later when you next are planning a similar project. But don’t limited yourself to just printed materials — consider anything at hand that has meaning for you and that you can scan or photograph. Start by tearing out evocative words and short phrases. If you have any antique books at hand, you might want to include their pages to give texture and rhythm to your composition. I (Nigel) added some pages from an old French medical encyclopedia I bought years ago in an antique shop (please note, no valuable books were harmed in the making of this collage).
When you have a small pile of clippings and bookmarked pages, it is time to dust off your scanner. No longer have a scanner because it stopped working after the last operating system “upgrade”? No worries, a camera, even a camera phone, will work; just make sure to photograph the pieces face-on with lighting that is as even as possible.
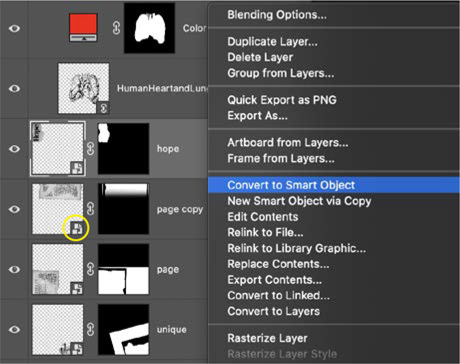
Convert the layers to Smart Objects before you do anything.
Smart Objects are denoted by the badge in the bottom right of the layer thumbnail.

Combining the type
Having captured your raw material (make sure to include the rough edges), open each image and copy and paste into the host document. The size and resolution of your host document will depend upon what you intend to do with the finished collage and on the processing power of your computer. I chose a size of 12 ¼ inches square at a resolution of 400 pixels per inch. Does the resolution need to be so high? Not really, I’m just giving myself some wiggle room. Pixel-based images are like haircuts — you can always take more off, but once it’s gone, you can’t add it back.
Before you do anything to the individual elements, to play it safe, convert each layer to a Smart Object. This will allow you to experiment with scale non-destructively. You’ll be able to go smaller, but not bigger, than the original image size without incurring a loss of quality, so make sure that each piece starts out a bit bigger than you’re likely to use it.
It’s now time to mask the edges of each element using layer masks. On the layer mask, with black as the foreground color, paint around the edges with a soft brush. To avoid sharp edges, I like to paint with a black-to-transparent gradient, which allows me to fade the edges of the torn strip or page into the background. Let one hand hover over Cmd/Ctrl+Z, and be prepared to experiment to get the result you’re after.
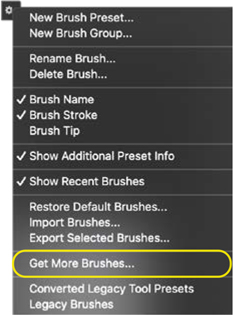
To download the Brushes Megapack, choose Get More Brushes from the Brushes panel menu.
As well as position, scale, and rotation, experiment with blending modes, opacity, and layer stacking order. Blending modes that typically work well for this purpose are Multiply and Darken, or for a lightening effect, Screen and Soft Light, but it will depend upon the colors in your composition. You can’t predict blending modes; you just have to try them out — and thankfully you can do this till the cows come home without degrading the image in the slightest. To do this, choose the Move tool and select the layer; then press Shift+plus and Shift+minus to cycle through the blending modes. When you combine blending modes with opacity, your options are limitless. Staying in the Move tool, press 1–9 to change opacity, with 1 being 10%, 9 being 90%. For 100%, press 0.
Distress the text
For the text, I used Alternate Gothic No 3. This beautiful typeface, which despite being over a hundred years old, always looks contemporary, has for some time been my go-to font for a condensed sans serif, always in all caps. To create the “badly printed” effect, I painted with a Brayer Boss brush on a layer mask attached to the text layer. The brush is part of Kyle Webster’s Megapack; you’ll find it in the Inkbox section.

Make the brush slightly bigger than the height of the letters.
With black as the foreground color, and making sure you have the layer mask selected, dab over each letter to introduce the distressing.
Alternatively, you might want to fill the layer mask with black, concealing the type completely, and then gradually reveal it dabbing with the brush in white on the layer mask.
Adapt the clip art
Vintage clip art is readily available from such design resource sites as Creative Market, Graphic River, and Tom Chalky, as well as on the standard stock sites, like Shutterstock and Adobe Stock. It can also be found in many old books, including Gray’s Anatomy and similar classics. I colorized the lungs with a solid color layer of red, positioned above the clip art. The blending mode of the layer was set to Color and the shape clipped by a layer mask in the shape of the lungs.

Add texture
Textures are available from the same sources as the clip art. A good, free resource is Texture Palace (texturepalace.com), but it’s easy — and satisfying — to capture your own. Any time you see an interesting texture shoot it with your camera or smartphone, and you’ll soon have your own, unique texture library.
Blending modes that typically work well for blending texture are Overlay and Soft Light. When blending texture, you will also be combining the colors of the texture layer. This might turn out to be a good thing, but if you want to blend the gray values only, then add a Black & White adjustment layer above the texture layer and save both layers in a group with its blending mode set to Pass Through so that the resulting grayscale image blends with the layers below.